Intel DH61SKCH Intel Desktop Board DH61SKCH Product Guide - Page 10
Preparing the Motherboard
 |
View all Intel DH61SKCH manuals
Add to My Manuals
Save this manual to your list of manuals |
Page 10 highlights
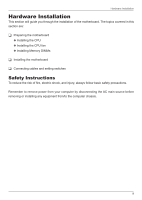
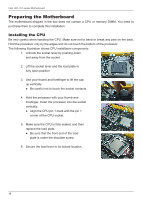
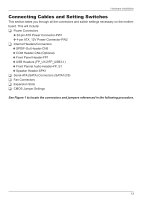
Intel H61-ITX series Motherboard Preparing the Motherboard The motherboard shipped in the box does not contain a CPU or memory DIMM. You need to purchase them to complete this installation. Installing the CPU Be very careful when handling the CPU. Make sure not to bend or break any pins on the back. Hold the processor only by the edges and do not touch the bottom of the processor. The following illustration shows CPU installtaion components 1. Unhook the socket lever by pushing down and away from the socket. 2. Lift the socket lever and the load plate to fully open position. 3. Use your thumb and forefinger to lift the cap up vertically. ● Be careful not to touch the socket contacts. 4. Hold the processor with your thumb and forefinger. Insert the processor into the socket vertically. ● Align the CPU pin 1 mark with the pin 1 corner of the CPU socket. 5. Make sure the CPU is fully seated, and then replace the load plate. ● Be sure that the front end of the load plate is under the shoulder screw. 6. Secure the load lever to its locked location. 10
-
 1
1 -
2
-
3
-
4
-
 5
5 -
 6
6 -
 7
7 -
 8
8 -
 9
9 -
 10
10 -
 11
11 -
 12
12 -
 13
13 -
 14
14 -
 15
15 -
16
-
17
-
18
-
19
-
20
-
21
-
22
-
23
-
24
-
25
-
26
-
27
-
28
-
29
-
30
-
31
-
32
-
33
-
34
-
35
-
36
-
37
-
38
-
39
-
40
-
41
-
42
-
43
-
44
-
45
-
46
-
47
-
48
 |
 |
