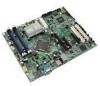
Intel S3210SHLC User Guide - Page 56
Installing the Removing PCI Add-in Boards
 |
UPC - 735858197489
View all Intel S3210SHLC manuals
Add to My Manuals
Save this manual to your list of manuals |
Page 56 highlights
Hardware Installations and Upgrades 6. If reinstalling a new CD-ROM or DVD-ROM drive, see "Installing a DVD-ROM or CD-ROM Drive" for instructions. If not replacing the drive, reinstall the EMI shield and front bezel filler panel, if available. TP02048 Figure 42. Installing 5.25-in Drive EMI Shield (DP/WS/BRP configuration shown) 7. Reinstall the front bezel assembly. For instructions, see "Installing the Front Bezel Assembly". 8. Reinstall the chassis cover. For instructions, see "Installing the Left Side Cover". 9. Reconnect all peripheral devices and the AC power cable(s). Power up the server. Installing the Removing PCI Add-in Boards The following instructions describe how to install and remove a PCI add-in board in the Intel® Entry Server Chassis SC5299-E. These instructions are server board dependent. See your server board documentation to determine PCI add-in board compatibility. Caution: Do not overload the server board by installing add-in boards that draw excessive current. Caution: PCI add-in boards can be extremely sensitive to electric static discharge (ESD) and always require careful handling. After removing the add-in board from its protective wrapper or from the server board, place it component side up on a grounded, static-free surface or conductive foam pad. Do not slide the add-in board over any surface. Installing PCI Add-in Boards Note: You may want to install an operating system before installing any PCI add-in boards. 1. Observe the safety and ESD precautions listed in Appendix A, "Safety Information". 2. Power down the server and unplug all peripheral devices and the AC power cable. 38 Intel® Entry Server Chassis SC5299-E UP/DP/WS/BRP User Guide
-
 1
1 -
2
-
3
-
4
-
5
-
6
-
7
-
8
-
9
-
10
-
11
-
12
-
13
-
14
-
15
-
16
-
17
-
18
-
19
-
20
-
21
-
22
-
23
-
24
-
25
-
26
-
27
-
28
-
29
-
30
-
31
-
32
-
33
-
34
-
35
-
36
-
37
-
38
-
39
-
40
-
41
-
42
-
43
-
44
-
45
-
46
-
47
-
48
-
49
-
50
-
 51
51 -
 52
52 -
 53
53 -
 54
54 -
 55
55 -
 56
56 -
 57
57 -
 58
58 -
 59
59 -
 60
60 -
 61
61 -
62
-
63
-
64
-
65
-
66
-
67
-
68
-
69
-
70
-
71
-
72
-
73
-
74
-
75
-
76
-
77
-
78
-
79
-
80
-
81
-
82
-
83
-
84
-
85
-
86
-
87
-
88
-
89
-
90
-
91
-
92
-
93
-
94
-
95
-
96
-
97
-
98
-
99
-
100
-
101
-
102
-
103
-
104
-
105
-
106
-
107
-
108
-
109
-
110
-
111
-
112
-
113
-
114
-
115
-
116
-
117
-
118
-
119
-
120
-
121
-
122
-
123
-
124
-
125
-
126
-
127
-
128
-
129
-
130
-
131
-
132
-
133
-
134
-
135
-
136
-
137
-
138
-
139
-
140
-
141
-
142
-
143
-
144
-
145
-
146
-
147
-
148
-
149
-
150
-
151
-
152
-
153
-
154
-
155
-
156
-
157
-
158
-
159
-
160
-
161
-
162
-
163
-
164
-
165
-
166
-
167
-
168
-
169
-
170
-
171
-
172
-
173
-
174
 |
 |
