Intel SC5100 Installation Guide - Page 21
Install the Left Side Cover, Install the Epac or Plastic Fan Holder - sc5200 server chassis
 |
UPC - 735858147040
View all Intel SC5100 manuals
Add to My Manuals
Save this manual to your list of manuals |
Page 21 highlights
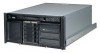
Install the Left Side Cover 1. Slide the new cover into position. 2. Insert the black clip. 3. Press the clip down. 4. Insert and tighten the screw you removed earlier. Install the Epac or Plastic Fan Holder • For the SC5100 Chassis and the SC5200 Base Chassis: Re-install the epac holding the system fans. • For the SC5200 HSRP Chassis: Re-install the plastic fan holder by re-installing it in the system and tightening the 3 retention screws that connect it to the baseplate. Remove the Bottom Cover 1. Remove and save the two screws that attach the top cover to the chassis. 2. Slide the cover backward a short distance, until it stops. 3. Pull the entire cover outward, straight away from the chassis, to disengage the rows of tabs from the notches in the top and bottom edges of the chassis. Set the cover aside. Install the Bottom Cover 1. Place the new cover so the tabs go into the slots on the server. The cover should be flush against the chassis. 2. Slid the cover forward until it stops. 3. Tighten the two screws into the rear of the chassis. Rack Installation Procedures 21
-
 1
1 -
2
-
3
-
4
-
5
-
6
-
7
-
8
-
9
-
10
-
11
-
12
-
13
-
14
-
15
-
 16
16 -
 17
17 -
 18
18 -
 19
19 -
 20
20 -
 21
21 -
 22
22 -
 23
23 -
 24
24 -
 25
25 -
 26
26 -
27
-
28
-
29
-
30
-
31
-
32
 |
 |
