Intel SE7501WV2 Product Guide - Page 21
Installing System Components, Remove the Cover
 |
UPC - 735858159388
View all Intel SE7501WV2 manuals
Add to My Manuals
Save this manual to your list of manuals |
Page 21 highlights
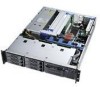
Installing System Components Remove the Cover 1. While pressing the blue latch button (A) with your left thumb, slide the top cover back using the heel of your right hand on the blue pad. ✏ NOTE A non-skid surface or a stop behind the chassis may be needed if attempting to remove the top cover on a flat surface. 2. Set the cover aside and away from the immediate work area. A Figure 6. Removing the Cover OM14086 Assembling the System 21
-
 1
1 -
2
-
3
-
4
-
5
-
6
-
7
-
8
-
9
-
10
-
11
-
12
-
13
-
14
-
15
-
 16
16 -
 17
17 -
 18
18 -
 19
19 -
 20
20 -
 21
21 -
 22
22 -
 23
23 -
 24
24 -
 25
25 -
 26
26 -
27
-
28
-
29
-
30
-
31
-
32
-
33
-
34
-
35
-
36
-
37
-
38
-
39
-
40
-
41
-
42
-
43
-
44
-
45
-
46
-
47
-
48
-
49
-
50
-
51
-
52
-
53
-
54
-
55
-
56
-
57
-
58
-
59
-
60
-
61
-
62
-
63
-
64
-
65
-
66
-
67
-
68
-
69
-
70
-
71
-
72
-
73
-
74
-
75
-
76
-
77
-
78
-
79
-
80
-
81
-
82
-
83
-
84
-
85
-
86
-
87
-
88
 |
 |

Assembling the System
21
Installing System Components
Remove the Cover
1.
While pressing the blue latch button (A) with your left thumb, slide the top cover back using
the heel of your right hand on the blue pad.
NOTE
A non-skid surface or a stop behind the chassis may be needed if attempting
to remove the top cover on a flat surface.
2.
Set the cover aside and away from the immediate work area.
OM14086
A
Figure 6.
Removing the Cover