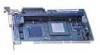
Intel SRCU31A User Guide - Page 54
Installing Drivers for the Intel RAID Controller SRCU31 - drivers download
 |
View all Intel SRCU31A manuals
Add to My Manuals
Save this manual to your list of manuals |
Page 54 highlights
Installing Drivers for the Intel RAID Controller SRCU31 Method 1 (preferred method): 1. Insert the RAID Software Suite CD-ROM in CD-ROM drive. 2. Click "Install" to install the Windows drivers. 3. The InstallShield Wizard starts. Select "Modify." Click "Next." 4. In the File Download screen, select "Run this program from its current location." 5. The "Select Components" window appears. Select "Device Drivers." 6. Click "Next" and follow the instructions up to and including system reboot. Method 2 (alternate): 1. Insert the RAID Software Suite CD-ROM in CD-ROM drive. 2. If the CD does not start automatically, then run the "\autorun.exe" file. 3. Click "OS Diskette" and then click "Windows." Select the appropriate Windows version. 4. A command prompt window appears requesting that you insert a formatted floppy diskette. 5. Insert the floppy in the floppy drive and press . The command prompt window closes automatically after the diskette has been written. 6. Open the Device Manager for the given OS and scan the PCI bus for new hardware. 7. Select "Intel RAID Controller SRCU31" in the "hardware found" list, and then click "Next." 8. Select "Search" for a suitable driver for my device, and then click "Next." 9. Select "Floppy Drive." 10. Click "Next" and follow the instructions up to and including system reboot. 54 Intel RAID SRCU31 Users Guide
-
 1
1 -
2
-
3
-
4
-
5
-
6
-
7
-
8
-
9
-
10
-
11
-
12
-
13
-
14
-
15
-
16
-
17
-
18
-
19
-
20
-
21
-
22
-
23
-
24
-
25
-
26
-
27
-
28
-
29
-
30
-
31
-
32
-
33
-
34
-
35
-
36
-
37
-
38
-
39
-
40
-
41
-
42
-
43
-
44
-
45
-
46
-
47
-
48
-
 49
49 -
 50
50 -
 51
51 -
 52
52 -
 53
53 -
 54
54 -
 55
55 -
 56
56 -
 57
57 -
 58
58 -
 59
59 -
60
-
61
-
62
-
63
-
64
-
65
-
66
-
67
-
68
-
69
-
70
-
71
-
72
-
73
-
74
-
75
-
76
-
77
-
78
-
79
-
80
-
81
-
82
-
83
-
84
-
85
-
86
-
87
-
88
-
89
-
90
-
91
-
92
-
93
-
94
-
95
-
96
-
97
-
98
-
99
-
100
-
101
-
102
-
103
-
104
-
105
-
106
-
107
-
108
-
109
-
110
-
111
-
112
-
113
-
114
-
115
-
116
-
117
-
118
-
119
-
120
-
121
-
122
-
123
-
124
-
125
-
126
-
127
-
128
-
129
-
130
-
131
-
132
-
133
-
134
-
135
-
136
-
137
-
138
-
139
-
140
-
141
-
142
-
143
-
144
-
145
-
146
-
147
-
148
-
149
-
150
-
151
-
152
-
153
-
154
-
155
-
156
-
157
-
158
-
159
-
160
-
161
-
162
-
163
-
164
-
165
-
166
-
167
-
168
-
169
-
170
-
171
-
172
-
173
-
174
-
175
-
176
-
177
-
178
-
179
-
180
-
181
-
182
 |
 |
