Intel SRCU41L User Manual - Page 20
Detailed Installation - support
 |
UPC - 735858171632
View all Intel SRCU41L manuals
Add to My Manuals
Save this manual to your list of manuals |
Page 20 highlights
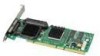
Hardware Installation 2.3 6. Turn power on after completing the safety check. Detailed Installation This section provides detailed instructions for installing a Intel® Raid Controller SRCU41L. 1. Unpack the Storage Adapter Unpack and remove the Intel® Raid Controller SRCU41L. Inspect it for damage. If it appears damaged, or if any items listed below are missing, contact your Intel support representative. The Intel® Raid Controller SRCU41L is shipped with - the Intel® SRCU41L Raid Controller CD, which contains drivers for supported operating systems, an electronic version of this Hardware and Software User Guide, and other related documentation. - a license agreement 2. (Optional, required to enable Write Back Cache) Attach Battery Backup Unit (BBU) to the adapter. a. Remove the Battery Backup Unit from its packaging. b. Connect the wire from the battery to the circuit board. (A) c. Position the BBU over the RAID adapter so the connectors line up (B). Press the BBU onto the adapter. d. Turn the adapter over. e. Using three screws (C), secure the BBU to the RAID adapter. 6 Intel® SRCU41L Raid Controller User Manual
-
 1
1 -
2
-
3
-
4
-
5
-
6
-
7
-
8
-
9
-
10
-
11
-
12
-
13
-
14
-
 15
15 -
 16
16 -
 17
17 -
 18
18 -
 19
19 -
 20
20 -
 21
21 -
 22
22 -
 23
23 -
 24
24 -
 25
25 -
26
-
27
-
28
-
29
-
30
-
31
-
32
-
33
-
34
 |
 |
