Intermec 6822 6820 Series 80-Column Printer Terminal Holder Installation Instr - Page 7
Installing the Holder, Tools Required, Removing the Existing Holder - printer cost
 |
View all Intermec 6822 manuals
Add to My Manuals
Save this manual to your list of manuals |
Page 7 highlights
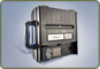
The Bluetooth-enabled holder in this kit must be installed by a qualified technician. The hardware in this kit is warranted for 1 year. If the hardware is installed by non-Intermecauthorized service personnel and there is a hardware failure, at Intermec's sole discretion, if the cause of this failure is determined to be related to improper installation of the Bluetooth-enabled holder, any warranty periods remaining for any components of the kit will be voided. Any costs associated with the remediation of such failures will be the responsibility of the user. Tools Required You need these tools to install the holder in the printer: • #1 Phillips screwdriver • #0 Phillips screwdriver Installing the Holder To install the holder, you need to follow the steps below. These steps are explained in the next sections. 1 Remove the existing holder. 2 Install the cables for the new holder. 3 Install the new holder. 4 Insert the computer in the holder. 5 Configure the printer to communicate with your computer. Removing the Existing Holder The steps for removing the holder are different depending on whether the 6820 printer is fixed or portable: • For a portable printer, see the next procedure. • For a fixed printer, see "To remove the existing holder from a fixed printer" on page 10. To remove the existing holder from a portable printer 1 Disconnect external power and remove the internal battery (if installed) from the printer. 2 Open the printer lid. 6820 Series 80-Column Printer Terminal Holder Installation Instructions 7
-
 1
1 -
 2
2 -
 3
3 -
 4
4 -
 5
5 -
 6
6 -
 7
7 -
 8
8 -
 9
9 -
 10
10 -
 11
11 -
 12
12 -
13
-
14
-
15
-
16
-
17
-
18
-
19
-
20
-
21
-
22
-
23
-
24
 |
 |
