Intermec PX6i Fingerprint Developer's Guide (old) - Page 113
Creating a Simple Label
 |
View all Intermec PX6i manuals
Add to My Manuals
Save this manual to your list of manuals |
Page 113 highlights
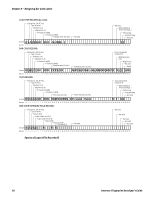
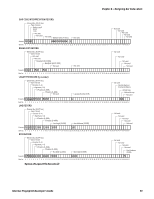
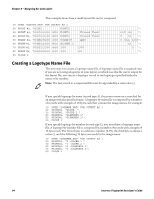
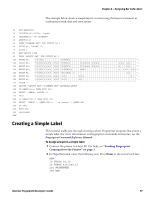
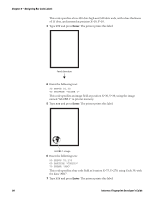
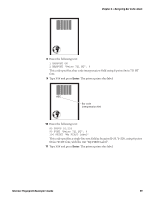
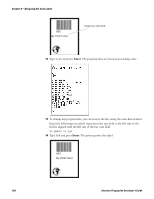
Chapter 6 - Designing Bar Code Labels The example below shows a simple layout created using the layout statement in combination with data and error arrays: 10 DIM QERR%(28) 20 LAYDATA$(0)="02Var. input" 30 LAYDATA$(1)="03 PRINTER" 40 QERR%(0)=0 50 OPEN "LOGNAME.DAT" FOR OUTPUT AS 1 60 PRINT #1, "GLOBE.1"; 70 CLOSE 1 80 REM:LAYOUT FILE 90 OPEN "LAYOUT.DAT" FOR OUTPUT AS 2 100 PRINT #2, " 0 1 H 1 FONT1 110 PRINT #2, " 0 2 C 1 1 1 0 0 6 5 0 F O N T 1 Fixed Text 120 PRINT #2, " 0 2 C 1 1 1 3 0 4 5 0 F O N T 1 Fixed Text 130 PRINT #2, " 0 3 B 1 7 1 0 0 3 0 0 C O D E 3 9 ABC 140 PRINT #2, " 0 4 A 1 2 3 0 0 8 0 0 G L O B E . 1 150 PRINT #2, " 0 5 X 1 1 1 0 0 4 4 0 3 0 0 100 160 PRINT #2, " 0 6 S 1 1 1 0 0 1 0 0 3 0 0 10 170 CLOSE 2 180 LAYOUT "LAYOUT.DAT","LOGNAME.DAT",LAYDATA$,QERR% 190 IF QERR%(1)=0 THEN GOTO 260 200 PRINT "-ERROR- LAYOUT 1" 210 I%=0 220 IF QERR%(I%)=0 THEN GOTO 260 230 PRINT " ERROR "; QERR%(I%+1); " in record "; QERR%(I%) 240 I%=I%+2 250 GOTO 220 260 PRINTFEED RUN "; 11I 22 "; 0 11 "; 3 311 100"; 11 "; 5 "; "; Creating a Simple Label This tutorial walks you through creating a short Fingerprint program that prints a simple label. For more information on Fingerprint commands and syntax, see the Fingerprint Command Reference Manual. To design and print a simple label 1 Connect the printer to a host PC. For help, see "Sending Fingerprint Commands to the Printer" on page 3. 2 In HyperTerminal, enter the following text. Press Enter at the end of each line: NEW 10 PRPOS 10,10 20 PRBOX 430,340,15 200 PRINTFEED 300 END Intermec Fingerprint Developer's Guide 97
-
 1
1 -
2
-
3
-
4
-
5
-
6
-
7
-
8
-
9
-
10
-
11
-
12
-
13
-
14
-
15
-
16
-
17
-
18
-
19
-
20
-
21
-
22
-
23
-
24
-
25
-
26
-
27
-
28
-
29
-
30
-
31
-
32
-
33
-
34
-
35
-
36
-
37
-
38
-
39
-
40
-
41
-
42
-
43
-
44
-
45
-
46
-
47
-
48
-
49
-
50
-
51
-
52
-
53
-
54
-
55
-
56
-
57
-
58
-
59
-
60
-
61
-
62
-
63
-
64
-
65
-
66
-
67
-
68
-
69
-
70
-
71
-
72
-
73
-
74
-
75
-
76
-
77
-
78
-
79
-
80
-
81
-
82
-
83
-
84
-
85
-
86
-
87
-
88
-
89
-
90
-
91
-
92
-
93
-
94
-
95
-
96
-
97
-
98
-
99
-
100
-
101
-
102
-
103
-
104
-
105
-
106
-
107
-
 108
108 -
 109
109 -
 110
110 -
 111
111 -
 112
112 -
 113
113 -
 114
114 -
 115
115 -
 116
116 -
 117
117 -
 118
118 -
119
-
120
-
121
-
122
-
123
-
124
-
125
-
126
-
127
-
128
-
129
-
130
-
131
-
132
-
133
-
134
-
135
-
136
-
137
-
138
-
139
-
140
-
141
-
142
-
143
-
144
-
145
-
146
-
147
-
148
-
149
-
150
-
151
-
152
-
153
-
154
-
155
-
156
-
157
-
158
-
159
-
160
-
161
-
162
-
163
-
164
-
165
-
166
-
167
-
168
-
169
-
170
-
171
-
172
-
173
-
174
-
175
-
176
-
177
-
178
-
179
-
180
-
181
-
182
-
183
-
184
-
185
-
186
-
187
 |
 |
