Invacare 3GSEAT Owners Manual 2 - Page 69
Replacing Composite/Articulating Footplate Heel Loop
 |
View all Invacare 3GSEAT manuals
Add to My Manuals
Save this manual to your list of manuals |
Page 69 highlights
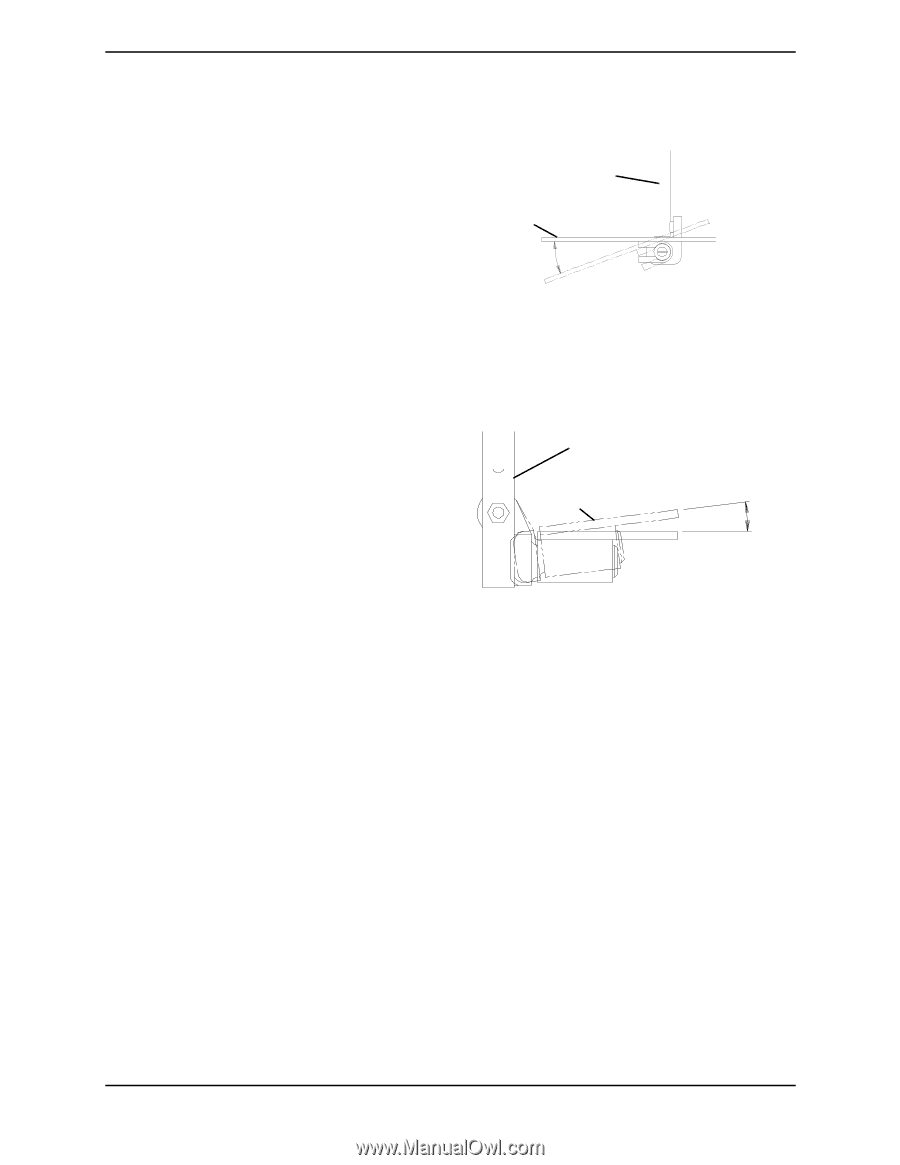
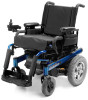
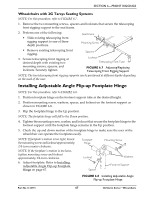
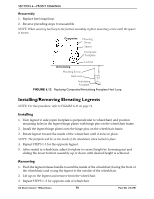
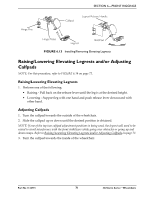
SECTION 6-FRONT RIGGINGS Angle NOTE: For this procedure, refer to FIGURE 6.10. 1. Loosen, but DO NOT remove the two flat screws, washer and locknuts that secure the footplate to the footplate hinge. 2. Position the articulating footplate to the necessary angle to accommodate the user. Footrest Support Articulating Footplate Side View Of Footplate and Footrest Support 3. Retighten the two flat screws, washers and locknuts. FIGURE 6.10 Adjusting Adjustable Angle Flip-up Footplates - Angle Perpendicular and/or Inversion/Eversion Adjustment NOTE: For this procedure, refer to FIGURE 6.11. NOTE: It is not necessary to remove the footplate to perform this adjustment. 1. Insert a flathead screwdriver through the half clamp on the articulating footplate. Footrest Support Footplate Front View Of Footplate and Footrest Support 2. Slowly turn nylon adjustment screw in or out until articulating footplate is perpendicular to the footrest assembly or the desired inversion or eversion is obtained. FIGURE 6.11 Adjusting Adjustable Angle Flip-up Footplates - Perpendicular and/or Inversion/Eversion Adjustment Replacing Composite/Articulating Footplate Heel Loop NOTE: For this procedure, refer to FIGURE 6.12 on page 70. Disassembly Composite 1. Remove the mounting screw and spacer that secures the lower half of the footrest to the swingaway footrest assembly. 2. Remove the lower footrest assembly. 3. Remove the mounting screw and locknut that secure the heel loop to the footrest. 4. Slide heel strap over cane of footrest assembly. Articulating 1. Remove the two mounting screws that secure the heel loop to the articulating footplate. Part No 1134791 69 3G Storm Series® Wheelchairs
-
 1
1 -
2
-
3
-
4
-
5
-
6
-
7
-
8
-
9
-
10
-
11
-
12
-
13
-
14
-
15
-
16
-
17
-
18
-
19
-
20
-
21
-
22
-
23
-
24
-
25
-
26
-
27
-
28
-
29
-
30
-
31
-
32
-
33
-
34
-
35
-
36
-
37
-
38
-
39
-
40
-
41
-
42
-
43
-
44
-
45
-
46
-
47
-
48
-
49
-
50
-
51
-
52
-
53
-
54
-
55
-
56
-
57
-
58
-
59
-
60
-
61
-
62
-
63
-
 64
64 -
 65
65 -
 66
66 -
 67
67 -
 68
68 -
 69
69 -
 70
70 -
 71
71 -
 72
72 -
 73
73 -
 74
74 -
75
-
76
-
77
-
78
-
79
-
80
-
81
-
82
-
83
-
84
-
85
-
86
-
87
-
88
-
89
-
90
-
91
-
92
-
93
-
94
-
95
-
96
-
97
-
98
-
99
-
100
-
101
-
102
-
103
-
104
-
105
-
106
-
107
-
108
-
109
-
110
-
111
-
112
-
113
-
114
-
115
-
116
-
117
-
118
-
119
-
120
-
121
-
122
-
123
-
124
-
125
-
126
-
127
-
128
-
129
-
130
-
131
-
132
 |
 |