Invacare L-3XB Owners Manual - Page 41
Removing/Installing the Batteries, Removing, Installing
 |
View all Invacare L-3XB manuals
Add to My Manuals
Save this manual to your list of manuals |
Page 41 highlights
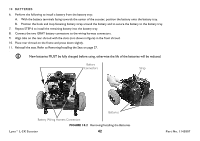
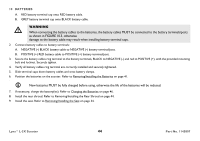
10.2 Removing/Installing the Batteries 10 BATTERIES For this procedure, refer to FIGURE 10.3 on page 45. Removing 1. Place the powered scooter in a well ventilated area. ƽ CAUTION Work should be performed in an area without risking damage to carpeting or floor covering. 2. Turn power off and remove the key from the ignition. 3. Remove the seat. Refer to Removing/Installing the Seat on page 27. 4. Lifting up to release the hook and loop strips, remove the rear shroud from the scooter. 5. Disconnect the two GRAY battery connectors from the wiring harness connectors. 6. Perform the following to remove a battery from the battery tray: A. Pull the hook and loop fastening battery strap apart. B. Lift the battery from the battery tray. 7. Repeat STEP 6 to remove the remaining battery. 8. If necessary, remove the battery cables. Refer to Connecting/Disconnecting the Battery Cables on page 43. Installing 1. Place the powered scooter in a well ventilated area where work can be performed without risking damage to carpeting or floor covering. 2. Turn power off and remove the key from the ignition. 3. If necessary, connect the battery cable. Refer to Connecting/Disconnecting the Battery Cables on page 43. 4. Remove the seat. Refer to Removing/Installing the Seat on page 27. 5. Lifting up to release the hook and loop strips, remove the rear shroud from the scooter. Part No. 1145807 41 Lynx™L-3X Scooter
-
 1
1 -
2
-
3
-
4
-
5
-
6
-
7
-
8
-
9
-
10
-
11
-
12
-
13
-
14
-
15
-
16
-
17
-
18
-
19
-
20
-
21
-
22
-
23
-
24
-
25
-
26
-
27
-
28
-
29
-
30
-
31
-
32
-
33
-
34
-
35
-
 36
36 -
 37
37 -
 38
38 -
 39
39 -
 40
40 -
 41
41 -
 42
42 -
 43
43 -
 44
44 -
 45
45 -
 46
46 -
47
-
48
-
49
-
50
-
51
-
52
-
53
-
54
-
55
-
56
-
57
-
58
-
59
-
60
 |
 |
