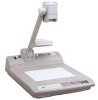
JVC AV-P720U 15 pg instruction manual on the AV-P720U Visual Presenter (250KB, - Page 10
Brightness, Lighting, Auto White Set
 |
View all JVC AV-P720U manuals
Add to My Manuals
Save this manual to your list of manuals |
Page 10 highlights
Lighting • This button turns lighting ON/OFF. • If you press this button while lighting is turned OFF, light will come on; if you push this button while lighting is turned ON, light will go out. Note: • Because a fluorescent lamp is used for lighting, it will take a few seconds to come on. ON-SCREEN ADJUSTMENT AUTO WHITE IRIS SET Rear Control Panel MENU/ENTER LIGHTING Brightness • This function is used to adjust brightness of the material shown on the monitor screen. • Adjustment is made with pressing the brightness adjustment buttons ᮢ and ᮡ , and the level of adjustment can be confirmed with the values (+10 to -10) indicated at the upper right corner of the monitor screen. The initial setting is '0'. Note: • If brightness is lacking while IRIS is set at AUTO with the ON SCREEN ADJUSTMENT, the AUTO IRIS function may not start at all or take time before starting to operate. • If you wish to fix the brightness, change the IRIS mode to MANUAL on the ON SCREEN ADJUSTMENT. (See page 11) ON-SCREEN ADJUSTMENT AUTO WHITE IRIS SET MENU/ENTER Rear Control Panel LIGHTING Auto White Set • This function temporarily maintains the AUTO WHITE BAL- OFF ᮣ ANCE adjustment. This will be particularly effective when filming a single color material. [How to use AUTO WHITE SET] 1 ON-SCREEN ADJUSTMENT 1 Press the AUTO WHITE SET button while filling the screen with colorless subject (e.g., the stage's white section). 2 The indicator lamp will start blinking and the AUTO WHITE AUTO WHITE IRIS SET Rear Control Panel MENU/ENTER LIGHTING BALANCE adjustment will begin. 3 As soon as the AUTO WHITE BALANCE adjustment is com- 2 Blinking ᮣ pleted, the indicator lamp will stop blinking and remain lit. 4 To return to the original setting, press the AUTO WHITE ON-SCREEN ADJUSTMENT button. This will cancel the AUTO WHITE SET function and the indicator lamp will go out. AUTO WHITE IRIS SET MENU/ENTER LIGHTING Note: • Every time lighting on a subject changes, you must repeat the AUTO WHITE SET function. • In order to adjust WHITE BALANCE manually set the WHITE BALANCE mode to MANUAL on the ON SCREEN ADJUSTMENT and then fine tune the balance using the RED LEVEL and the BLUE LEVEL. • While the ON SCREEN ADJUSTMENT is shown on the monitor or the MANUAL setting is indicated, the AUTO WHITE SET button will not function. 3 ON AUTO WHITE SET 4 OFF ᮣ ON-SCREEN ADJUSTMENT IRIS MENU/ENTER LIGHTING ᮣ ON-SCREEN ADJUSTMENT AUTO WHITE IRIS SET MENU/ENTER LIGHTING 10
-
 1
1 -
2
-
3
-
4
-
 5
5 -
 6
6 -
 7
7 -
 8
8 -
 9
9 -
 10
10 -
 11
11 -
 12
12 -
 13
13 -
 14
14 -
 15
15
 |
 |
