JVC D93US Installation Manual - Page 12
Disconnecting the USB Cable (Windows®), When using Windows
 |
UPC - 046838010743
View all JVC D93US manuals
Add to My Manuals
Save this manual to your list of manuals |
Page 12 highlights
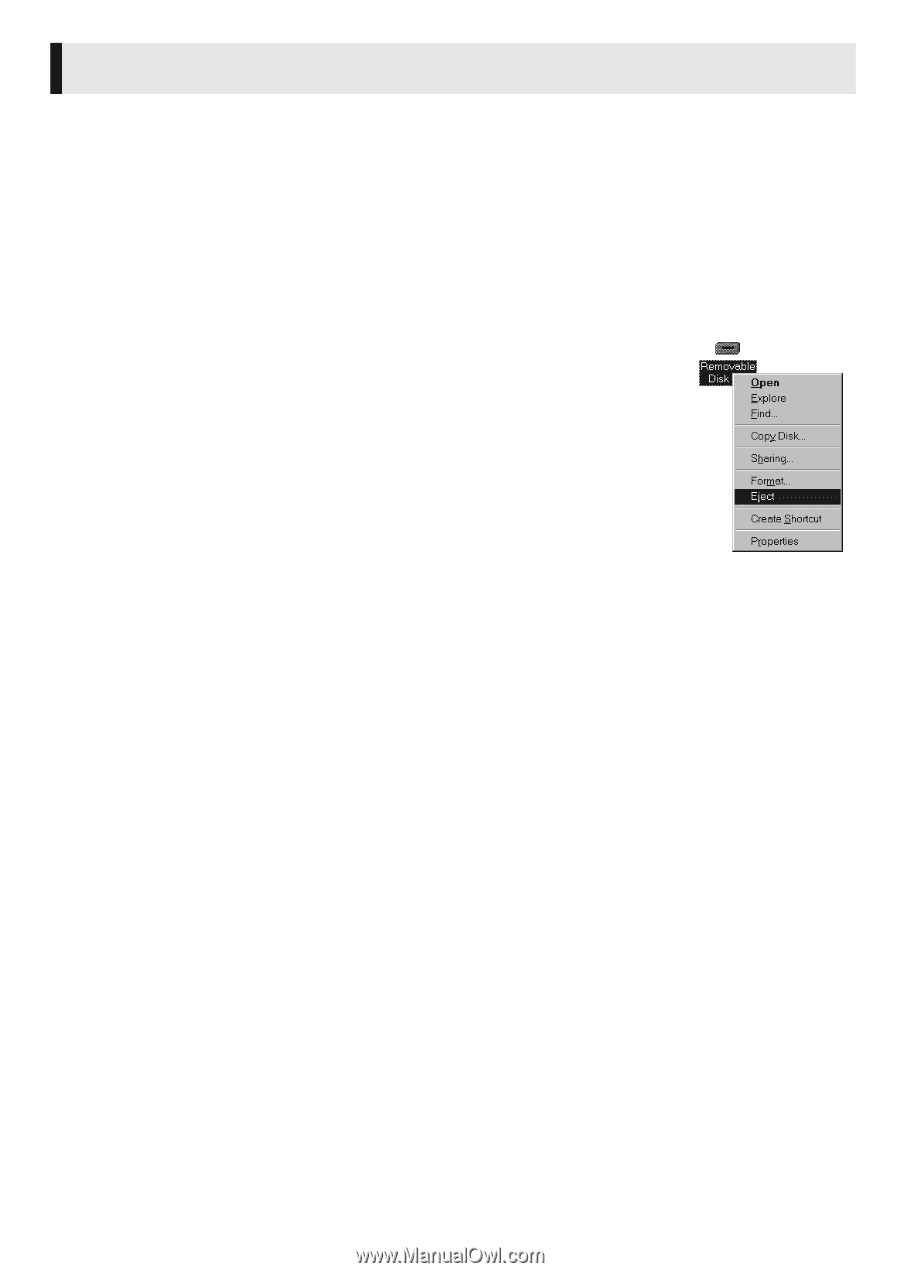
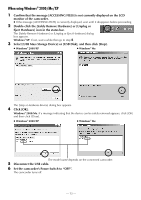
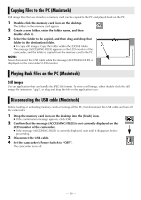
Disconnecting the USB Cable (Windows®) Before loading or unloading memory cards or turning off the PC, first disconnect the USB cable and turn off the camcorder. When using Windows® 98/98SE 1 Confirm that the message [ACCESSING FILES] is not currently displayed on the LCD monitor of the camcorder. ● If the message [ACCESSING FILES] is currently displayed, wait until it disappears before proceeding. 2 Double-click the [My Computer] icon on the desktop. If the camcorder is connected to the PC correctly, the [Removable Disk] icon appears. 3 Right-click the [Removable Disk] icon in the [My Computer] window. A menu appears. 4 Click [Eject] in the menu. The [Removable Disk] icon disappears. ● If the icon does not disappear, wait for a while, and then proceed to step 5. 5 Disconnect the USB cable. ● If any message appears, click [OK]. 6 Set the camcorder's Power Switch to "OFF". The camcorder turns off. - 12 - CONTINUED ON NEXT PAGE
-
 1
1 -
2
-
3
-
4
-
5
-
6
-
 7
7 -
 8
8 -
 9
9 -
 10
10 -
 11
11 -
 12
12 -
 13
13 -
 14
14 -
 15
15 -
 16
16
 |
 |