JVC FS-SD1000 User Manual - Page 13
Basic Operations
 |
View all JVC FS-SD1000 manuals
Add to My Manuals
Save this manual to your list of manuals |
Page 13 highlights
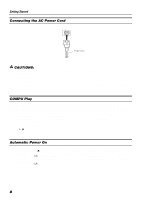
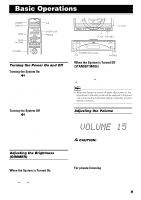
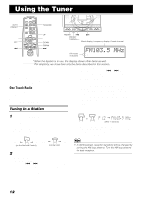
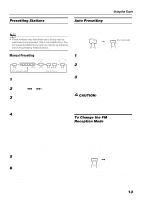
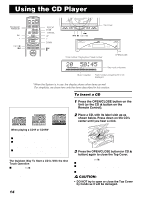
Basic Operations DIMMER DISPLAY BASS FADE MUTING REMOTE CONTROL RM-SFSSD1000J STANDBY/ON DIMMER SLEEP AUTO DISPLAY PRESET FM MODE PROGRAM RANDOM REPEAT DOOR SLIDE CD BASS TREBLE CANCEL UP SET FADE MUTING DOWN CD MD/AUX FM / AM VOLUME+,- VOLUME ü DOOR SLIDE TREBLE Turning the Power On and Off Turning the System On Press the % button. The Top Cover moves backward and the Unit's top buttons appear. The display comes on and "HELLO" is displayed once. The STANDBY/ON indicator lights in green. The System comes on ready to continue in the mode it was in when the power was last turned off. s For example, if the last thing you were doing was listening to a CD, you are now ready to listen to a CD again. If you wish, you can change to another source. s If you were listening to the Tuner last, the Tuner comes on playing the station it was last set to. Turning the System Off Press the % button again. The Top Cover moves back to the original position. "GOOD BYE" is displayed and the display goes out, except for the clock display. The STANDBY/ON indicator lights in red. s Some power is always consumed even though power is turned off (called Standby Mode). s To switch off the System completely, unplug the AC power cord from the wall outlet. When you unplug the AC power cord, the clock will be reset to AM 12:00 after about 20 minutes. Adjusting the Brightness (DIMMER) You can adjust the brightness of the backlighting for the display. When the System is Turned On Each time you press the DIMMER button on the Remote Control, the brightness of the backlighting changes as follows: Bright = Dark = (back to the beginning) MD/AUX FM/AM PRESET TUNING CD DOWN UP MULTI CONTROL CLOCK TIMER VOLUME Top Cover CLOCK VOLUME+,- STANDBY/ON OPEN/CLOSE CD - R / RW PLAYBACK PHONES STANDBY/ON indicator ü PHONES When the System is Turned Off (STANDBY MODE) Each time you press the DIMMER button on the Remote Control, the brightness of the backlighting changes as follows: No backlighting = Dark backlighting = (back to the beginning) • When the System is turned off again after power on, the brightness in Standby mode will be restored to the previous one since the brightness setting in Standby mode is stored in memory. Adjusting the Volume Press the VOLUME + button to increase the volume or press the VOLUME - button to decrease it. You can adjust the volume level between 0 and 50. CAUTION: • DO NOT turn off the System with the volume set to an extremely high level; otherwise a sudden blast of sound could damage your hearing, speakers and/or headphones when you turn on the System or start playing any source next time. REMEMBER you cannot adjust the volume level while the System is in standby mode. For private listening Connect a pair of headphones to the PHONES jack. No sound comes out of the speakers. Be sure to turn down the volume before connecting or putting on headphones. 9
-
 1
1 -
2
-
3
-
4
-
5
-
6
-
7
-
 8
8 -
 9
9 -
 10
10 -
 11
11 -
 12
12 -
 13
13 -
 14
14 -
 15
15 -
 16
16 -
 17
17 -
 18
18 -
19
-
20
-
21
-
22
-
23
-
24
-
25
-
26
-
27
-
28
-
29
-
30
 |
 |
