JVC GZ-E200 User Manual - English - Page 61
Connecting to and Viewing on TV, Connecting via the HDMI Mini Connector
 |
View all JVC GZ-E200 manuals
Add to My Manuals
Save this manual to your list of manuals |
Page 61 highlights
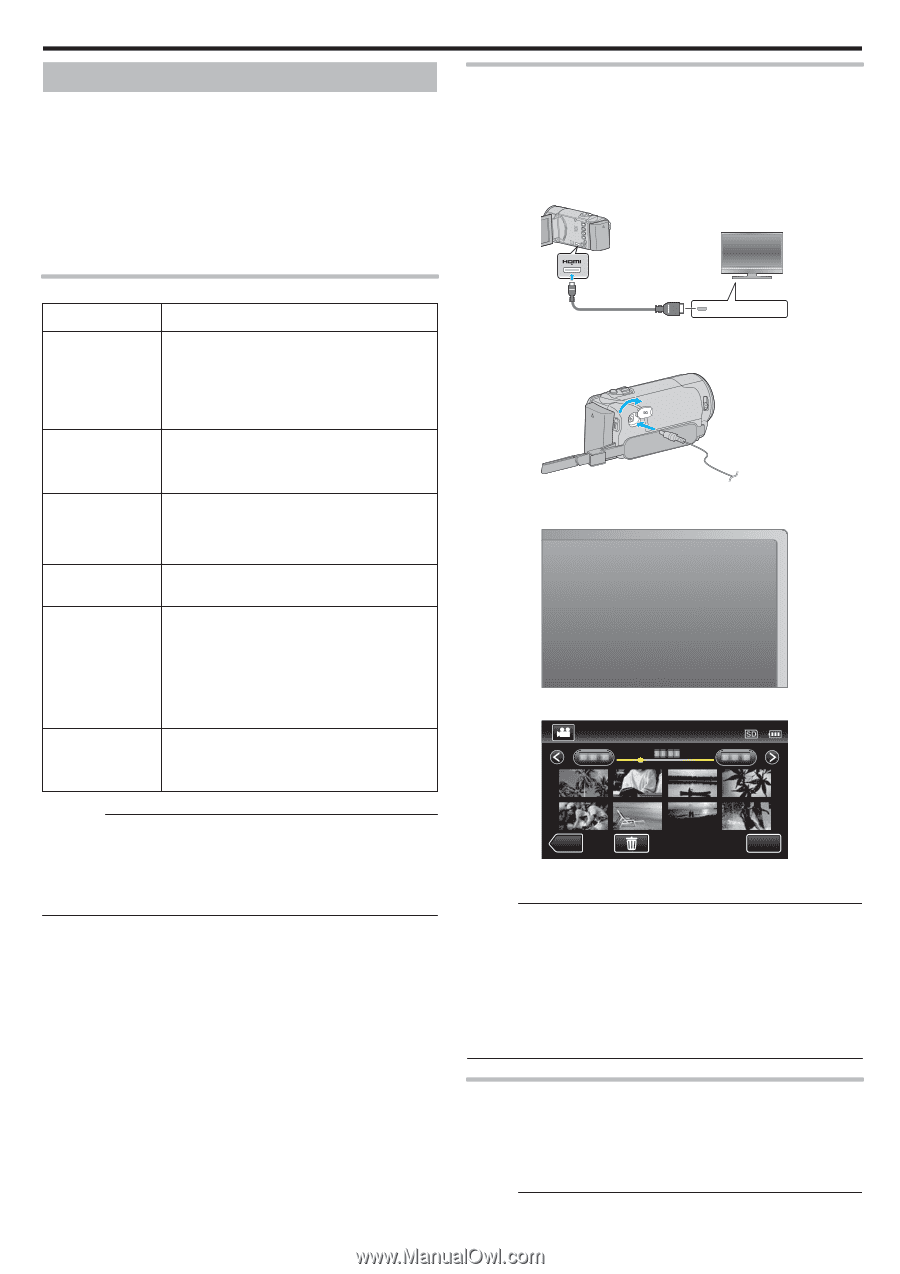
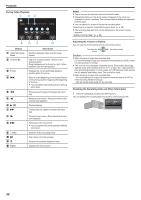
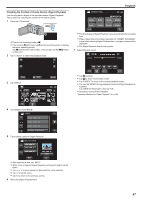
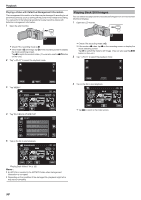
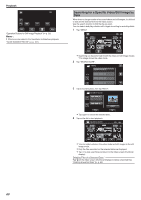
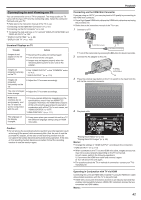
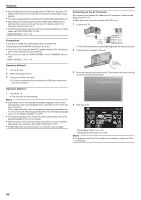
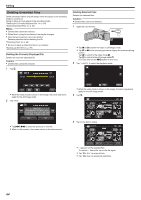
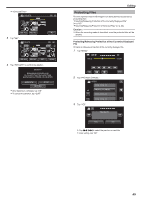
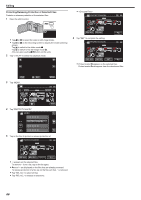
Playback Connecting to and Viewing on TV You can connect this unit to a TV for playback. The image quality on TV varies with the type of TV and the connecting cable. Select the connector that best suits your TV. 0 Refer also to the instruction manual of the TV in use. "Connecting via the HDMI Mini Connector" (A p. 61) "Connecting via the AV Connector" (A p. 62) 0 To display the date and time on TV, set both "DISPLAY DATE/TIME" and "DISPLAY ON TV" to "ON". " DISPLAY DATE/TIME " (A p. 99) " DISPLAY ON TV " (A p. 109) Unnatural Displays on TV Trouble Images do not appear on the TV properly. Action 0 Disconnect the cable and connect again. 0 Turn off and on this unit again. 0 Images may not appear properly when the remaining battery power is low. Use an AC adapter. Images are projected vertically on the TV. 0 Set "VIDEO OUTPUT" in the "COMMON" menu to "4:3". " VIDEO OUTPUT " (A p. 110) Images are projected horizontally on the TV. 0 Adjust the TV's screen accordingly. The color of images 0 Adjust the TV's screen accordingly. looks strange. HDMI-CEC functions do not work properly, and the TV does not work in conjunction with this unit. 0 TVs may operate differently depending on the specifications, even if they are HDMI-CEC compliant. Therefore, the HDMI-CEC functions of this unit cannot be guaranteed to operate in combination with all the TVs. In such cases, set "HDMI CONTROL" to "OFF". " HDMI CONTROL " (A p. 111) The language on the display changed. 0 It may occur when you connect this unit to a TV with different language setting using an HDMI mini cable. Connecting via the HDMI Mini Connector If you are using an HDTV, you can play back in HD quality by connecting to the HDMI mini connector. 0 Use a High Speed HDMI mini cable as the HDMI mini cable when not using the provided one. 0 Refer also to the instruction manual of the TV in use. 1 Connect to a TV. To HDMI Mini Connector TV HDMI Connector Input . 0 Turn off the camcorder by pressing the M button for about 2 seconds. 2 Connect the AC adapter to this unit. AC Adapter To AC Outlet (110 V to 240 V) . 3 Press the external input button on the TV to switch to the input from this unit via the connected connector. External Input . 4 Play back a file. Caution : 0 Do not remove the recording medium or perform any other operation (such as turning off the power) while accessing files. Also, be sure to use the provided AC adapter, as the data on the recording medium may be corrupted if the battery becomes exhausted during operation. If the data on the recording medium becomes corrupted, format the recording medium to use the medium again. ˻REC MENU . "Playing Back Videos" (A p. 55) "Playing Back Still Images" (A p. 58) Memo : 0 Change the settings in "HDMI OUTPUT" according to the connection. " HDMI OUTPUT " (A p. 110) 0 When connected to the TV via the HDMI mini cable, images and sounds may not be output properly depending on the TV connected. In such cases, perform the following operations. 1) Disconnect the HDMI mini cable and connect it again. 2) Turn off and on this unit again. 0 For questions about the TV or method of connection, contact your TV's manufacturer. Operating in Conjunction with TV via HDMI Connecting this unit to an HDMI-CEC enabled TV using the HDMI mini cable allows linked operations with the TV to be performed. 0 HDMI-CEC (Consumer Electronics Control) is an industry standard that enables interoperability between HDMI-CEC compliant devices that are connected via HDMI cables. Memo : 61
-
 1
1 -
2
-
3
-
4
-
5
-
6
-
7
-
8
-
9
-
10
-
11
-
12
-
13
-
14
-
15
-
16
-
17
-
18
-
19
-
20
-
21
-
22
-
23
-
24
-
25
-
26
-
27
-
28
-
29
-
30
-
31
-
32
-
33
-
34
-
35
-
36
-
37
-
38
-
39
-
40
-
41
-
42
-
43
-
44
-
45
-
46
-
47
-
48
-
49
-
50
-
51
-
52
-
53
-
54
-
55
-
 56
56 -
 57
57 -
 58
58 -
 59
59 -
 60
60 -
 61
61 -
 62
62 -
 63
63 -
 64
64 -
 65
65 -
 66
66 -
67
-
68
-
69
-
70
-
71
-
72
-
73
-
74
-
75
-
76
-
77
-
78
-
79
-
80
-
81
-
82
-
83
-
84
-
85
-
86
-
87
-
88
-
89
-
90
-
91
-
92
-
93
-
94
-
95
-
96
-
97
-
98
-
99
-
100
-
101
-
102
-
103
-
104
-
105
-
106
-
107
-
108
-
109
-
110
-
111
-
112
-
113
-
114
-
115
-
116
-
117
-
118
-
119
-
120
-
121
-
122
-
123
-
124
-
125
-
126
-
127
 |
 |