JVC GZ-GX1BUS other - Page 13
USB Menu Operations
 |
View all JVC GZ-GX1BUS manuals
Add to My Manuals
Save this manual to your list of manuals |
Page 13 highlights
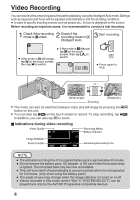
USB Menu Operations By connecting a USB cable between this unit and your computer, you can perform operations such as file backups to PC/disc or file uploads to file-sharing site using your computer. 2 The "CONNECT TO PC" menu appears. Tap an option that best suits your needs. CONNECT TO PC PLAYBACK ON PC Preparation: 0 Install the Everio MediaBrowser software onto the PC. 0 Disconnect the power supply to turn off the camera. 0 Connect the camera to the PC with the USB cable. Refer to the connection diagram in the "File Backup (Windows)" section. (p. 14) 0 Reconnect the power supply to turn on the camera. 1 The "SELECT DEVICE" menu appears. Tap "CONNECT TO PC" on the camera's touch screen. SELECT DEVICE SELECT DEVICE TYPE TO CONNECT CONNECT TO PC . Option Usage PLAYBACK 0 To play back your recordings ON PC on the PC. 0 To back up your recordings on the PC without using the provided software. CREATE 0 To save your recordings on a DISC disc. DIRECT 0 To save all unsaved DISC recordings on a disc. UPLOAD 0 To upload videos to file- sharing sites. BACK UP 0 To back up recordings on the PC. . 0 Tap "CONNECT TO OTHER" if the camera is connected to a device other than a computer. For detailed operations on the above options, refer to the other sections in this guide or the "Detailed User Guide". 13
-
 1
1 -
2
-
3
-
4
-
5
-
6
-
7
-
 8
8 -
 9
9 -
 10
10 -
 11
11 -
 12
12 -
 13
13 -
 14
14 -
 15
15 -
 16
16 -
 17
17 -
 18
18 -
19
-
20
-
21
-
22
-
23
-
24
-
25
-
26
-
27
-
28
-
29
-
30
-
31
-
32
-
33
-
34
-
35
-
36
-
37
-
38
-
39
-
40
-
41
-
42
-
43
-
44
-
45
-
46
-
47
-
48
-
49
-
50
-
51
-
52
-
53
-
54
-
55
-
56
-
57
-
58
-
59
-
60
 |
 |
