JVC KY-F550U Instruction Manual - Page 16
Preparation Before Shooting, Connecting Through Digital Output
 |
View all JVC KY-F550U manuals
Add to My Manuals
Save this manual to your list of manuals |
Page 16 highlights
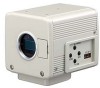
2. Preparation Before Shooting Connecting Through Digital Output Computer can be used to control this unit remotely, record captured images on digital device or display them on the computer or monitor. (Please pre-install the exclusive software for this unit.) 'Connecting the Power Supply' (Page 18) BNC CABLE AA-P700 AC ADAPTER AA-P700 POWER ON OFF AC IN BR-DV3000 BR-DV6000 DV VTR Monitor Clamp filter (accessories) [VIDEO OUT] [DV] DV 'Connecting the IEEE 1394 Cable' (Page 48) RGB, Y/C, SYNC OUT Exclusive Software Computer IEEE 1394 Terminal 'Mounting the Lens' (Page 17) 5 / BARS LENS TRGGER VIDEO OUT POWER DC IN 1 2 34 MENU SET 5 / AW [DC IN] AC Adapter REMORT SEE INSTRUCTION MANUAL [LENS] Notes ● 2 or more of this unit cannot be connected to 1 computer. ● Ensure to attach the supplied clamp filter to the cable connected to the Digital Output [DV] terminal in order to reduce unwanted electromagnetic emissions. 1. Connect the [DV] terminal of this unit to the computer's DV [IEEE1394] terminal. 2. Set the Switch 1 and Switch 4 located at the side of this unit to [ON] (upper side). 3. Switch on the power of this unit. 4. Set the "DV SYSTEM" under "SYSTEM" screen to "JVC". 5. Power on the computer and launch the software. 1 23 4 ON OFF Switch 1 Switch 4 With the exclusive software provided, it is possible to select the various camera settings and operate the camera for shooting. For details, please consult your JVC-authorized dealer. Please refer to the software's HELP menu for details on how it could be used. Caution ● Perform this when the devices are off. ● When the software has been launched, do not switch on/off the power of the AC adapter or insert and remove the IEEE 1394 cable. ● Disable the automatic standby or hibernation function of your computer before using it. ● This unit's power can be supplied from the IEEE 1394 cable. However, use the power supply voltage between 10.5 V - 15 V if power lens is to be used. Ensure that the supply capacity of the supply source is adequate in meeting the total power consumptions of both this unit and the power lens used. 14
-
 1
1 -
2
-
3
-
4
-
5
-
6
-
7
-
8
-
9
-
10
-
 11
11 -
 12
12 -
 13
13 -
 14
14 -
 15
15 -
 16
16 -
 17
17 -
 18
18 -
 19
19 -
 20
20 -
 21
21 -
22
-
23
-
24
-
25
-
26
-
27
-
28
-
29
-
30
-
31
-
32
-
33
-
34
-
35
-
36
-
37
-
38
-
39
-
40
-
41
-
42
-
43
-
44
-
45
-
46
-
47
-
48
-
49
-
50
-
51
-
52
-
53
-
54
-
55
-
56
 |
 |
