JVC RCEZ38 Instruction Manual - Page 11
Setting The Clock
 |
UPC - 046838021459
View all JVC RCEZ38 manuals
Add to My Manuals
Save this manual to your list of manuals |
Page 11 highlights
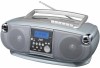
SETTING THE CLOCK 1 2, 4, 6 3, 5 3, 5 1 3, 5 STANDBY/ ON / TAPE MENU/ FM MODE TUNER/ CD USB BAND STOP/ ENTER PROGRAM/ RANDOM REPEAT PRESET MUTING SLEEP EQ 1 2 3 4 5 6 7 8 9 0 VOL REMOTE CONTROL UNIT Before operating the unit any further, first set the clock built in this unit. There is a time limit in doing the following steps. If the setting is canceled before you finish, start from step 2 again. 1 Press STANDBY/ON to turn on. 2 Press and hold CLOCK. The hour digits start flashing. To set the sleep timer When the time you specify elapses, the system will be turned off automatically. On the remote control only. 1 Press SLEEP. Flashing "SLEEP 10" and " S " are displayed. 005 00:01 SLEEP 10 S 3 Press 4 or ¢ to adjust the hour. 4 Press CLOCK. The minute digits start flashing. 5 Press 4 or ¢ to adjust the minutes. 6 Press CLOCK. Note: If there is a power failure, the clock loses the setting. The clock indication will keep flashing until you set the clock again. To show the clock when the unit is on Press CLOCK. Each time you press the button, the display changes the clock indication and the normal indication alternately. Each time you press the SLEEP button, the time length changes as follows: 10=20=30=60=90=120=OFF=(back to the beginning) 2 Wait for a few seconds. Only the " S " is displayed, and the sleep timer is set. To Confirm the Sleep Time: Press SLEEP once while the sleep timer is set. To Cancel the Sleep Timer Setting: Press SLEEP repeatedly until "SLEEP OFF" appears. Note: The sleep timer will also be cancelled when the power is turned off. 7
-
 1
1 -
2
-
3
-
4
-
5
-
 6
6 -
 7
7 -
 8
8 -
 9
9 -
 10
10 -
 11
11 -
 12
12 -
 13
13 -
 14
14 -
 15
15 -
 16
16 -
17
-
18
-
19
-
20
-
21
-
22
-
23
-
24
-
25
-
26
-
27
-
28
-
29
 |
 |
