JVC THG51 Instructions - Page 10
Installation and Setup
 |
UPC - 046838039348
View all JVC THG51 manuals
Add to My Manuals
Save this manual to your list of manuals |
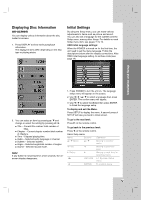
Page 10 highlights
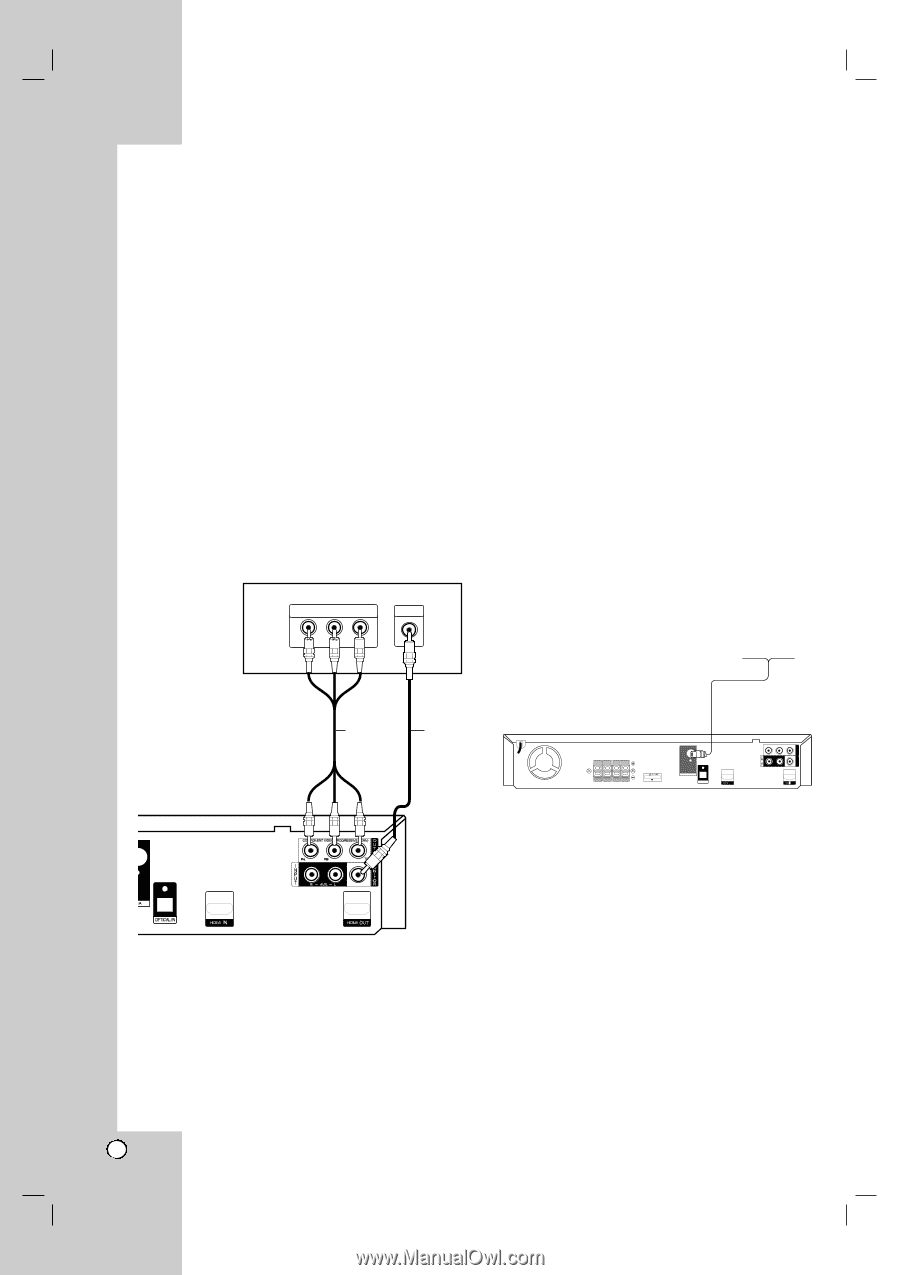
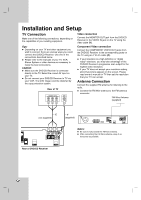
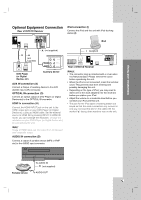
Installation and Setup TV Connection Make one of the following connections, depending on the capabilities of your existing equipment. Tips: Depending on your TV and other equipment you wish to connect, there are various ways you could connect the DVD/CD Receiver. Use one of the connections described below. Please refer to the manuals of your TV, VCR, Stereo System or other devices as necessary to make the best connections. Caution: Make sure the DVD/CD Receiver is connected directly to the TV. Select the correct AV input on your TV. Do not connect your DVD/CD Receiver to TV via your VCR. The DVD image could be distorted by the copy protection system. Rear of TV COMPONENT VIDEO / PROGRESSIVE SCAN INPUT Y VIDEO INPUT Video connection Connect the MONITOR OUT jack from the DVD/CD Receiver to the VIDEO IN jack on the TV using the video cable (V). Component Video connection Connect the COMPONENT VIDEO OUT jacks from the DVD/CD Receiver to the corresponding jacks on the TV using an Y PB PR cable (C). If your television is a high-definition or "digital ready" television, you may take advantage of the DVD/CD Receiver's progressive scan output for the highest video resolution. If your TV does not accept your resolution setting, abnormal picture appears on the screen. Please read owner's manual for TV then set the resolution that your TV can accept. Antenna Connection Connect the supplied FM antenna for listening to the radio. Connect the FM Wire antenna to the FM antenna connector. FM Wire Antenna (supplied) C (not supplied) V (supplied) Notes: Be sure to fully extend the FM wire antenna. After connecting the FM Wire antenna, keep it as horizontal as possible. Rear of DVD/CD Receiver 6
-
 1
1 -
2
-
3
-
4
-
 5
5 -
 6
6 -
 7
7 -
 8
8 -
 9
9 -
 10
10 -
 11
11 -
 12
12 -
 13
13 -
 14
14 -
 15
15 -
16
-
17
-
18
-
19
-
20
-
21
-
22
-
23
-
24
-
25
-
26
-
27
-
28
-
29
-
30
-
31
-
32
-
33
 |
 |