JVC UX-GN6 Instructions - Page 9
Basic Disc/USB Mass Storage Class Device Operations - micro
 |
UPC - 046838037924
View all JVC UX-GN6 manuals
Add to My Manuals
Save this manual to your list of manuals |
Page 9 highlights
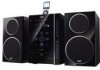
MICRO COMPONENT SYSTEM UX-GN6 -Consists of CA-UXGN6 and SP-UXGN5 CAUTION: Proper Ventilation To avoid risk of electric shock and fire, and to prevent damage, locate the apparatus as follows: 1. Front: No obstructions and open spacing. 2. Sides/Top/Back: No obstructions should be placed in the areas shown by the dimensions below. 3. Bottom: Place on the level surface. Maintain an adequate air path for ventilation by placing on a stand with a height of 10 cm or more. Front view Side view CA-UXGN6 SP-UXGN5 SP-UXGN5 CA-UXGN6 Thank you for purchasing a JVC product. INSTRUCTIONS LVT1989-018A[A] 0609RYMMDWDAT ©2009 Victor Company of Japan, Limited IMPORTANT FOR LASER PRODUCTS 1. CLASS 1 LASER PRODUCT 2. CAUTION: Do not open the top cover or cabinet. There are no user serviceable parts inside the unit; leave all servicing to qualified service personnel. 3. CAUTION: Visible and/or invisible class 1M laser radiation when open. Do not view directly with optical instruments. 4. REPRODUCTION OF LABEL: CAUTION LABEL, PLACED INSIDE THE UNIT. Warnings, Cautions and Others CAUTION The button in any position does not disconnect the mains line. Disconnect the mains plug to shut the power off completely (the STANDBY lamp goes off). The MAINS plug or an appliance coupler is used as the disconnect device, the disconnect device shall remain readily operable. • When the System is on standby, the STANDBY lamp lights red. • When the System is turned on, the STANDBY lamp goes off. The power can be remote controlled. CAUTION: To reduce the risk of electrical shocks, fire, etc.: 1. Do not remove screws, covers or cabinet. 2. Do not expose this appliance to rain or moisture. CAUTION: • Do not block the ventilation openings or holes. (If the ventilation openings or holes are blocked by a newspaper or cloth, etc., the heat may not be able to get out.) • Do not place any naked flame sources, such as lighted candles, on the apparatus. • When discarding batteries, environmental problems must be considered and local rules or laws governing the disposal of these batteries must be followed strictly. • Do not expose this apparatus to rain, moisture, dripping or splashing and that no objects filled with liquids, such as vases, shall be placed on the apparatus. CAUTION: Excessive sound pressure from earphones or headphones can cause hearing loss. CAUTION: Battery shall not be exposed to excessive heat such as sunshine, fire, or the like. [European Union only] Precautions Notes on the power cord • When you are away on travel or otherwise for an extended period of time, remove the plug from the wall outlet. • When unplugging the System from the wall outlet, always pull the plug, not the power cord. • Do not handle the power cord with wet hands. • Disconnect the power cord before cleaning the System or moving the System. • Do not alter, twist or pull the power cord, or put anything heavy on it, which may cause fire, electric shock, or other accidents. • If the cord is damaged, consult a dealer and have the power cord replaced with a new one. Avoid moisture, water, dust, and high temperatures • Do not place the System in moist or dusty places. • If water gets inside the System, turn off the power and remove the plug from the wall outlet, then consult your dealer. Using the System in this state may cause a fire or electrical shock. • Do not expose the System to direct sunlight or place it near a heating device. Notes on installation • Select a place which is level, dry and neither too hot nor too cold-between 5˚C and 35˚C. • Do not install the System in a place subject to vibrations. • Do not put heavy objects on the System. To prevent malfunction or damage of the System • Do not insert any metallic objects, such as wires, hairpins, coins, etc. into the System. • Do not block the vents. There are no user-serviceable parts inside. If anything goes wrong, unplug the power cord and consult your dealer. 1 Basic and Common Operations The operations on pages 4 to 7 are explained using the remote control, unless mentioned otherwise. However, if the System has the same or similar button names, they can also be used for the operations. Remote sensor STANDBY lamp Point at the remote sensor on the front panel. To Turn on or off (standby) the power Select a source Press Main unit Remote Indication/Result The STANDBY lamp on the System turns off/on. See "Playing Back a Disc/USB Mass Storage Class Device" on page 4. Adjust the volume See "Listening to an iPod/Viewing Images on the iPod" on page 5. Press repeatedly to select "FM," "AM," or "AUDIO IN" as the source. • See "Listening to FM and AM Broadcasts" on page 5 or "Listening to Other Equipment" on page 7. - PHONES jack Stereo mini plug cord Headphones (not supplied) Display Demonstration When you plug in the System, the display demonstration automatically starts. To cancel the display demonstration, press and hold DEMO until "DEMO CLR" is displayed while the System is on standby. • When the ECO Mode is activated, the display demonstration does not work (and you cannot deactivate it). Laser Touch Operation You can use 4/¢ and VOL +/- on the front panel by sliding your finger up or down on the illumination. To use 4/¢ To use VOL +/- Using Headphones Be sure to turn down the volume before connecting or putting on the headphones. • Connecting the headphones will deactivate the speakers. • Sound adjustments also affect the sound through the headphones. Motion Sensor on the Front Panel When you move your hand close to the front panel while the System is on standby, the controls on the front panel illuminate. • When no operation is done for about 5 seconds, the illumination turns off. • When the ECO Mode is activated, the motion sensor does not work. Touch to turn on the System. 3 Drop the volume in a moment - Select the Sound Mode - To restore the volume, press again, or adjust the volume level. Press repeatedly to select the desired Sound Mode. The SOUND indicator lights up. Emphasize the sound (Sound Turbo) Reinforce the bass sound (Hyper Bass Sound) - Change the display brightness Turn off the display while on standby (canceled) The S.TURBO indicator lights up. To cancel this function, press again. The HBS indicator lights up. • When Sound Turbo function is activated (see above), the HBS indicator goes off and HBS button does not work. To cancel this function, press again. Press repeatedly when the System is turned on. (canceled) Press repeatedly while the System is on standby. Clock DISP OFF: Turns off the display with the motion sensor on. ECO ON: Turns on the ECO (Ecology) Mode. ECO Mode reduces power consumption while the System is on standby by turning off the display and motion sensor. NOTE: DO NOT turn off (standby) the System with the volume set to an extremely high level; otherwise, the sudden blast of sound can damage your hearing, speakers and/or headphones when you turn on the System or start playback. Getting Started Supplied Accessories After unpacking, check to be sure that you have all the following items. • Remote control, RM-SUXGN6U (× 1) • Lithium coin battery (× 1: installed in the remote control) • AM loop antenna (× 1) • FM antenna (× 1) • Video cord (× 1) If anything is missing, consult your dealer immediately. Prepare the Remote Control When you use the remote control for the first time, pull out the insulation sheet. Connections To a wall outlet Plug the AC power cord only after all connections are complete. Rear view Insulation sheet To Replace the Battery in the Remote Control Lithium coin battery (product number: CR2025) NOTES: • Store the battery in a place where children cannot reach. If a child accidentally swallows the battery, consult a doctor immediately. • To prevent the battery from overheating, cracking, or starting a fire: - Do not recharge, short, disassemble or heat the battery or dispose of it in a fire. - Do not leave the battery with other metallic materials. - Wrap the battery with tape and insulate when throwing away or saving it. - Do not poke the battery with tweezers or similar tools. • Dispose of battery in the proper manner, according to federal, state, and local regulations. CAUTION: Danger of explosion if battery is incorrectly replaced. Replace only with the same or equivalent type. To connect the FM antenna (supplied) Extend it so that you can obtain the best reception. FM antenna (supplied) To assemble the AM loop antenna (supplied) AM loop antenna (supplied) For iPod To connect the monitor (not supplied) -To view video/picture from the iPod Do not connect the AC power cord until all other connections have been made. Video cord (supplied) Monitor To connect the speaker cords Playing Back a Disc/USB Mass Storage Class Device This System can play back... - CD. - CD-R/CD-RW recorded in audio CD format (CD-DA) or recorded MP3/WMA files in ISO 9660 format. - USB mass storage class device containing MP3/WMA files. • When playing back an MP3 or WMA track, corresponding indicator lights up. Loading a Disc (on the System only) 1 Touch to open the disc tray. 2 • When using an 8 cm disc, place it on the inner circle of the disc tray. Basic Disc/USB Mass Storage Class Device Operations To Play back the disc Press Indication/Result • During playback, press again to pause. Play back the USB mass storage class device Stop playback Select a track • While playback is stopped, total track number and total playing time (for MP3/WMA files, group number and track number) appear. Select the next tracks. For better FM reception Disconnect the supplied FM antenna, and connect to an outdoor FM antenna using a 75 Ω wire with coaxial type connector. Outdoor FM antenna (not supplied) To connect the AM loop antenna Turn the AM loop antenna until the best reception is obtained. Black Gray 2 Press and hold Release Red Black From right speaker Insert Red Black From left speaker NOTES: • Make sure the antenna conductors do not touch any other terminals, connecting cords and power cord. Also, keep the antennas away from metallic parts of the System, connecting cords, and the AC power cord. This could cause poor reception. • Keep the AM loop antenna cable wrapped around the AM loop antenna frame, otherwise the effectiveness and sensitivity of the AM loop antenna may be reduced. • Make sure both the speakers are connected correctly and firmly. • When connecting the speaker cords, match the polarity of the speaker terminals: red color to (+) and black color to (-). • DO NOT connect more than one speaker to each terminal. • DO NOT allow the conductor of the speaker cords to be in touch with the metallic parts of the System. 3 Touch to close the disc tray. Connecting a USB Mass Storage Class Device You can connect a USB mass storage class device such as a USB flash memory device, MP3 player, multimedia card reader, etc. to the System. Front view USB cable (not supplied) USB memory (not supplied) or NOTES: • When connecting with a USB cable, use the USB 2.0 cable whose length is less than 1 m. • USB mass storage class device is charged through the USB REC/PLAY terminal when the System is turned on and the source is "USB." • You cannot connect a computer to the USB REC/PLAY terminal of the System. • Do not disconnect the USB mass storage class device when the System is turned on. It may cause malfunction of both this System and the device. • Noise and static electricity may stop the USB mass storage class device sound. In this case, disconnect the USB mass storage class device and connect it again after turning off the System. • Depending on the shape of USB mass storage class device, the USB REC/PLAY terminal may not be fully inserted into the USB REC/PLAY terminal on the System. In such a case, use a USB extension cable (not supplied) to connect. Prohibiting Disc Ejection (on the System only) You can lock the disc tray so that no one can eject the loaded disc. While the System is on standby... To cancel the prohibition, repeat the same procedure. Select a group (MP3/WMA only) To go back to the beginning of the current or previous tracks. Select the next groups. Select the previous groups. Forward search/ Reverse search Change the display information Press and hold to fast-forward the track during playback. Press and hold to fast-reverse the track during playback. (For MP3/WMA) Press repeatedly. NOTES: • If no disc is inserted or no USB mass storage class device is connected, "NO DISC" or "NO USB" appears on the main display. • If MP3/WMA files are not recorded on the disc or in the USB mass storage class device, "NO PLAY" appears on the main display. Playing Repeatedly-Repeat Play 1 Press repeatedly to specify the repeat mode as follows: RPT TRK: Repeats the current (or specified) track. [ 1] RPT GRP: Repeats all tracks in the current group (MP3/WMA only). [ ] RPT ALL: Repeats all tracks. [ ALL] RPT OFF: Normal playback 2 or 4 Programming the Playing Order-Program Play (only for Disc) 1 Select disc as the source. 2 Activate the Program Play. 3 or Select tracks you want for Program Play. • For MP3/WMA files only: You can also use UP or DOWN. 4 Press to store the selected track. 5 Repeat steps 3 and 4 to program other tracks you want. • If you try to program a 33rd track, "PGM FULL" appears. 6 The program is completed and the tracks are played back in the programmed order. Operations for Program Play (while not playing) • To check the programmed contents, press 4 or ¢. • To erase the entire program, press and hold CANCEL for about 2 seconds. • To exit from Program Play, press 7. - The stored program is kept. Playing at Random-Random Play (only for Disc) 1 Select disc as the source. 2 Press repeatedly to select the desired Random Mode. RND ALL: Plays all tracks in random order. [ALL RND] RND GRP: Plays tracks in the current group in random order. (MP3/WMA only). [RND] RND OFF: Normal playback 3 Playback starts in random order. Operations for Random Play • To skip a track, press ¢. • To go back to the beginning of the current track, press 4.
-
 1
1 -
2
-
3
-
 4
4 -
 5
5 -
 6
6 -
 7
7 -
 8
8 -
 9
9 -
 10
10
 |
 |
