JVC VN-C2U Instruction Manual - Page 18
Controller 1
 |
View all JVC VN-C2U manuals
Add to My Manuals
Save this manual to your list of manuals |
Page 18 highlights
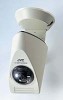
Controller 1 The VN-C2U screen will immediately appear when connection is established. The currently connected VN-C2U name, angle steps of the pan/tilt, and pan/tilt positions will be displayed. Current pan/tilt position display Angle steps of pan/tilt Currently connected VN-C2U Pan/tilt button The connected VN-C2U angle steps of the pan/tilt can be changed using the right and left arrow buttons ( and ). The pan/tilt positions are changed using the 8 pan/tilt buttons. The operating angle of the pan/tilt button when pressed one time is set using the angle steps. The pan/tilt position display is as shown in the illustration. area Portion of the image will be missing with this range. area Pan direction Pan range 13 Tilt range area Tilt direction Pan/tilt shoot range
-
 1
1 -
2
-
3
-
4
-
5
-
6
-
7
-
8
-
9
-
10
-
11
-
12
-
 13
13 -
 14
14 -
 15
15 -
 16
16 -
 17
17 -
 18
18 -
 19
19 -
 20
20 -
 21
21 -
 22
22 -
 23
23 -
24
-
25
-
26
-
27
-
28
-
29
-
30
 |
 |
