Jenn-Air JFFCC72EF Owners Manual - Page 22
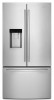
Replace Refrigerator Doors and Hinges, Remove and Replace Refrigerator Drawer
 |
View all Jenn-Air JFFCC72EF manuals
Add to My Manuals
Save this manual to your list of manuals |
Page 22 highlights
Replace Refrigerator Doors and Hinges Replace Right-Hand Refrigerator Door 1. Set the right-hand door onto the bottom hinge pin. 2. Insert the top hinge pin into the open hole in the top of the refrigerator door. 3. Fasten the hinge to the cabinet. Do not tighten the screws completely. Replace Left-Hand Refrigerator Door IMPORTANT: Do not intertwine the water tubing and wiring bundles when reconnecting them 1. Set the left-hand door onto the bottom hinge pin. 2. Fasten the hinge to the cabinet. Do not tighten the screws completely. 3. If applicable, reconnect the water dispenser tubing. Style 1 - Insert the tubing into the fitting until it stops and the outer ring is touching the face of fitting. Style 2 - Insert the tubing firmly into the fitting until it stops. Close the clasp around the tubing. The clasp snaps into place between the fitting and the collar. 4. Reconnect the electrical wiring. � Push together the two sections of the wiring plug. Final Steps 1. Completely tighten the internal screws 2. Replace both top hinge covers. Remove and Replace Refrigerator Drawer Depending on the width of your door opening, it may be necessary to remove the drawer fronts to move the refrigerator into your home. REMOVE DRAWER FRONT IMPORTANT: � If the refrigerator was previously installed and you are moving it out of the home, before you begin, turn the refrigerator control Off, and unplug the refrigerator or disconnect power. Remove food and any adjustable door or utility bins from doors. � Two people may be required to remove and replace the freezer drawer. Graphics are included later in this section. Tools Needed: 1/4" Hex head nut driver, Flat-blade screwdriver Disconnect Wiring (if applicable) NOTES: � The exterior refrigerator drawer front is connected to the temperature control on some models. Before removing the drawer front, the wires must be disconnected from the temperature control. � The gray cable visible behind and under the pantry drawer at the right side contains wiring for the pantry control and moves with the drawer as it is pulled out. There is no need to disconnect this cable. 1. Open the drawer to its full extension, and remove the interior bin. 2. Left-hand drawer only: Remove the wiring connection cover. Press in on the side of the cover to release the tab from the slot, and then pull the cover away from the bracket. A. Cover tab B. Wiring connection cover 3. Left-hand drawer only, disconnect the wiring. NOTE: � On one side of the wiring connector, insert the screwdriver blade between the connector tab and the connector to release. Repeat for the opposite side. Pull the wiring connector apart. 4. Remove the drawer front. Style 1: Bottom Release Lever � Push up on the lever at the bottom of the drawer glide bracket to release the drawer front from the bracket. � Lift the drawer front up and off the drawer glide brackets. A. Drawer glide bracket B. Release lever 22 04-Jan-2021 11:49:29 EST | RELEASED In some European factories the letter "W" of the part code mentioned herein will be automatically replaced by the number "4000" (e.g. "W12345678" becomes "400012345678")
-
 1
1 -
2
-
3
-
4
-
5
-
6
-
7
-
8
-
9
-
10
-
11
-
12
-
13
-
14
-
15
-
16
-
 17
17 -
 18
18 -
 19
19 -
 20
20 -
 21
21 -
 22
22 -
 23
23 -
 24
24 -
 25
25 -
 26
26 -
 27
27 -
28
-
29
-
30
-
31
-
32
-
33
-
34
-
35
-
36
-
37
-
38
-
39
-
40
-
41
-
42
-
43
-
44
-
45
-
46
-
47
-
48
-
49
-
50
-
51
-
52
-
53
-
54
-
55
-
56
-
57
-
58
-
59
 |
 |
