Jenn-Air JGC3215GS Installation Instruction - Page 3
Installation Requirements
 |
View all Jenn-Air JGC3215GS manuals
Add to My Manuals
Save this manual to your list of manuals |
Page 3 highlights
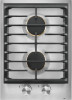
INSTALLATION REQUIREMENTS Tools and Parts Gather the required tools and parts before starting installation. Tools needed ■■ Tape measure ■■ Flat-blade screwdriver ■■ #2 Phillips screwdriver ■■ 15/16" (24 mm) combination wrench ■■ Pipe wrench ■■ Channel lock pliers ■■ Marker or pencil ■■ Pipe-joint compound resistant to Propane gas ■■ Noncorrosive leakdetection solution Parts supplied ■■ Gas pressure regulator ■■ Burner grates (1) ■■ Burner bases: Single burner units (1) Double burner units (2) ■■ Burner caps (2) ■■ Clamp brackets (2) ■■ 21/2" (6.4 cm) clamping screws (2) ■■ Foam tape seal ■■ Propane conversion kit: W11027216 ■■ Mounting bridge kit: W11031680 Parts needed Check local codes and consult gas supplier. Check existing gas supply and electrical supply. See the "Electrical Requirements" and "Gas Supply Requirements" sections. Location Requirements IMPORTANT: Observe all governing codes and ordinances. Do not obstruct flow of combustion and ventilation air. ■■ It is the installer's responsibility to comply with installation clearances specified on the model/serial/rating plate. The model/serial/rating plate is located on the underside of the cooktop burner box. ■■ Do not unpack the burner grate and base(s) until after the cooktop is installed to avoid scratching the cooktop. ■■ The cooktop should be installed in a location away from strong draft areas, such as windows, doors, and strong heating vents or fans. ■■ All openings in the wall or floor where cooktop is to be installed must be sealed. ■■ Cabinet opening dimensions that are shown must be used. Given dimensions are minimum clearances. ■■ Grounded and polarized electrical supply is required. See the "Electrical Requirements" section. ■■ Proper gas supply connection must be available. See the "Gas Supply Requirements" section. ■■ The gas and electric supply should be located as shown in "Gas and Electric Connection Locations" in the "Location Requirements" section so that they are accessible without requiring removal of the cooktop. IMPORTANT: To avoid damage to your cabinets, check with your builder or cabinet supplier to make sure that the materials used will not discolor, delaminate, or sustain other damage. Mobile Home-Additional Installation Requirements The installation of this cooktop must conform to the Manufactured Home Construction and Safety Standard, Title 24 CFR, Part 3280 (formerly the Federal Standard for Mobile Home Construction and Safety, Title 24, HUD Part 280). When such standard is not applicable, use the Standard for Manufactured Home Installations, ANSI A225.1/NFPA 501A, or local codes. In Canada, the installation of this cooktop must conform with the current standards CAN/CSA-A240-latest edition, or with local codes. Product Dimensions B A B A C C A. 21" (53.3 cm) B. 15" (38.1 cm) C. 31/4" (8.3 cm) Gas and Electric Connection Locations A D B C A. Gas pressure regulator (supplied)- arrow pointed toward cooktop B. 3 prong grounding type outlet with correct polarity C. Gas shut-off valve D. 18" (45.7 cm) minimum NOTE: Each unit must have a separate regulator (supplied). 3
-
 1
1 -
 2
2 -
 3
3 -
 4
4 -
 5
5 -
 6
6 -
 7
7 -
 8
8 -
 9
9 -
10
-
11
-
12
-
13
-
14
-
15
-
16
-
17
-
18
-
19
-
20
 |
 |
