Jenn-Air JGC3215GS Instruction Sheet - Page 9
Low Flame Height Adjustment
 |
View all Jenn-Air JGC3215GS manuals
Add to My Manuals
Save this manual to your list of manuals |
Page 9 highlights
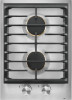
Low Flame Height Adjustment Each burner flame has been factory set to the lowest position available to provide reliable and constant reignition of the burner. However, each burner can be adjusted. For Propane gas conversion: Tighten (clockwise) screw "C" snugly to set the minimum flame height. Do not adjust for a higher flame. 5. Replace the control knob. 6. Repeat steps 1 through 5 for each burner. 7. Check burner flame(s) for proper size and shape. The cooktop "low" burner flame should be a steady blue flame approximately 1/4" (6.4 mm) high. For Natural gas conversion: A Tighten (clockwise) screw "C" to reduce flame height. Loosen (counterclockwise) screw to increase flame height. To Adjust: The flame can be adjusted using the adjustment screws underneath the control knob. 1. Set the burner flame to LO. 2. Remove the control knob. 3. For single valves, hold the knob stem with a pair of pliers. Use a 3/32" (#0 [2.0 mm]) flat-blade screwdriver to turn the screw located within the shaft of the control knob stem until the flame is the proper size. B Standard burner A. Low flame B. High flame A A B C A. 3/32" (2.0 mm)-#0 flat-blade screwdriver (shaft must be a minimum of 21/2" [6.4 cm] long) B. Control knob stem opening C. Adjustment screw location 4. For the center burner dual valve, use a 3/32" (#0 [2.0 mm]) flat-blade screwdriver to turn the screw located on the bottom, upper surface of the valve until the flame is the proper size. B A B Dual flame burner A. Simmer flame B. High flame 8. Completely fill out the conversion label and attach label to bottom of the cooktop next to the rating tag. Do not cover the rating tag with the conversion label. 9. Save the orifices removed from the cooktop along with these instructions for future reference. Read the "Sealed Surface Burners" section in the Use and Care Guide supplied with your cooktop. A. Adjustment screw location B. 3/32" (2.0 mm)-#0 flat-blade screwdriver (shaft must be a minimum of 21/2" [6.4 cm] long) 9
-
 1
1 -
2
-
3
-
 4
4 -
 5
5 -
 6
6 -
 7
7 -
 8
8 -
 9
9 -
 10
10 -
 11
11 -
 12
12 -
 13
13 -
 14
14 -
15
-
16
-
17
-
18
-
19
-
20
 |
 |
