Jensen SMPV-2GBLB User Manual - Page 9
Movie Mode, Record Mode
 |
UPC - 077283939211
View all Jensen SMPV-2GBLB manuals
Add to My Manuals
Save this manual to your list of manuals |
Page 9 highlights
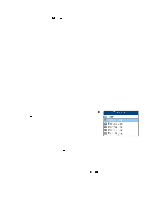
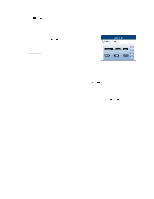
3. Movie Mode Select the Movie icon from the main menu using the / buttons. Press the MODE button to enter. Press the / buttons to choose video you desire and then press PLAY to watch. If you want to pause, press & hold the PLAY button and then press PLAY again to resume. If the video is paused, press the MODE button and you will find the following options: Local folder; Delete file; Delete all; Exit and Repeat It is similar to music mode and includes the following repeat modes: Normal, Repeat One, Folder, Repeat Folder, Repeat All, Random and Intro. Note: this device can only play videos in amv format. You must convert all other video formats including wmv, mp4, mov and mpeg etc, into amv before playing. A "Media Player Software Utilities" CD is included which will install the conversion program automatically onto your PC. For full details of the conversion procedures, please refer to the attached software quick instruction guide. 4. Record Mode After turning the unit on, select the Record icon from the main menu using the / buttons. Press the MODE button to enter record standby mode. Before starting, we strongly recommend you fully charge up the battery for stable recording results. This unit allows 99 recording files to be stored in each directory. You just press the REC button directly to start the recording process. When not recording, tap the MODE button to enter the record setting mode. The following options are present. Local folder: Press the / buttons to choose and then press the MODE button again to enter. Select the desired local folder using the / buttons and press the MODE button again to confirm. Press the PLAY button to confirm the selected folder and the unit will return to Record feature and starts recording automatically. Note: The recorded file will always begin with filename "REC001" and go up as you record more files, REC002, REC003, etc. REC type: After choosing the Record type submenu, press the / buttons to set the desired recording format. There are 4 different formats to choose from (see table below). Press the 9
-
 1
1 -
2
-
3
-
 4
4 -
 5
5 -
 6
6 -
 7
7 -
 8
8 -
 9
9 -
 10
10 -
 11
11 -
 12
12 -
 13
13 -
 14
14 -
15
-
16
-
17
-
18
 |
 |