Kenmore 4300 Use and Care Guide - Page 6
Induction, Cooktop, Display, Messages
 |
View all Kenmore 4300 manuals
Add to My Manuals
Save this manual to your list of manuals |
Page 6 highlights
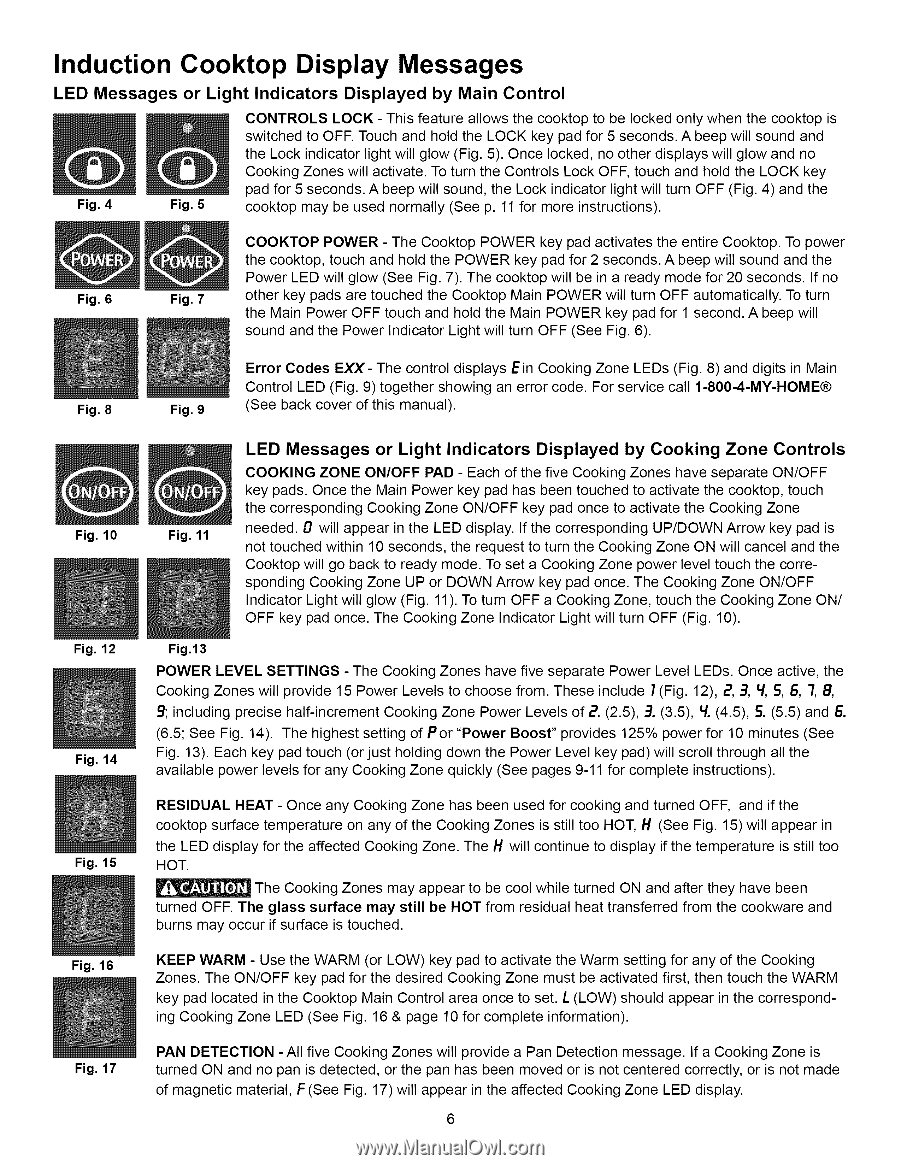
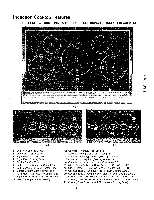
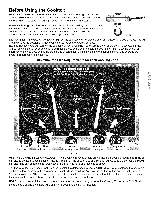
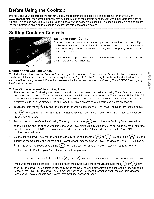
Induction Cooktop Display Messages LED Messages or Light Indicators Displayed by Main Control Fig. 4 Fig. 5 CONTROLS LOCK - This feature allows the cooktop to be locked only when the cooktop is switched to OFF. Touch and hold the LOCK key pad for 5 seconds. A beep will sound and the Lock indicator light will glow (Fig. 5). Once locked, no other displays will glow and no Cooking Zones will activate. To turn the Controls Lock OFF, touch and hold the LOCK key pad for 5 seconds. A beep will sound, the Lock indicator light will turn OFF (Fig. 4) and the cooktop may be used normally (See p. 11 for more instructions). Fig. 6 Fig. 7 COOKTOP POWER - The Cooktop POWER key pad activates the entire Cooktop. To power the cooktop, touch and hold the POWER key pad for 2 seconds. A beep will sound and the Power LED will glow (See Fig. 7). The cooktop will be in a ready mode for 20 seconds. If no other key pads are touched the Cooktop Main POWER will turn OFF automatically. To turn the Main Power OFF touch and hold the Main POWER key pad for 1 second. A beep will sound and the Power Indicator Light will turn OFF (See Fig. 6). Fig. 8 Fig. 9 Error Codes EXX- The control displays E in Cooking Zone LEDs (Fig. 8) and digits in Main Control LED (Fig. 9) together showing an error code. For service call 1-800-4-MY-HOME® (See back cover of this manual). Fig. 10 Fig. 12 Fig. 14 Fig. 15 Fig. 16 Fig. 17 Fig. 11 LED Messages or Light Indicators Displayed by Cooking Zone Controls COOKING ZONE ON/OFF PAD - Each of the five Cooking Zones have separate ON/OFF key pads. Once the Main Power key pad has been touched to activate the cooktop, touch the corresponding Cooking Zone ON/OFF key pad once to activate the Cooking Zone needed. D will appear in the LED display. If the corresponding UP/DOWN Arrow key pad is not touched within 10 seconds, the request to turn the Cooking Zone ON will cancel and the Cooktop will go back to ready mode. To set a Cooking Zone power level touch the corresponding Cooking Zone UP or DOWN Arrow key pad once. The Cooking Zone ON/OFF Indicator Light will glow (Fig. 11). To turn OFF a Cooking Zone, touch the Cooking Zone ON/ OFF key pad once. The Cooking Zone Indicator Light will turn OFF (Fig. 10). Fig.13 POWER LEVEL SETTINGS - The Cooking Zones have five separate Power Level LEDs. Once active, the Cooking Zones will provide 15 Power Levels to choose from. These include 7 (Fig. 12), 2, 3, 4, 5, 5, 7, 8, 9; including precise half-increment Cooking Zone Power Levels of 2. (2.5), 3. (3.5), 4. (4.5), 5. (5.5) and 5. (6.5; See Fig. 14). The highest setting of Pot "Power Boost" provides 125% power for 10 minutes (See Fig. 13). Each key pad touch (or just holding down the Power Level key pad) will scroll through all the available power levels for any Cooking Zone quickly (See pages 9-11 for complete instructions). RESIDUAL HEAT - Once any Cooking Zone has been used for cooking and turned OFF, and if the cooktop surface temperature on any of the Cooking Zones is still too HOT, H (See Fig. 15)will appear in the LED display for the affected Cooking Zone. The H will continue to display if the temperature is still too HOT. The Cooking Zones may appear to be cool while turned ON and after they have been turned OFF. The glass surface may still be HOT from residual heat transferred from the cookware and burns may occur if surface is touched. KEEP WARM - Use the WARM (or LOW) key pad to activate the Warm setting for any of the Cooking Zones. The ON/OFF key pad for the desired Cooking Zone must be activated first, then touch the WARM key pad located in the Cooktop Main Control area once to set. L (LOW) should appear in the corresponding Cooking Zone LED (See Fig. 16 & page 10 for complete information). PAN DETECTION - All five Cooking Zones will provide a Pan Detection message. If a Cooking Zone is turned ON and no pan is detected, or the pan has been moved or is not centered correctly, or is not made of magnetic material, F(See Fig. 17)will appear in the affected Cooking Zone LED display.
-
 1
1 -
 2
2 -
 3
3 -
 4
4 -
 5
5 -
 6
6 -
 7
7 -
 8
8 -
 9
9 -
 10
10 -
 11
11 -
 12
12 -
13
-
14
-
15
-
16
-
17
-
18
 |
 |