Kenmore 4558 Installation Instructions - Page 6
Range, Installation
 |
View all Kenmore 4558 manuals
Add to My Manuals
Save this manual to your list of manuals |
Page 6 highlights
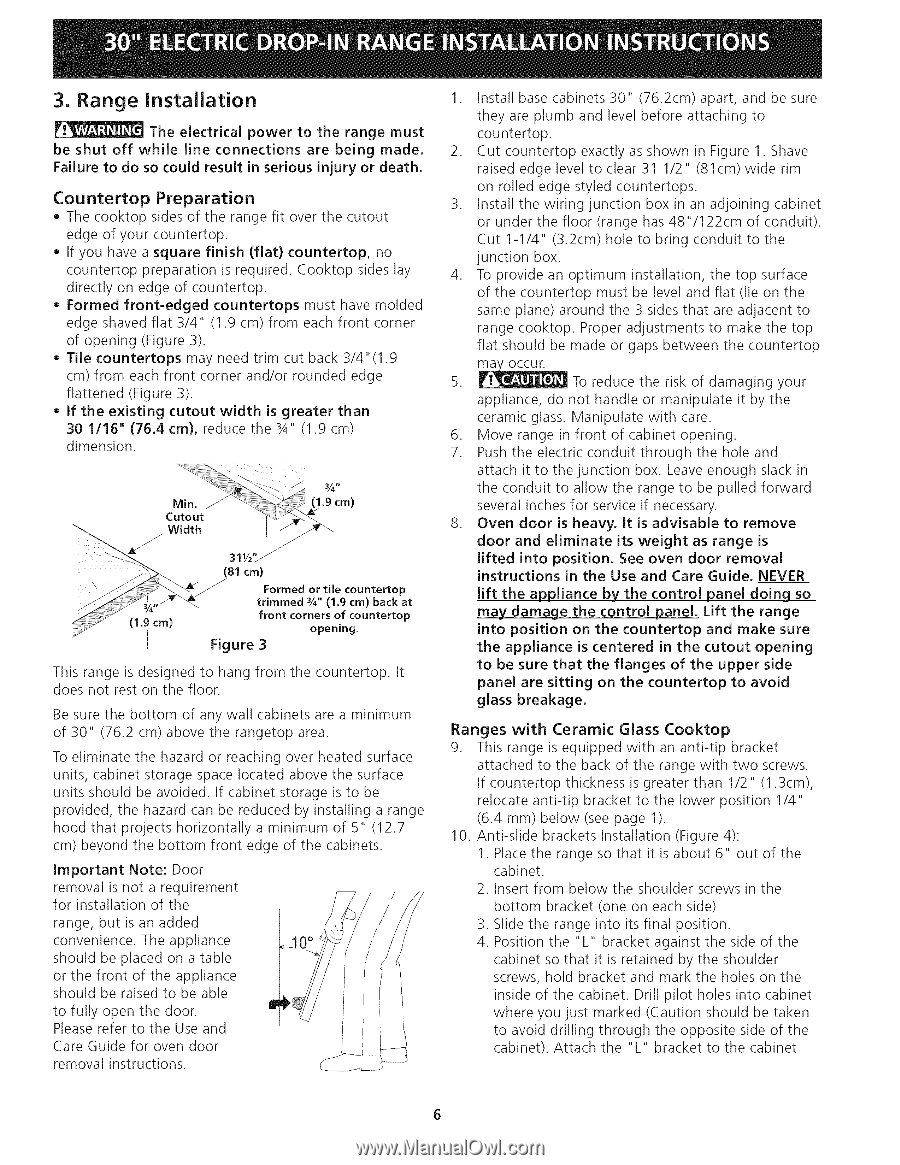
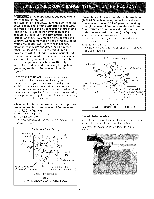
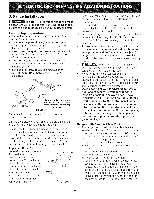
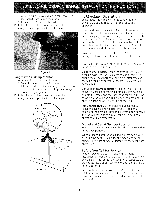
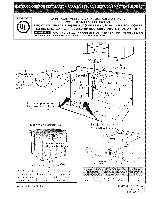
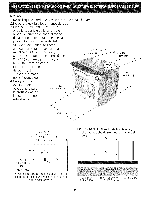
3. Range Installation The electrical power to the range must be shut off while line connections are being made, Failure to do so could result in serious injury or death, Countertop Preparation • The cooktop sides of the range fit over the cutout edge of your countertop. • If you have a square finish (flat) countertop, no countertop preparation is required. Cooktop sides lay directly on edge of countertop. • Formed front-edged countertops must have molded edge shaved flat 3/4" (1.9 cm) from each front corner of opening (Figure 3). Tile countertops may need trim cut back 3/4"(1.9 cm) from each front corner and/or rounded edge flattened (Figure 3). • If the existing cutout width is greater than 30 1/16" (76,4 cm), reduce the 3A" (1.9 cm) dimension. (1.9 crn) I 311/2,>_ (81 crn) Formed or tile countertop trimmed _A" (1.9 crn) back at front corners of countertop opening. Figure 3 This range is designed to hang from the countertop. It does not rest on the floor. Be sure the bottom of any wall cabinets are a minimum of 30" (76.2 cm) above the rangetop area. To eliminate the hazard or reaching over heated surface units, cabinet storage space located above the surface units should be avoided. If cabinet storage is to be provided, the hazard can be reduced by installing a range hood that projects horizontally a minimum of 5" (12.7 cm) beyond the bottom front edge of the cabinets. Important Note: Door removal is not a requirement for installation of the range, but is an added convenience. The appliance should be placed on a table or the front of the appliance should be raised to be able to fully open the door. Please refer to the Use and Care Guide for oven door removal instructions. 1. Install base cabinets 30" (76.2cm) apart, and be sure they are plumb and level before attaching to countertop. 2. Cut countertop exactly as shown in Figure 1. Shave raised edge level to clear 31 1/2" (81cm) wide rim on rolled edge styled countertops. 3. Install the wiring junction box in an adjoining cabinet or under the floor (range has 48"/122cm of conduit). Cut 1-1/4" (3.2cm) hole to bring conduit to the junction box. 4. To provide an optimum installation, the top surface of the countertop must be level and flat (lie on the same plane) around the 3 sides that are adjacent to range cooktop. Proper adjustments to make the top flat should be made or gaps between the countertop 5. '_ To reduce the risk of damaging your appliance, do not handle or manipulate it by the ceramic glass. Manipulate with care. 6. Move range in front of cabinet opening. 7. Push the electric conduit through the hole and attach it to the junction box. Leave enough slack in the conduit to allow the range to be pulled forward several inches for service if necessary. 8. Oven door is heavy. It is advisable to remove door and eliminate its weight as range is lifted into position. See oven door removal instructions in the Use and Care Guide. NEVER lift the appliance by the control panel doing so may damage the control panel. Lift the range into position on the countertop and make sure the appliance is centered in the cutout opening to be sure that the flanges of the upper side panel are sitting on the countertop to avoid glass breakage. Ranges with Ceramic Glass Cooktop 9. This range is equipped with an anti-tip bracket attached to the back of the range with two screws. If countertop thickness is greater than 1/2" (1.3cm), relocate anti-tip bracket to the lower position 1/4" (6.4 ram) below (see page 1). 10. Anti-slide brackets Installation (Figure 4): 1. Place the range so that it is about 6" out of the cabinet. 2. Insert from below the shoulder screws in the bottom bracket (one on each side) 3. Slide the range into its final position. 4. Position the "L" bracket against the side of the cabinet so that it is retained by the shoulder screws, hold bracket and mark the holes on the inside of the cabinet. Drill pilot holes into cabinet where you just marked (Caution should be taken to avoid drilling through the opposite side of the cabinet). Attach the "L" bracket to the cabinet
-
 1
1 -
 2
2 -
 3
3 -
 4
4 -
 5
5 -
 6
6 -
 7
7 -
 8
8 -
 9
9 -
 10
10 -
 11
11 -
 12
12 -
13
-
14
-
15
-
16
 |
 |