Kenmore 4559 Installation Instructions - Page 8
Anti-tip, Bracket, installation - range installation
 |
View all Kenmore 4559 manuals
Add to My Manuals
Save this manual to your list of manuals |
Page 8 highlights
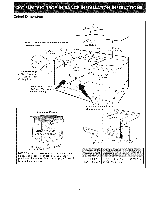
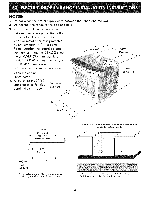
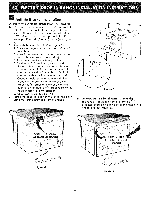
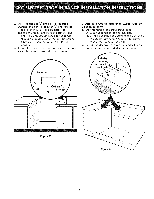
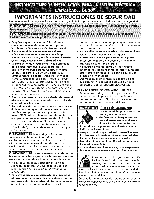
Anti-tip Bracket installation A° Preferred Anti-tip installation {All models). 1. The range is equipped with an anti-tip bracket attached to the back of the range with two screws, if countertop thickness is greater than 1/2" (1.3cm), relocate anti-tip bracket to the lower position 1/4" (6.4 mm) below (see figure 4). 2. Anti-slide brackets installation (Figure 5): A.Ptace the range so that it is about 6" out of the cabinet. B. Insert from below the shoulder screws in the bottom bracket (one on each side) C.Stide the range into its final position. D.Position the "L" bracket against the side of the cabinet so that it is retained by the shoulder screws, hold bracket and mark the holes on the inside of the cabinet. Drill pilot holes into cabinet where you just marked (Caution should be taken to avoid drilling through the opposite side of the cabinet). Attach the "L" bracket to the cabinet with the screws provided (don't forget to insert the shoulder screw into the bracket). E, Repeat steps D on the other side. 3, Instait the decorative lower trim under the door using the screws provided with the range. Figure 5 B. Alternate Anti tip installation (All models)_ 1. The range is equipped with two anti-tip "L" brackets located on each side of the range with two screws (see figure 6). ANTI-TiP BRACKET AT REAR OF RANGE Figure 4 ANTI-TIP "L" BRACKET ON EACH SIDE OF RANGE Figure 6
-
 1
1 -
2
-
 3
3 -
 4
4 -
 5
5 -
 6
6 -
 7
7 -
 8
8 -
 9
9 -
 10
10 -
 11
11 -
 12
12 -
 13
13 -
14
-
15
-
16
-
17
-
18
-
19
-
20
 |
 |
