Kenmore 6972 Installation Instructions - Page 6
Fire Hazard
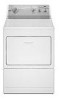 |
View all Kenmore 6972 manuals
Add to My Manuals
Save this manual to your list of manuals |
Page 6 highlights
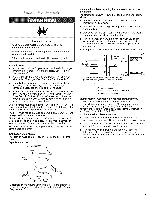
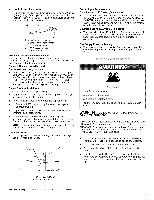
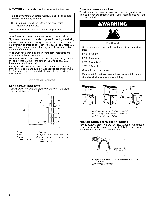
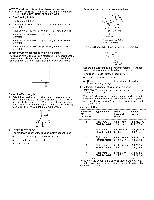
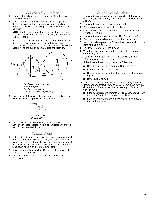
IMPORTANT: Observe all governing codes and ordinances. improper venting can cause moisture and lint to cotlect indoors, which may resumt in: [] Moisture damage to woodwork, furniture, paint, wallpaper, carpets, etc= [] Housecleaning problems and health problems. Use a heavy metal vent. Do not use plastic or metal foil vent. Rigid metal vent is recommended to prevent crushing and kinking. Flexible metal vent must be fully extended and supported when the dryer is in its final position. Remove excess flexible metal vent to avoid sagging and kinking that may result in reduced airflow and poor performance. An exhaust hood should cap the vent to prevent rodents and insects from entering the home. Exhaust hood must be at least 12" (30.5 cm) from the ground or any object that may be in the path of the exhaust (such as flowers, rocks or bushes, etc.). If using an existing vent system, clean lint from the entire length of the system and make sure exhaust hood is not plugged with lint. Replace any plastic or metal foil vent with rigid metal or flexible metal vent. Optional exhaust installations This dryer can be converted to exhaust out the right side, left side, or through the bottom. Contact your local dealer to have the dryer converted. Fire Hazard Cover unused exhaust holes with one of the following kits: 279818 (white) 279819 (ammond) 279915 (graphite} 279925 (biscuit) Contact your Ioca_ dea{ero Failure to follow these instructions can resumt in death, fire, electricam shock, or serious injury. Typical exhaust installations Typical installations vent the dryer from the rear of the dryer. Other installations are possible. B A. Dryer B. Elbow C. Wall D. Exhaust hood A B C A. Standard rear offset exhaust installation B. Left or right side exhaust installation C. Bottom exhaust installation Alternate installations for close clearances Venting systems come in many varieties. Select the type best for your installation. Two close-clearance installations are shown. Refer to the manufacturer's instructions. A B A. Over-The-Top installation (also available with one offset elbow) B. Periscope installation
-
 1
1 -
 2
2 -
 3
3 -
 4
4 -
 5
5 -
 6
6 -
 7
7 -
 8
8 -
 9
9 -
 10
10 -
 11
11 -
 12
12 -
13
-
14
-
15
-
16
-
17
-
18
-
19
-
20
 |
 |