Kenmore 7937 Use and Care Guide - Page 17
Adjustingcontrolsettings
 |
View all Kenmore 7937 manuals
Add to My Manuals
Save this manual to your list of manuals |
Page 17 highlights
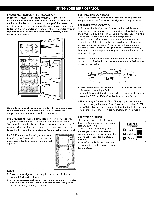
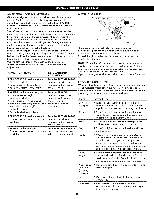
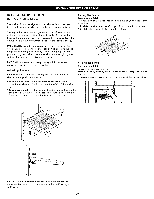
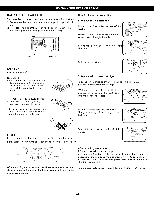
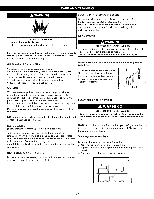
ADJUSTINGCONTROLSETTINGS Give the refrigerator time to cool down completely before making final adjustments. It is best to wait 24 hours before doing this. The initial settings mentioned in SEETING THE CONTROLS section should be correct for normal household refrigerator use. The refrigerator control functions as the thermostat for the entire appliance (refrigerator and freezer sections). The colder the setting, the longer the compressor will run to keep the temperature colder. The freezer control adjusts the cold air flow from the freezer to the refrigerator. Setting the freezer control to a lower temperature keeps more cold air in the freezer compartment to make it colder. If you need to adjust temperatures in the refrigerator or freezer, start by adjusting the refrigerator. Then wait 24 hours before checking the freezer temperature. If it is too warm or too cold, then adjust the freezer control. Use the settings listed in the chart below as a guide. Always remember to wait of least 24 hours between adjustments. CONDITION/REASON: REFRIGERATOR section too worm ° Door opened often ° Large amont of food added ° Room temperatue very warm RECOMMENDED ADJUSTMENT: Turn the REFRIGERATOR control to next higher number, wait 24 hours, then re-check FREEZER section too worm/ice not mode fast enough ° Door opened often ° Large amount of food added ° Very cold room temperature (can not cycle often enough) ° Heavy ice usage °Air vents blocked by items Turn the FREEZER control to next higher number, wait 24 hours, then re-check. Move items out of airstream REFRIGERATOR section too cold ° Controls not set correctly for your conditions Turn the REFRIGERATOR control to next lower number, wait 24 hours, then re-check FREEZER section too cold ° Controls not set correctly for your conditions Turn FREEZER control to next lower number, wait 24 hours, then re-check WATER DISPENSER There are 2 ways to activate the water dispenser. 1. Place the glass under the dispenser and push up on the activation switch (see picture above). 2. Hold the glass under the dispenser and push the hand activation button. NOTE: When the refrigerator is first connected to the water supply it is necesarry to dispense 2.5 gallons (9.46L) of water to purge the system, depressing and releasing the dispenser button (30 seconds ON, 60 seconds OFF). Open the refrigerator door and shelf area to check for water lea ks. FOOD STORAGE GUIDE Wrap or store food in the refrigerator in airtight and moistureproof material unless otherwise noted. This prevents food odor and taste transfer throughout the refrigerator. For dated products, check date code to ensure freshness. items Butter or margarine Cheese Mill< Eggs Fruits How to Store I_ Keep opened butter in a covered dish or closed compartment. When storing an extra supply, wrap in freezer packaging and freeze. _ Store in the original wrapping until you are ready to use it. Once opened, rewrap tightly in plastic wrap or aluminum foil. I_ Wipe mill< cartons. For best storage, place mill< on interior shelf, not on door rack. I_ Store in original carton on interior shelf, not on door rack. _ Wash, let dry, and store in refrigerator in plastic bags or in the crisper. Do not wash or hull berries until you are ready to use them. Sort and keep berries in their original container in a crisper, or store in a closed and sealed paper bag on a refrigerator shelf. Leafy vegetables Vegetables with skins (carrots, peppers) Fish Remove store wrapping and trim and tear off bruised and discolored areas. Wash in cold water and drain. Place in plastic bag or plastic container and store them in crisper. Place in plastic bags or plastic container and store in crisper. _ Use fresh fish and shellfish the same day purchased. Leftovers _ Cover leftovers with plastic wrap or aiuminium foil. Plastic containers with tight lids can also be used. 18
-
 1
1 -
2
-
3
-
4
-
5
-
6
-
7
-
8
-
9
-
10
-
11
-
 12
12 -
 13
13 -
 14
14 -
 15
15 -
 16
16 -
 17
17 -
 18
18 -
 19
19 -
 20
20 -
 21
21 -
 22
22 -
23
-
24
-
25
-
26
-
27
-
28
-
29
-
30
-
31
-
32
 |
 |
