Kenmore 8873 Use and Care Guide - Page 10
Connect, the inlet hoses, to the washer, If you are working, in a closet, for leaks, Typical, - model
 |
View all Kenmore 8873 manuals
Add to My Manuals
Save this manual to your list of manuals |
Page 10 highlights
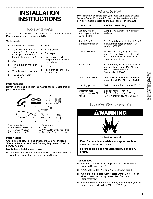
Connect the inlet hoses to the washer 6. Attach the hose with the blue coupling to the cold (top) inlet valve. Screw on coupling by hand until seated on the washer. 1. Move the laundry center to its final location and remove any cardboard used to move the laundry center. 2. Locate the plastic strap included in the parts package. 1. Cold water inlet valve (blue) 2. Hot water inlet valve (red) 7. Attach the hose with the red coupling to the hot water (bottom) inlet valve. Screw on coupling by hand until seated on the washer. 8. Using pliers, tighten the couplings with an additional twothirds turn. Do not overtighten. Damage to the valves can result. If you are working in a closet or recessed area Move the laundry center into its final position and remove cardboard from under laundry center. Remove the access panel by removing two Phillips-head screws located at the top of the access panel. Set panel and screws aside. Complete hook-up of water hoses, exhaust vent, and (on gas models) the flexible gas connector through the access area. Replace access panel upon completion of laundry center installation. Beaded tie strap 3. Wrap the drain hose to the laundry tub leg or standpipe with the plastic strap (1 or 2 below) and secure. 1 2 3 If the water faucets and the drain standpipe are recessed, put the hooked end of the drain hose in the standpipe. Tightly wrap the plastic strap around the water inlet hoses and the drain hose (3 above). Do not force excess drain hose back into the rear of the laundry centen Check for leaks 9. Turn on the water faucets and check for leaks. A small amount of water might enter the washer. You will drain this later. Typical exhaust installations Typical installations vent the dryer from rear of the laundry center. Other installations are possible. 1 H 2 8_ • 1, Dryer 2. Heavy metal vent 3. Duct tape & clamps 4. Wall -6 7 _. 8 5. Elbow 6. Duct tape & clamps 7. Elbow 8. Exhaust hood 10
-
 1
1 -
2
-
3
-
4
-
 5
5 -
 6
6 -
 7
7 -
 8
8 -
 9
9 -
 10
10 -
 11
11 -
 12
12 -
 13
13 -
 14
14 -
 15
15 -
16
-
17
-
18
-
19
-
20
-
21
-
22
-
23
-
24
 |
 |
