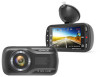
Kenwood DRV-A301W Operation Manual
Kenwood DRV-A301W Manual
 |
View all Kenwood DRV-A301W manuals
Add to My Manuals
Save this manual to your list of manuals |
Kenwood DRV-A301W manual content summary:
- Kenwood DRV-A301W | Operation Manual - Page 1
DRV-A301W GPS Integrated Dashboard Camera INSTRUCTION MANUAL • Updated information (the latest Instruction Manual, etc.) is available from . For your records Record the serial number, found on the back of the unit in the spaces designated on the warranty card, - Kenwood DRV-A301W | Operation Manual - Page 2
- Kenwood DRV-A301W | Operation Manual - Page 3
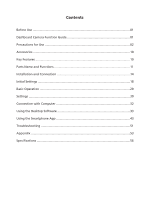
Guide 01 Precautions for Use 02 Accessories ...10 Key Features ...10 Parts Name and Functions 11 Installation and Connection 14 Initial Settings ...18 Basic Operation ...20 Settings ...30 Connection with Computer 32 Using the Desktop Software 33 Using the Smartphone App 43 Troubleshooting - Kenwood DRV-A301W | Operation Manual - Page 4
a result of incorrectly using this product, a failure during use of this product, or other trouble, or due to the use of this product, unless Function Guide With new technology readily available, JVCKENWOOD has developed an easy to use dashboard camera for everyday use. The device allows its user to - Kenwood DRV-A301W | Operation Manual - Page 5
power source. The voltage requirements are found on the product case and/or packaging. • Do not use the charger if the cord becomes damaged. • Do not attempt to service the unit. There are no serviceable parts inside. Replace the unit if it is damaged or exposed to excess moisture. Caring for your - Kenwood DRV-A301W | Operation Manual - Page 6
the device in a vehicle equipped with a driving support system, check the instruction manual of the vehicle and then select an installation position that will not interfere with the driving support system. • If the device is installed incorrectly, event recording or parked recording may not work - Kenwood DRV-A301W | Operation Manual - Page 7
Information on Disposal of Old Electrical and Electronic Equipment and Batteries (applicable for countries that have adopted separate waste collection systems) Products and batteries with the symbol (crossed-out wheeled bin) cannot be disposed of as household waste. Old electrical and electronic - Kenwood DRV-A301W | Operation Manual - Page 8
Der volle Text der EUKonformitätserklärung steht unter der folgenden Internetadresse zur Verfügung: Nederlands Hierbij verklaart JVCKENWOOD dat de radioapparatuur DRV-A301W in overeenstemming is met Richtlijn 2014/53/EU. De volledige tekst van de EU-verklaring van overeenstemming is te vinden op het - Kenwood DRV-A301W | Operation Manual - Page 9
podmínky směrnice 2014/53/EU. Plný text EU prohlášení o shodě je dostupný na následující internetové adrese: Magyar JVCKENWOOD ezennel kijelenti, hogy a DRV-A301W rádióberendezés megfelel a 2014/53/EU irányelvnek. Az EU konformitási nyilatkozat teljes szövege az alábbi weboldalon érhető el: Hrvatski - Kenwood DRV-A301W | Operation Manual - Page 10
, JVCKENWOOD declară că echipamentul radio DRV-A301W este în conformitate cu Directiva 2014/53/UE. Textul integral al declarației de conformitate UE este disponibil la urmatoarea adresă de internet: JVCKENWOOD DRV-A301W 2014/53 URL: https://www.kenwood.com/cs/ce/eudoc/ 7 2 eгo - Kenwood DRV-A301W | Operation Manual - Page 11
3-12 221-0022 DRV-A301W RU Д-JP.РА01.В.86908/19 ЕАЭС N RU Д-JP.РА01.В. generate or use radio frequency energy. Changes or modifications to this equipment may cause harmful interference unless the modifications are expressly approved in the instruction manual. The user could lose - Kenwood DRV-A301W | Operation Manual - Page 12
de l'IC. Cet équipement doit être installé et utilisé en gardant une distance de 20 cm ou plus entre le radiateur et le corps humain. Supplier's Declaration of Conformity Trade Name: KENWOOD Products: Dashboard Camera Model Name: DRV-A301W Responsible Party: JVCKENWOOD USA CORPORATION 2201 - Kenwood DRV-A301W | Operation Manual - Page 13
your camera, without any loss of resolution. This design allows you to use the playback feature, instantly letting you view the shot you just captured. device to save what has been just recorded. The file can also be manually saved. By pressing our easy to access button around the screen, you are - Kenwood DRV-A301W | Operation Manual - Page 14
Parts Name and Functions 1 5 2 6 3 4 7 9 8 1. Power Button Press and hold the button for 3 seconds to turn the device on/off. 2. Up/Mute Button Up Navigate up within menus or go to the previous file in playback mode. Mute Turn on or off the audio recording function while in video mode. 3. - Kenwood DRV-A301W | Operation Manual - Page 15
6. Record/OK Button Record In Video mode, press to start or stop recording. In Photo mode, press to take a photo. OK The confirm button used to select options in menus. 7. Mode/Screen Shot Button Mode This button allows you to navigate between video, photo and playback modes. Screen Shot While - Kenwood DRV-A301W | Operation Manual - Page 16
Into The Device The device is designed to allow a standard microSD card to record your footage. Before installing, make sure the gold end of the card is facing the LCD screen. Once it's aligned with The device can be connected to other screen by using the AV cable. (commercially available) 13 - Kenwood DRV-A301W | Operation Manual - Page 17
On the rare occasions the device has a problem, use the reset button to shut down the device. Simply press the reset until the device turns off and the device will automatically turn on. Installation and Connection Recommended installation position • Install the device in a position where it will - Kenwood DRV-A301W | Operation Manual - Page 18
adhesive type. The suction mount makes it easier to attach and detach from the windshield while the adhesive mount provides more solid support for the camera. The magnetic connector is already installed on the suction mount. If you prefer using the adhesive mount, please follow the guide below: 15 - Kenwood DRV-A301W | Operation Manual - Page 19
How to use the Adhesive Mount: i. Loosen the (c) locking ring on the suction mount and pull the (e) magnetic connector out. ii. Next, loosen the (c) locking ring from the adhesive mount, and plug the (e) magnetic connector into the adhesive mount. iii. Clean the installation area on the windshield - Kenwood DRV-A301W | Operation Manual - Page 20
3. ADJUST THE ANGLE Loosen the (c) locking ring and adjust the device to the angle you want. When you find the perfect angle, remember to tighten the (c) locking ring again. 4. CONNECTING TO CIGAR LIGHTER SOCKET Connect the cigar lighter adapter cable that is in the package to your vehicle's 12 V - Kenwood DRV-A301W | Operation Manual - Page 21
Initial Settings THE FIRST-TIME SETUP When connecting the power, the device will turn on and display the first-time setup guide below. - Select the Language Language English En Deutsch De Français Fr Nederlands Nl Press OK to continue. - Select the Country and Time Zone Select - Kenwood DRV-A301W | Operation Manual - Page 22
driving! - If there is no 12 V outlet or cigar lighter socket for your vehicle, use the included USB power cord. - DO NOT wire the device directly to the car cigar outlet available for other use. Please read carefully and follow the instructions below to help you operate the device safely. 19 - Kenwood DRV-A301W | Operation Manual - Page 23
line across the icon. 13. Power Status: Indicates if the device is charging or not. The device's default settings have been set for you to use the device without needing to change the settings. If you need to make adjustments to the settings, the following - Kenwood DRV-A301W | Operation Manual - Page 24
the VIDEO MENU by pressing the MENU button while in VIDEO MODE. Resolution FHD 1080P Video Length Exposure Parking Mode Sensor OK Enter MENU Back Use the UP and DOWN buttons to select setting options and press the OK button to enter the sub-menu. Once you access the sub-menu - Kenwood DRV-A301W | Operation Manual - Page 25
: When Parking Mode is activated, after 2 minutes of recording, LCD Display will automatically turn off. (Parking mode LCD display time setting: N/A) • KENWOOD Stamp: Turn the KENWOOD logo stamp ON or OFF on the recorded files. OPTIONS: On (default)/Off • Time & Date Stamp: Turn ON or OFF the date - Kenwood DRV-A301W | Operation Manual - Page 26
Mode While in VIDEO MODE, press the MODE button to enter PHOTO MODE. In PHOTO MODE, you are able to take stationary photos. The following instructions will explain the icons in PHOTO MODE. Some icons show up only when corresponding functions are activated. 12 11:17:01 02/13/2019 5 4 3 1 . Mode - Kenwood DRV-A301W | Operation Manual - Page 27
Basic Operation -Photo Menu Access the PHOTO MENU by pressing the MENU button while in PHOTO MODE. Exposure Time & Date Stamp OK Enter MENU Back Use the UP and DOWN buttons to select setting options and press the OK button to enter the sub-menu. Press the MENU button twice to - Kenwood DRV-A301W | Operation Manual - Page 28
MODE button to enter PLAYBACK MODE In PLAYBACK MODE, you are able to review the videos and photos you have stored. DIRECTORIES Press the UP or DOWN MMOODDEE BBaackck OK PPlalayy Use the UP and DOWN buttons to select the video file and press the OK button to play. Use the Protect button to protect - Kenwood DRV-A301W | Operation Manual - Page 29
instructions will explain the icons in Video File. 02/13/2019 11:17:01 X:+3.80 Y:+1.02 Y:+1.65 30MPH N5° 41'33.15" W62"42"33.15 Logo Date Time Accelerator Data Speed Latitude & Longitude KENWOOD and time of the recorded file. 5. Playback Controls: Use the device buttons as instructed below. 26 - Kenwood DRV-A301W | Operation Manual - Page 30
the selected file is protected. MODE PHOTO FILES 80/80 20190213_111701 20190213_111801 20190213_111901 20190213_112001 02.13.2019 11:17:01 MMEENNUUMMMeeennnuuu MODDEEBBBaaacckkck OOKK PPPllaalayyy Use the UP and DOWN buttons to select the Photo file and press the OK button to play - Kenwood DRV-A301W | Operation Manual - Page 31
Type: Indicates the file type is photo. 3. Date & Time: Indicates the date and time of the recorded file. 4. Playback Controls: Use the device buttons as instructed below. UP: Previous file DOWN: Next file 5. Charging Indicator: Indicates if the device is charging or not. DELETING FILES Highlight - Kenwood DRV-A301W | Operation Manual - Page 32
Files Unprotect All Files MENU MOOeKnu EEnntMteerOr DE BacMkMEENU BOaaKcckkPlay To Protect All Files, select the option then follow the on-screen instructions to Protect All files in the current folder. Protect File Unprotect File Protect All Files Unprotect All Files MENU MOOeKnu EEnntMteerOr DE - Kenwood DRV-A301W | Operation Manual - Page 33
Format SD Card Device Sounds Time & Date OK Enter JUL 7 MENU Back Use the UP and DOWN buttons to select setting options and press the OK button On (default)/Off • Time & Date: Adjust the TIME and DATE as required by using use the UP and DOWN buttons to set the value. Press the OK button to save - Kenwood DRV-A301W | Operation Manual - Page 34
Info. FHD 1080P 03:22:43 11:17:01 02/13/2019 Model: Firmware: Check updates: FCC ID: IC: OK Next System Info DRV-A301W V3.3_AIZGAA_D www.kenwood.com/cs/ce IOMDRVA301W 282C-DRVA301W MENU Back System Info This device complies with part 15 of the FCC Rules. Operation is subject to - Kenwood DRV-A301W | Operation Manual - Page 35
screen will show two available options. • USB Storage • Dash Cam Use the UP and DOWN buttons to select the necessary function, and press the If you want to copy/delete/edit the files, remove the SD card and use another card reader to connect your computer. Remember to always turn off the device - Kenwood DRV-A301W | Operation Manual - Page 36
the software in a computer environment in which you have administrator's rights. 1. Download the installer from https://www.kenwood.com/cs/ce/ 2. Install according to the on-screen instructions. Playback: JKVECNVWIDOEOODPVLIADYEEOR PLAYER File Edit Setup Share Help 00:27 INFORMATION 20 mph - Kenwood DRV-A301W | Operation Manual - Page 37
function window. 9. Screen shot : Click to capture the current image displayed on the main screen and save the file in a given space. -Default location : installation root directory /Snapshot. 10. Speed : Display the speed of the car in the video when it was recorded. You may change the UOM of speed - Kenwood DRV-A301W | Operation Manual - Page 38
the GPS and G-sensor file of the exported video. 3. Image export: Select the target storage location of the image file and its name. Default location: installation root directory / Edit video 35 - Kenwood DRV-A301W | Operation Manual - Page 39
1. Image processing: Proceed with image processing once the image export options are setup. 2. Export status (1): The image file export progress is presented as a percentage symbol "%" and is synced with item 3. 3. Export status (2): The image file export progress is presented by a frame being - Kenwood DRV-A301W | Operation Manual - Page 40
INFORMATION -Share Mode KENWOOD VIDEO PLAYER 00:27 Click Share ÷ Share Videos in the software system bar at the top of the window or the community sharing icon in - Kenwood DRV-A301W | Operation Manual - Page 41
KENWOOD VIDEO PLAYER Public Private Unlisted 00:27 4 01:00 5 1. Select a community the video when you upload the video, you can select the Auto: "DD/MM/YYYY (default) - Dash Cam - KENWOOD VIDEO PLAYER" or define the title by yourselves. 4. Last step: Click to go back to the last step. 5. - Kenwood DRV-A301W | Operation Manual - Page 42
INFORMATION KJEVNCWVOIDOEDO VPLIDAEYOERPLAYER File Edit Setup Share Help 00:27 1. File upload failure: This page displays if an upload failed or there is a server connection timeout. 2. Last step: Click to go back to the last step. 39 - Kenwood DRV-A301W | Operation Manual - Page 43
INFORMATION KENWOOD VIDEO PLAYER 00:27 1. Connect to community platform: The message "Connecting to Social Media...... Please Wait." displays when a connection is being initiated. Your default browser - Kenwood DRV-A301W | Operation Manual - Page 44
KENWOOD VIDEO PLAYER 1. Upload status (1): The file upload progress is presented as a percentage symbol "%" and synced with item 2. 2. Upload status (2): The file upload progress is presented - Kenwood DRV-A301W | Operation Manual - Page 45
KENWOOD VIDEO PLAYER 1. Confirm: Click to go back to play mode information. 42 - Kenwood DRV-A301W | Operation Manual - Page 46
of Cisco in the U.S. and other countries. -Installing the Smartphone App Download and install the app from App Store(iOS)/Google Play(Android) on your mobile device FHD 1080P 03:22:43 11:17:01 02/13/2019 Wireless Link Mode SSID: KENWOOD DRVA301W XXXX Password: xxxxxxxx Press 'MODE' to exit - Kenwood DRV-A301W | Operation Manual - Page 47
device and enter the connecting mode. 2. Open the KENWOOD DASH CAM MANAGER of the smartphone app. 3. Press the Connect button and select from the . 5. Connect completed, press the Continue button into the main screen of app. -Main Screen 1. Dashboard Camera Live View Live view of the dashboard - Kenwood DRV-A301W | Operation Manual - Page 48
-Preview Click the preview display to enter the video mode, and click the video/photo icon to switch between these two modes. By clicking the red dot to start/stop recording and the white dot to take photos. 1 1. Back Button Back to main screen. 2. Dashboard Camera Image Preview Displays the - Kenwood DRV-A301W | Operation Manual - Page 49
-Files on Dash Cam Click Files on Dash Cam to enter the Video Playback mode to review,protect/unprotect, and delete the files saved in the SD card. In addition, you can also download the important files to your mobile device. 1. Back - Kenwood DRV-A301W | Operation Manual - Page 50
to enter the Local Video Playback mode to review the downloaded videos with Google Maps, and also view the user's route, speed, G-sensor and distance data. You can also shorten the video by using the edit function and share it to the other social media apps installed in your mobile device. 1 2 3 45 - Kenwood DRV-A301W | Operation Manual - Page 51
-How to Edit the Video: 1. Files on Mobile Device. 2. Press the Edit Mode button. 3. Select the video. 4. Press the Edit button and then press the Cut button. 02:05 5. Select the area of video. 6. Press the Check button to output the video. 48 - Kenwood DRV-A301W | Operation Manual - Page 52
-How to Share the Video: 1. Files on Mobile. 2. Press the Edit Mode button. 3. Select the video. 02:05 4. Press the Share button and press the Check button. 5. Select the social media apps installed in your smartphone. Android IOS 49 - Kenwood DRV-A301W | Operation Manual - Page 53
-Menu Click Menu to enter the Video/Photo/General menu and adjust settings. Switch between these three menu by clicking the icons at the bottom. -About Click About icon to view the software version and the app's information. 50 - Kenwood DRV-A301W | Operation Manual - Page 54
Troubleshooting Blurred will be made. If you are unable to remove the SD card, use the edge of a small coin to push forward until the click sound is played on your computer if you do not have a suitable video player installed. Video files jump when they are being played The memory card that the - Kenwood DRV-A301W | Operation Manual - Page 55
files. If none of them work, the files are probably damaged. Use the device to format the memory card.(WARNING: formatting the memory card use. I cannot delete the file on the device Be sure the file you are trying to delete is unprotected. If the file is protected, please follow the instruction - Kenwood DRV-A301W | Operation Manual - Page 56
but nothing happens When I download files from the KENWOOD website a malicious software message appears Unresolved Issues Reminder: menu and begin the process over again. If these problems remain, Please contact your store of purchase or a service center. Appendix About the monitor screen • Do not - Kenwood DRV-A301W | Operation Manual - Page 57
troubles pertaining to security when using this function. Radio Interference with Bluetooth Devices With the Wireless Link in use Class 10 speed class is supported. Precaution for using SD cards • When using a commercially available SD card, also check the instructions supplied with the SD card. - Kenwood DRV-A301W | Operation Manual - Page 58
at the website below, http://www.kenwood.com/gpl. • FFmpeg This software uses libraries from the FFmpeg project (http://ffmpeg.org/) under the LGPLv2.1 License: GUN Lesser General Public License (LGPL) version 2.1 • NSIS This software's installer is made using NSIS (http://nsis.sourceforge.net - Kenwood DRV-A301W | Operation Manual - Page 59
Name Power Requirements Power Supply (Car power cable) DRV-A301W / GPS Integrated Dashboard Camera 5V / 2A; / SDHC, up to 256GB microSDXC/SDHC card 8GB to 256GB supported, Class 10 recommended for best results use a recognized brand SD Card Recorded File Capacity (based on default settings - Kenwood DRV-A301W | Operation Manual - Page 60
- Kenwood DRV-A301W | Operation Manual - Page 61
-
 1
1 -
 2
2 -
 3
3 -
 4
4 -
 5
5 -
 6
6 -
 7
7 -
8
-
9
-
10
-
11
-
12
-
13
-
14
-
15
-
16
-
17
-
18
-
19
-
20
-
21
-
22
-
23
-
24
-
25
-
26
-
27
-
28
-
29
-
30
-
31
-
32
-
33
-
34
-
35
-
36
-
37
-
38
-
39
-
40
-
41
-
42
-
43
-
44
-
45
-
46
-
47
-
48
-
49
-
50
-
51
-
52
-
53
-
54
-
55
-
56
-
57
-
58
-
59
-
60
-
61
 |
 |
DRV-A301W
© 2019 JVCKENWOOD Corporation
301-V2.5.A.A-EN
Register Online
Register your KENWOOD product at
www.kenwood.com/usa
US Residents Only
GPS Integrated Dashboard Camera
INSTRUCTION MANUAL
•
Updated information (the latest Instruction Manual, etc.) is available from
For your records
Record the serial number, found on the back of the unit in the spaces designated on the
warranty card, and in the space provided below. Refer to the model and serial numbers
whenever you can upon your KENWOOD dealer for information or service on the product.
Model DRV-A301W
Serial Number______________