Kenwood KW85 Use and Care Guide - Page 7
Operation - exhaust hose
 |
View all Kenwood KW85 manuals
Add to My Manuals
Save this manual to your list of manuals |
Page 7 highlights
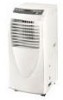
GB/KW85 18-11-2003 14:02 Pagina 7 Operation SETTING THE REMOTE CONTROL CLOCK Remove the cover of the battery compartment on the back of the remote control unit. After inserting two 1.5 V alkaline batteries in the compartment, the clock is automatically set at 12:00. If you want to set the time to 10:30, proceed as follows: Press the CLK button (in the battery compart- 1 ment) with a pointed object such as a pencil. The time indicator on the display flashes and the CLK ACL F correct time can be set. 2 Press the HOUR button on the remote control unit to set the hours (set to 10 am). 3 Press the MIN button on the remote control unit to set the minutes (set to 30). 4 Press the CLK button again to confirm the operation, then replace the battery compartment cover. Note: the RST button (reset) in the battery compartment cancels all the settings on the remote control unit (once pressed, the current time must be re-set). Important: make sure you do not reverse the poles of the batteries. OPERATING RANGE The operating range of the air conditioning unit goes from a minimum of +17°C (62°F) to a maximum of +35°C (95°F), with a choice of temperatures in cooling mode of from +17°C (62°F) to + 31°C (87°F). In dehumidifying mode, the operating range goes from +20°C (68°F) to + 31°C (87°F). The temperature cannot be selected in advance. POWER SUPPLY • Plug the air conditioning unit into a suita- ble outlet. Do not connect to multiple sockets. • Once plugged into the outlet, wait about two seconds until you hear a beep, then press the " " button to turn the appliance on. OPERATING IN AIR CONDITIONING MODE 1. Make sure the condensation tank is cor- rectly in place. 2. Press the "MODE" button repeatedly until the air conditioning mode is selected. "COOL" appears on the display. While the unit is operating in air conditioning mode, always place the exhaust hose through an open window to eject the hot air from the room. 3. Press the "SET TEMP" button to set a suitable room temperature between +17°C (62°F) and +31°C (87°F). 4. Press the "FAN SPEED" button to select a suitable fan speed: Max, Med, Min. OPERATING IN DEHUMIDIFYING MODE 1. Keep the windows and door closed to make dehumidification of the room more efficient. 2. Make sure the condensation tank is correctly in place. 3. Repeatedly press the "MODE" button to select the dehumidifying mode. "DRY" appears on the display. 4. Neither the fan speed nor temperature can be regulated. 5. Do not use the exhaust hose to expel the air outside. The hot air given out at the back of the appliance should not be expelled from the room. 7
-
 1
1 -
 2
2 -
 3
3 -
 4
4 -
 5
5 -
 6
6 -
 7
7 -
 8
8 -
 9
9 -
 10
10 -
 11
11 -
 12
12 -
13
-
14
 |
 |
