Kenwood TS-480 User Manual - Page 4
Basic Operation
 |
View all Kenwood TS-480 manuals
Add to My Manuals
Save this manual to your list of manuals |
Page 4 highlights
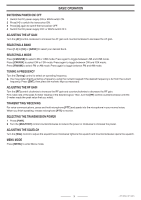
BASIC OPERATION SWITCHING POWER ON/ OFF 1 Switch the DC power supply ON or MAIN switch ON. 2 Press [ ] to switch the transceiver ON. 3 Press [ ] again to switch the transceiver OFF. 4 Switch the DC power supply OFF or MAIN switch OFF. ADJUSTING THE AF GAIN Turn the [AF] control clockwise to increase the AF gain and counterclockwise to decrease the AF gain. SELECTING A BAND Press [1.8] to [50] or [GENE] to select your desired band. SELECTING A MODE Press [LSB/USB] to select LSB or USB mode. Press again to toggle between LSB and USB mode. Press [CW/FSK] to select CW or FSK mode. Press again to toggle between CW and FSK mode. Press [FM/AM] to select FM or AM mode. Press again to toggle between FM and AM mode. TUNING A FREQUENCY Turn the [Tuning] control to select an operating frequency. ◆ You may prefer directly entering a frequency using the numeric keypad if the desired frequency is far from the current frequency. Press [ENT], then press the numeric keys as necessary. ADJUSTING THE RF GAIN Turn the [RF] control clockwise to increase the RF gain and counterclockwise to decrease the RF gain. First, take note of the peak S-meter reading of the desired signal. Then, turn the [RF] control counterclockwise until the S-meter reads the peak value that you noted. TRANSMITTING/ RECEIVING For voice communications, press and hold microphone [PTT] and speak into the microphone in your normal voice. When you finish speaking, release microphone [PTT] to receive. SELECTING THE TRANSMISSION POWER 1 Press [PWR]. 2 Turn the [MULTI/CH] control counterclockwise to reduce the power or clockwise to increase the power. Adjusting the Squelch Turn the [SQL] control to adjust the squelch level. Clockwise tightens the squelch and counterclockwise opens the squelch. MENU MODE Press [MENU] to enter Menu mode. 3 < HF_BASIC_OP_AMR >
-
 1
1 -
 2
2 -
 3
3 -
 4
4 -
 5
5 -
 6
6 -
 7
7 -
 8
8 -
 9
9 -
 10
10 -
11
-
12
-
13
-
14
-
15
-
16
-
17
-
18
-
19
-
20
-
21
-
22
-
23
-
24
-
25
-
26
-
27
-
28
-
29
-
30
-
31
-
32
-
33
-
34
-
35
-
36
-
37
-
38
-
39
-
40
-
41
-
42
-
43
-
44
-
45
-
46
-
47
-
48
-
49
-
50
-
51
-
52
-
53
-
54
-
55
-
56
-
57
-
58
-
59
-
60
-
61
-
62
-
63
-
64
-
65
-
66
-
67
-
68
-
69
-
70
-
71
-
72
-
73
-
74
-
75
-
76
 |
 |
