Kenwood WD250 Instruction Manual - Page 5
Operation
 |
UPC - 019048160652
View all Kenwood WD250 manuals
Add to My Manuals
Save this manual to your list of manuals |
Page 5 highlights
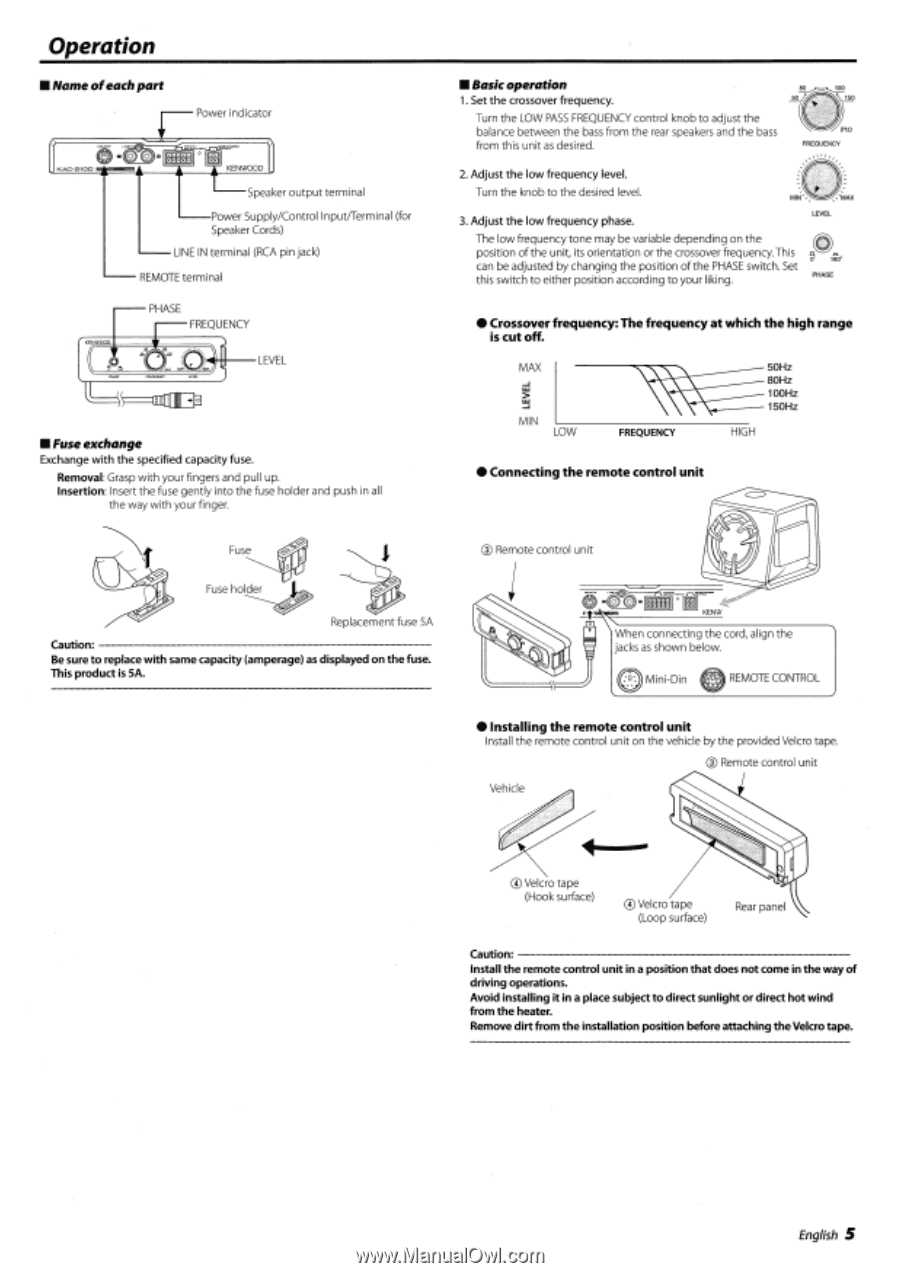
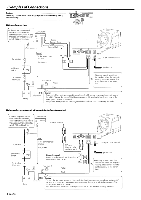
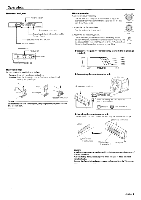
Operation ■ Name ofeachpart Power indicator 1, -.40-2100 KENWOOD Speaker output terminal Power Supply/Control Input/Terminal (for Speaker Cords) LINE IN terminal (RCA pin jack) REMOTE terminal PHASE FREQUENCY LEVEL rnlll ■ Fuse exchange Exchange with the specified capacity fuse. Removal: Grasp with your fingers and pull up. Insertion: Insert the fuse gently into the fuse holder and push in all the way with your finger. ■ Basic operation 1. Set the crossover frequency. Turn the LOW PASS FREQUENCY control knob to adjust the balance between the bass from the rear speakers and the bass from this unit as desired. L so • Mil FREQUENCY 2. Adjust the low frequency level. Turn the knob to the desired level. N 3. Adjust the low frequency phase. The low frequency tone may be variable depending on the position of the unit, its orientation or the crossover frequency.This can be adjusted by changing the position of the PHASE switch. Set this switch to either position according to your liking. PHASE • Crossover frequency: The frequency at which the high range is cut off. MAX U.] LLI MIN OW FREQUENCY 50Hz 80Hz 100Hz 150Hz HIGH • Connecting the remote control unit Fuse o. Fuse holder Replacement fuse 5A Caution: Be sure to replace with same capacity (amperage) as displayed on the fuse. This product is 5A. ® Remote control unit KENW When connecting the cord, align the jacks as shown below. Mini-Din REMOTE CONTROL • Installing the remote control unit Install the remote control unit on the vehicle by the provided Velcro tape. ® Remote control unit Vehicle ® Velcro tape (Hook surface) ® Velcro tape (Loop surface) Rear panel Caution: Install the remote control unit in a position that does not come in the way of driving operations. Avoid installing it in a place subject to direct sunlight or direct hot wind from the heater. Remove dirt from the installation position before attaching the Velcro tape. English 5
-
 1
1 -
 2
2 -
 3
3 -
 4
4 -
 5
5 -
 6
6
 |
 |