KitchenAid KBFO42FTX Use & Care Guide - Page 11
Refrigerator Care - water dispenser
 |
UPC - 883049033983
View all KitchenAid KBFO42FTX manuals
Add to My Manuals
Save this manual to your list of manuals |
Page 11 highlights
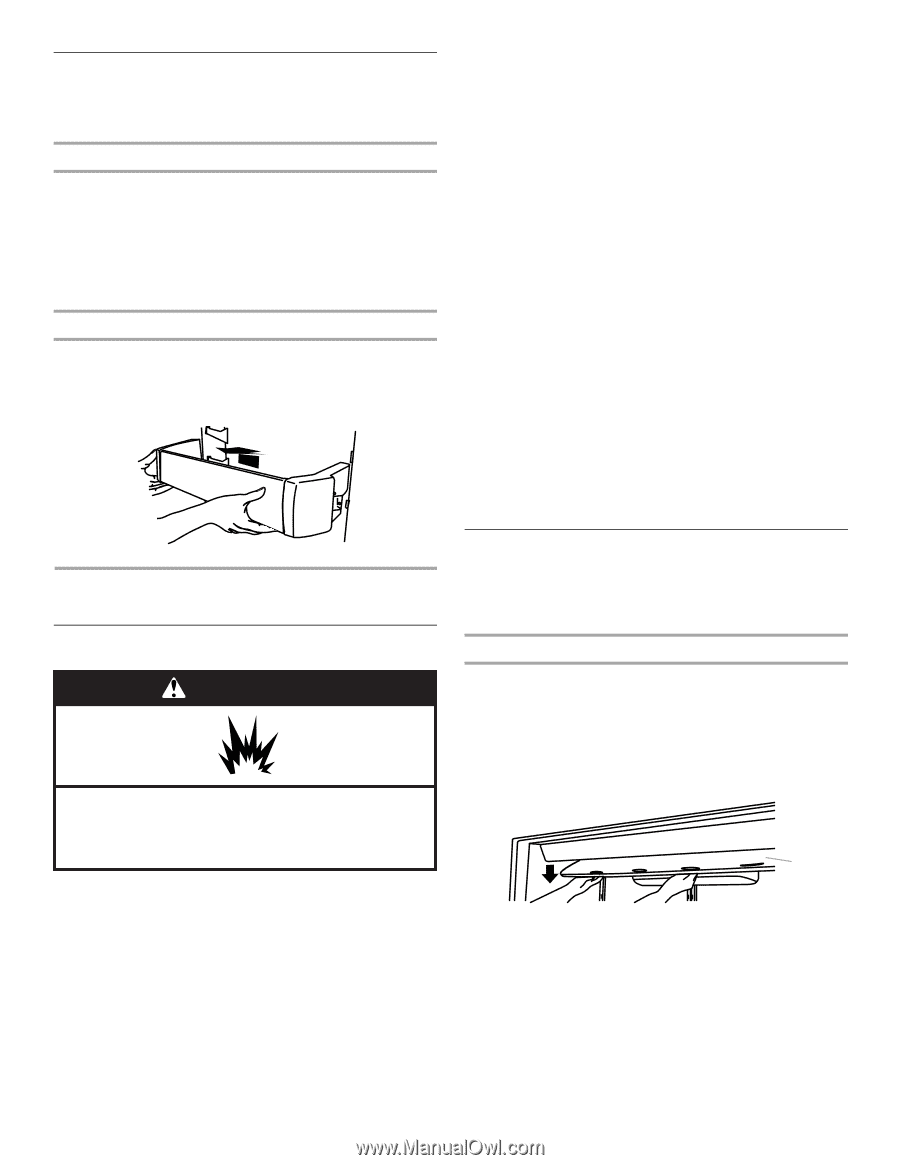
Door Bins Large door bins hold gallon containers and the smaller door bins hold 2-liter bottles. The door bins are adjustable and removable for easy cleaning and adjusting. Gallon Door Bin To Install Gallon Door Bin: NOTE: The gallon door bin can only be placed on the lower support. 1. Position gallon door bin above lowest door adjustment slot. 2. Push down to secure bin. 3. Adjust other bins, as necessary to allow for milk or beverage container height. Door Bins To Remove and Replace the Door Bins: 1. Remove the bin by lifting it up and pulling it out. 2. Replace the bin by sliding it in above the desired support and pushing it down until it stops. s Do not use abrasive or harsh cleaners such as window sprays, scouring cleansers, flammable fluids, cleaning waxes, concentrated detergents, bleaches or cleansers containing petroleum products on plastic parts, interior and door liners or gaskets. Do not use paper towels, scouring pads, or other harsh cleaning tools. These can scratch or damage materials. s To help remove odors, you can wash interior walls with a mixture of warm water and baking soda (2 tbs to 1 qt [26 g to 0.95 L] of water). 5. Wash stainless steel and painted metal exteriors with a clean sponge or soft cloth and a mild detergent in warm water. Do not use abrasive or harsh cleaners, or cleaners containing chlorine. Dry thoroughly with a soft cloth. For additional protection against damage to painted metal exteriors, apply appliance wax (or auto paste wax) with a clean, soft cloth. Do not wax plastic parts. NOTE: To keep your Stainless Steel refrigerator looking like new and to remove minor scuffs or marks, it is suggested that you use the manufacturer's approved Stainless Steel Cleaner & Polish. IMPORTANT: This cleaner is for Stainless Steel parts only! Do not allow the Stainless Steel Cleaner & Polish to come into contact with any plastic parts such as the trim pieces, dispenser covers or door gaskets. If unintentional contact does occur, clean plastic part with a sponge and mild detergent in warm water. Dry thoroughly with a soft cloth. To order the cleaner, see "Accessories." 6. Press the power switch to ON. 7. Replace the top grille. See "Power On/Off Switch." REFRIGERATOR CARE Cleaning WARNING Explosion Hazard Use nonflammable cleaner. Failure to do so can result in death, explosion, or fire. Both the refrigerator and freezer sections defrost automatically. However, clean both sections about once a month to avoid buildup of odors. Wipe up spills immediately. To Clean Your Refrigerator: 1. Remove the top grille. See "Power On/Off Switch." 2. Press power switch to OFF. 3. Remove all removable parts from inside, such as shelves, crispers, etc. 4. Hand wash, rinse, and dry removable parts and interior surfaces thoroughly. Use a clean sponge or soft cloth and a mild detergent in warm water. Changing the Light Bulbs NOTE: Not all appliance bulbs will fit your refrigerator. Be sure to replace the bulb with one of the same size and shape. The lights require a 40-watt maximum appliance bulb. Replacement bulbs are available from your dealer. Refrigerator Lights There are three light bulbs located in the top front of the refrigerator compartment behind a light shield. 1. Remove the top grille. See "Power On/Off Switch." 2. Press power switch to the Off position. 3. Open the light shield. Grasp the light shield by the openings. Gently push back and pull down, as shown, to access the light bulbs. A A. Light shield 4. Remove the light bulb and replace it with one of the same size, shape and wattage. 5. Close the light shield by raising it up into place. NOTE: If needed, clean the light shield with a damp soft cloth. 6. Press the power switch to the On position. 7. Replace the top grille. See "Power On/Off Switch." 11
-
 1
1 -
2
-
3
-
4
-
5
-
 6
6 -
 7
7 -
 8
8 -
 9
9 -
 10
10 -
 11
11 -
 12
12 -
 13
13 -
 14
14 -
 15
15 -
 16
16 -
17
-
18
-
19
-
20
-
21
-
22
-
23
-
24
-
25
-
26
-
27
-
28
-
29
-
30
-
31
-
32
-
33
-
34
-
35
-
36
-
37
-
38
-
39
-
40
-
41
-
42
-
43
-
44
-
45
-
46
-
47
-
48
-
49
-
50
-
51
-
52
 |
 |