KitchenAid KBNU271VSS Use & Care Guide - Page 17
Gas Connection to Natural Gas or Local LP Gas, Plug in Grill - transformer
 |
View all KitchenAid KBNU271VSS manuals
Add to My Manuals
Save this manual to your list of manuals |
Page 17 highlights
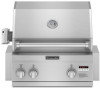
Gas Connection to Natural Gas or Local LP Gas WARNING 2. Open the manual shutoff valve in the gas supply line. The valve is open when the handle is parallel to the gas pipe. A B Explosion Hazard Use a new CSA International approved "outdoor" gas supply line. Securely tighten all gas connections. If connected to LP, have a qualified person make sure gas pressure does not exceed 11" (28 cm) water column. Examples of a qualified person include: licensed heating personnel, authorized gas company personnel, and authorized service personnel. Failure to do so can result in death, explosion, or fire. This installation must conform with local codes and ordinances. In the absence of local codes, installations must conform with either the National Fuel Gas Code ANSI Z223.1 - latest edition, or CAN/CGA-B149.1 Natural Gas and Propane installation code. Copies of the standards listed above may be obtained from: CSA International 8501 East Pleasant Valley Rd. Cleveland, Ohio 44131-5575 National Fire Protection Association One Batterymarch Park Quincy, Massachusetts 02269 1. Make gas connections. A combination of pipe fittings must be used to connect the grill to the existing gas line. ■ If local codes permit, use an outdoor flexible stainless steel tubing gas connector, design-certified by CSA International, to connect the grill to the rigid gas supply line. A ⁵⁄₈" diameter line is recommended. Using a wrench to tighten, connect the gas supply to the grill. Use pipejoint compound on all non-flared male threads. Do not kink or damage the flexible connector when moving the grill. ■ Pipe-joint compounds suitable for use with LP gas must be used. Do not use TEFLON®† tape. A. Closed valve B. Open valve 3. Test all connections by brushing on an approved noncorrosive leak-detection solution. Bubbles will show a leak. Correct any leak found. 4. The batteries are not factory installed. The 1.5-volt "D" size alkaline batteries are located in the accessory box on the grill grate. Install the batteries at this time following the instructions in the "Replacing the Batteries" section. Plug in Grill NOTE: This built-in outdoor grill comes with a large 5000 mAmp power transformer/plug assembly for the grill's lights and, on some models, for the electronic display and igniter. Follow the instructions for plugging in and mounting the power transformer. Keep any electrical supply cord away from any heated surfaces. 1. Plug the single prong plug of the large 5000 mAmp transformer/plug assembly into the receptacle on the left underside of the grill. A A. Single-prong plug 2. Locate or build a noncombustible surface inside the island cabinet to mount the power transformer. It must be to the left side of the grill at a minimum of 3" (7.6 cm) from the side and 4" (10.2 cm) below the bottom of the grill. 3. Mount the power transformer to the mounting surface using 4 #8 screws (not supplied) that are the proper type and length for the transformer and the mounting surface. It must be mounted with the wire for the single-prong plug upward or toward the grill. NOTE: The cord must be properly mounted with a cord retention device so that its 3-prong plug will not touch the ground when it is unplugged. A B C A. New CSA International approved "outdoor" flexible gas supply line B. Rear of grill C. To Natural gas or Local LP gas supply †®TEFLON is a registered trademark of E.I. Du Pont De Nemours and Company. 17
-
 1
1 -
2
-
3
-
4
-
5
-
6
-
7
-
8
-
9
-
10
-
11
-
 12
12 -
 13
13 -
 14
14 -
 15
15 -
 16
16 -
 17
17 -
 18
18 -
 19
19 -
 20
20 -
 21
21 -
 22
22 -
23
-
24
-
25
-
26
-
27
-
28
-
29
-
30
-
31
-
32
-
33
-
34
-
35
-
36
-
37
-
38
-
39
-
40
-
41
-
42
-
43
-
44
-
45
-
46
-
47
-
48
-
49
-
50
-
51
-
52
-
53
-
54
-
55
-
56
-
57
-
58
-
59
-
60
-
61
-
62
-
63
-
64
-
65
-
66
-
67
-
68
-
69
-
70
-
71
-
72
-
73
-
74
-
75
-
76
-
77
-
78
-
79
-
80
 |
 |
