KitchenAid KBSD618ESS Use & Care Guide - Page 11
Refrigerator Features
 |
View all KitchenAid KBSD618ESS manuals
Add to My Manuals
Save this manual to your list of manuals |
Page 11 highlights
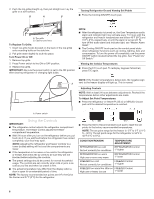
Using the Ice Maker Without a Water Filter You can operate the ice maker without a water filter. Your ice will not be filtered. 1. Remove the filter by pressing the eject button and pulling on the cap. See "Changing the Water Filter" earlier in this section. 2. Remove the cap by turning it counterclockwise until it stops. IMPORTANT: Do not discard the cap. It is part of your refrigerator. Keep the cap to use with the replacement filter. 3. With the cap in a horizontal position, insert the cap into the base grille until it stops. Ingredient Care Center The control for the Ingredient Care Center adjusts the storage temperature of the pan. Cold air flows into the pan through the air duct between the freezer and the refrigerator. Setting the controls allows more or less cold air through the air duct. To Adjust the Ingredient Care Center 1. Choose a setting based on the item to be stored in the pan. 2. Push the button that corresponds to that setting. 3. The indicator light for that setting will illuminate to verify that the pan is ready to be loaded. 4. Turn the cap counterclockwise until the cap slips into the attachment slot. Then, turn the cap clockwise until it is in a horizontal position. NOTE: The cap will not be even with the base grille. REFRIGERATOR FEATURES Refrigerator Shelves Important information to know about glass shelves and covers: Do not clean glass shelves or covers with warm water when they are cold. Shelves and covers may break if exposed to sudden temperature changes or impact, such as bumping. Tempered glass is designed to shatter into many small, pebble-size pieces. This is normal. Glass shelves and covers are heavy. Use both hands when removing them to avoid dropping. Remove and Replace the Ingredient Care Center Cover 1. Remove food from Ingredient Care Center cover. Pull drawer out about 4" (10.16 cm). Reach under the glass shelf with both hands and lift gently upward until back of shelf is free. Tilt the shelf at an angle and remove the shelf from the refrigerator. Be sure not to bump the glass. The shelves in your refrigerator are adjustable to meet your individual storage needs. Storing similar food items together in your refrigerator and adjusting the shelves to fit different heights of items will make finding the exact item you want easier. It will also reduce the amount of time the refrigerator door is open and help save energy. Shelves and Shelf Frames To remove and replace a shelf/frame: 1. Remove the shelf/frame by tilting it up at the front and lifting it out of the shelf supports. Pull shelf straight out. 2. Replace the shelf/frame by guiding the rear shelf hooks into the shelf supports. Tilt the front of the shelf up until the rear shelf hooks drop into the shelf supports. 3. Lower the front of the shelf and check that the shelf is securely in position. 2. Replace the cover by holding the glass shelf firmly with both hands, tilt the shelf at an angle and position it above the support rails. Place shelf gently on support rails on side wall. Meat Storage Guide Store most meat in original wrapping as long as it is airtight and moisture-proof. Rewrap if necessary. See the following chart for storage times. When storing meat longer than the times given, freeze the meat. Fresh fish or shellfish use same day as purchased Chicken, ground beef, variety meat (liver, etc 1-2 days Cold cuts, steaks/roasts 3-5 days Cured meats 7-10 days Leftovers - Cover leftovers with plastic wrap, aluminum foil, or plastic containers with tight lids. Crisper and Covers To remove and replace the crispers: 1. Slide the crisper drawer straight out to the stop. Lift the front of the drawer with one hand while supporting the bottom of the drawer with your other hand and slide the drawer out the rest of the way. 2. To replace the crisper drawer, place the drawer onto slides and push the drawer back until securely in position. 11
-
 1
1 -
2
-
3
-
4
-
5
-
 6
6 -
 7
7 -
 8
8 -
 9
9 -
 10
10 -
 11
11 -
 12
12 -
 13
13 -
 14
14 -
 15
15 -
 16
16 -
17
-
18
-
19
-
20
-
21
-
22
-
23
-
24
-
25
-
26
-
27
-
28
-
29
-
30
-
31
-
32
-
33
-
34
-
35
-
36
-
37
-
38
-
39
-
40
-
41
-
42
-
43
-
44
-
45
-
46
-
47
-
48
-
49
-
50
-
51
-
52
-
53
-
54
-
55
-
56
-
57
-
58
-
59
-
60
-
61
-
62
-
63
-
64
 |
 |
