KitchenAid KCM111OB Use & Care Guide - Page 13
Coffee Maker Care - coffee maker replacement carafe
 |
UPC - 883049216256
View all KitchenAid KCM111OB manuals
Add to My Manuals
Save this manual to your list of manuals |
Page 13 highlights
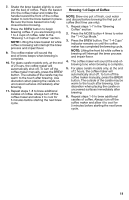
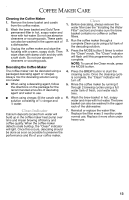
COFFEE MAKER CARE Cleaning the Coffee Maker 1. Remove the brew basket and carafe from the coffee maker. 2. Wash the brew basket and Gold Tone permanent filter in hot, soapy water and rinse with hot water. Do not use abrasive cleansers or scouring pads. These parts can also be washed in the upper rack of a dishwasher. 3. Unplug the coffee maker and wipe the housing with a warm, soapy cloth. Then wipe clean with damp cloth and dry with a soft cloth. Do not use abrasive cleansers or scouring pads. Descaling the Coffee Maker The coffee maker can be descaled using a packaged descaling agent or vinegar. Always mix the descaling solution using cool water. ■ When using a descaling agent, follow the directions on the package for the recommended amounts of descaling agent and water to use. ■ When using vinegar, fill the carafe with a solution consisting of ¹⁄₂ vinegar and ¹⁄₂ water. Clean Indicator Calcium deposits (scale) from water will build up in the coffee maker heat pump over time and impair brewing efficiency and coffee quality. When the coffee maker detects scale buildup, the "Clean" indicator will light. Once this occurs, descaling should be done as soon as possible to preserve the performance and life of your coffee maker. Clean 1. Before descaling, always remove the water filter (see the "Installing the Water Filter" section) and make sure the brew basket contains no coffee or coffee filters. 2. Run the coffee maker through a complete Clean cycle using a full tank of the descaling solution. 3. Press the MODE button 5 times to enter the "Clean" mode. The "Clean" indicator will flash until this programming cycle is complete. NOTE: To cancel the Clean mode, press the MODE button. 4. Press the BREW button to start the cleaning cycle. Once the cleaning cycle is complete, the "Clean" indicator will turn off. 5. Rinse the coffee maker by running it through 2 brewing cycles using a full water tank of fresh, cool water each time. 6. Wash the brew basket in hot, soapy water and rinse with hot water. The brew basket can also be washed in the upper rack of the dishwasher. 7. Reinstall or replace the water filter. Replace the filter every 3 months under normal use. Replace it more often under heavy use. 13
-
 1
1 -
2
-
3
-
4
-
5
-
6
-
7
-
 8
8 -
 9
9 -
 10
10 -
 11
11 -
 12
12 -
 13
13 -
 14
14 -
 15
15 -
 16
16 -
 17
17 -
 18
18 -
19
-
20
-
21
-
22
-
23
-
24
-
25
-
26
-
27
-
28
-
29
-
30
-
31
-
32
-
33
-
34
-
35
-
36
-
37
-
38
-
39
-
40
-
41
-
42
-
43
-
44
-
45
-
46
-
47
-
48
 |
 |
