KitchenAid KCM111OB Use & Care Guide - Page 9
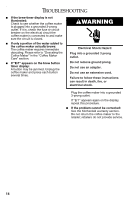
Warning - instructions
 |
UPC - 883049216256
View all KitchenAid KCM111OB manuals
Add to My Manuals
Save this manual to your list of manuals |
Page 9 highlights
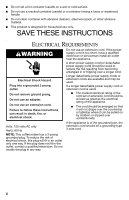
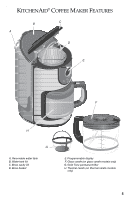
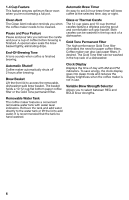
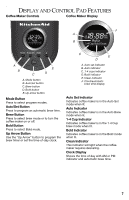
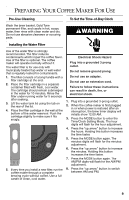
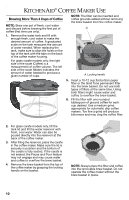
PREPARING YOUR COFFEE MAKER FOR USE Pre-Use Cleaning Wash the brew basket, Gold Tone permanent filter, and carafe in hot, soapy water, then rinse with clean water and dry. Do not use abrasive cleansers or scouring pads. To Set the Time-of-Day Clock WARNING Installing the Water Filter Use of the water filter is strongly recommended. The filter reduces contaminants which impair the coffee flavor. Use of the filter is optional. The coffee maker will operate normally without it. The water filter is for use only with municipally treated tap water or well water that is regularly tested for contaminants. 1. The filter consists of a long handle with a filter cartridge at the end. 2. Place the filter cartridge in a separate container filled with fresh, cool water. The cartridge should remain submerged in the water for 10 minutes. Rinse the filter under running water for 5 seconds after soaking. 3. Lift the water tank lid using the tab on the rear of the lid. 4. Place the filter cartridge in the well at the bottom of the water reservoir. Push the cartridge slightly to make sure it fits snugly. 5. Every time you install a new filter, run the coffee maker through a complete brewing cycle without coffee. Use a full carafe of clean, cool water. Electrical Shock Hazard Plug into a grounded 3 prong outlet. Do not remove ground prong. Do not use an adapter. Do not use an extension cord. Failure to follow these instructions can result in death, fire, or electrical shock. 1. Plug into a grounded 3-prong outlet. 2. When the coffee maker is first plugged in or when power is restored after an interruption, the brew timer display will initially show 12:00 AM. 3. Press the MODE button to enter the Time/Clock Setting Mode. The hour digits will flash for the hour adjustment. 4. Press the "up arrow" button to increase the hours. Holding this button increases the time faster. 5. Press the MODE button again. The minutes digits will flash for the minutes adjustment. 6. Press the "up arrow" button to increase the minutes. Holding this button increases the time faster. 7. Press the MODE button again. The AM/PM digits will flash for the AM/PM adjustment. 8. Press the "up arrow" button to switch between AM and PM. 9
-
 1
1 -
2
-
3
-
 4
4 -
 5
5 -
 6
6 -
 7
7 -
 8
8 -
 9
9 -
 10
10 -
 11
11 -
 12
12 -
 13
13 -
 14
14 -
15
-
16
-
17
-
18
-
19
-
20
-
21
-
22
-
23
-
24
-
25
-
26
-
27
-
28
-
29
-
30
-
31
-
32
-
33
-
34
-
35
-
36
-
37
-
38
-
39
-
40
-
41
-
42
-
43
-
44
-
45
-
46
-
47
-
48
 |
 |