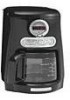
KitchenAid KCM511OB Instruction Manual - Page 14
The Pause and Pour Feature, Using the Automatic Brew Timer
 |
UPC - 050946967318
View all KitchenAid KCM511OB manuals
Add to My Manuals
Save this manual to your list of manuals |
Page 14 highlights
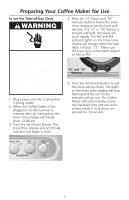
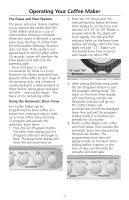
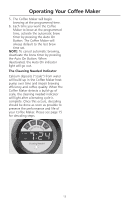
Operating Your Coffee Maker The Pause and Pour Feature The pause and pour feature enables you to remove the carafe from the Coffee Maker and pour a cup of coffee before brewing is finished. When the carafe is removed, a special valve stops the flow of coffee from the brew basket. Brewing, however, does not stop. If the carafe is not placed back on the hot plate within 25 seconds, water will overflow the brew basket and spill onto the warming plate. Pause and pour is a great convenience for those in a hurry. However, the flavors extracted from ground coffee differ at each stage of the brewing cycle, and a finished carafe represents a delicate blend of these flavors. Using pause and pour will alter - and usually impair - the flavor of the remaining coffee. Using the Automatic Brew Timer The Coffee Maker can be programmed to brew coffee at a preset time, making it easy to wake up to fresh coffee every morning. To program and activate the automatic brew timer: 1. Press the Set (Program) Button. The brew timer display and Set (Program) indicator will begin to flash. The brew timer display will show the last brew time set. 2. Press the "H" (hour) and "M" (minute) Buttons below the brew timer display to set the hour and minutes. If a "H" or "M" Button is pressed and held, the digits will scroll rapidly. The AM and PM indicator lights on the brew timer display will change when the hour digits roll past "12". Make sure the desired brew time is correct with respect to AM or PM. "H" and "M" Buttons 3. After setting the brew time, press the Set (Program) Button to exit the program-setting mode. The digits on the brew timer display will stop flashing and the Set (Program) indicator will go out. The Coffee Maker will automatically record the displayed brew time and exit the programsetting mode if no buttons are pressed for 10 seconds. 4. Fill the Coffee Maker with coffee and fresh water, then activate the automatic brew timer by pressing the Auto On Button. The programmed brew time will appear briefly on the brew timer display before it returns to the time-of-day, and the Auto On indicator will illuminate. 12
-
 1
1 -
2
-
3
-
4
-
5
-
6
-
7
-
8
-
 9
9 -
 10
10 -
 11
11 -
 12
12 -
 13
13 -
 14
14 -
 15
15 -
 16
16 -
 17
17 -
 18
18 -
 19
19 -
20
-
21
-
22
-
23
-
24
 |
 |
