KitchenAid KDFE304DWH Installation Guide - Page 11
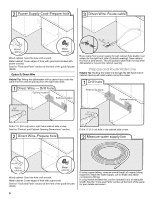
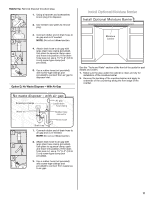
Install Optional Moisture Barrier
 |
View all KitchenAid KDFE304DWH manuals
Add to My Manuals
Save this manual to your list of manuals |
Page 11 highlights
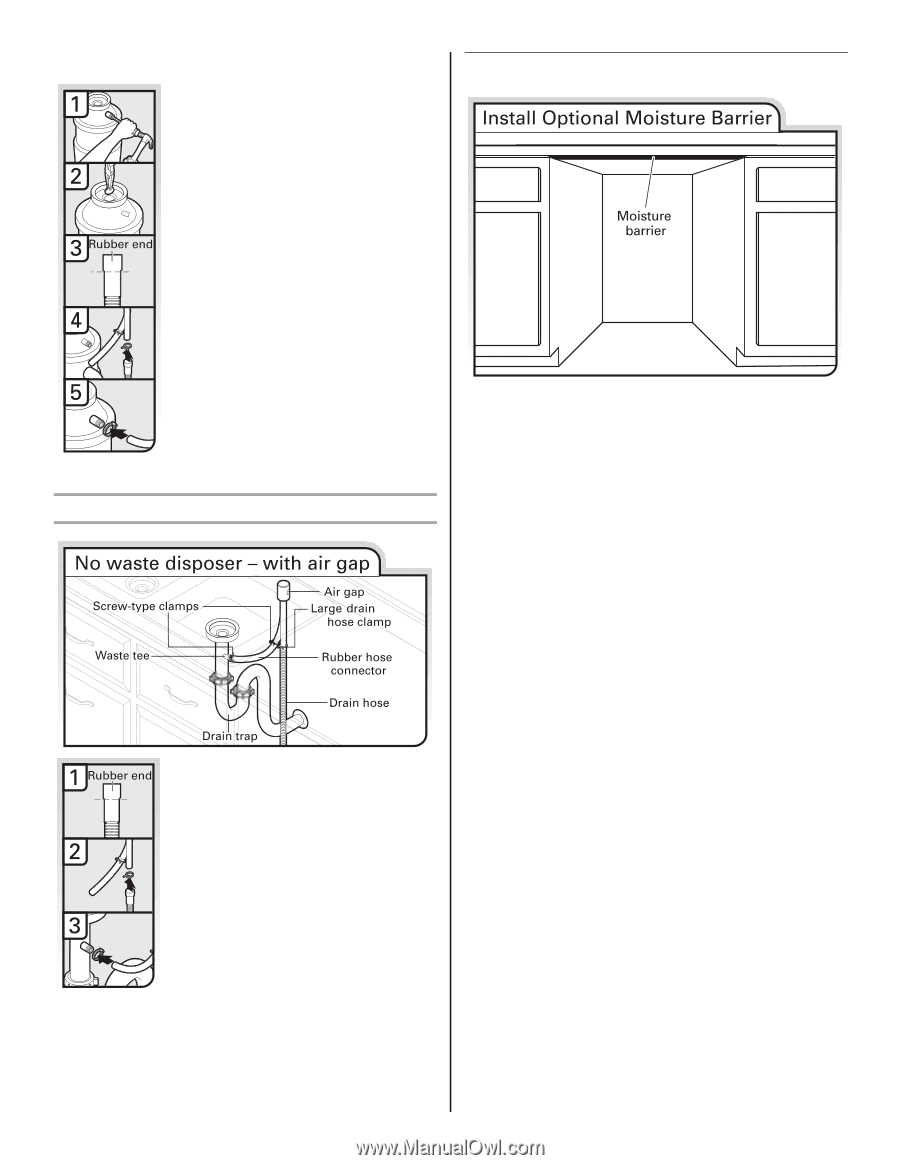
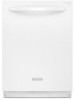
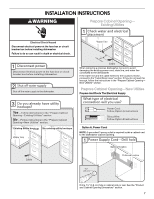
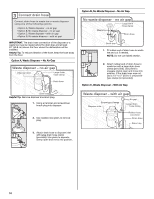
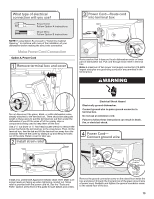
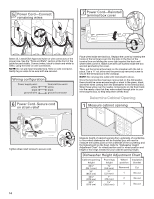
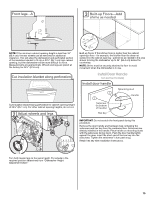
Helpful Tip: Remove disposer knockout plug. 1. Using a hammer and screwdriver, knock plug into disposer. 2. Use needle-nose pliers to remove plug. Install Optional Moisture Barrier 3. Connect rubber end of drain hose to air gap and cut if needed. NOTE: Do not cut ribbed section. 4. Attach drain hose to air gap with large drain hose clamp (provided). Use pliers to squeeze clamp open and move into position. If the drain hose was cut, use a 1¹⁄₂" to 2" (3.8 to 5 cm) screw-type clamp (not provided). 5. Use a rubber hose (not provided) with screw-type clamps (not provided) to connect from air gap to disposer inlet. Option D, No Waste Disposer - With Air Gap See the "Tools and Parts" section at the front of the guide for part details and orders. 1. Make sure the area under the cabinet is clean and dry for installation of the moisture barrier. 2. Remove the backing of the moisture barrier and apply to underside of the countertop along the front edge of the counter. 1. Connect rubber end of drain hose to air gap and cut if needed. NOTE: Do not cut ribbed section. 2. Attach drain hose to air gap with large drain hose clamp (provided). Use pliers to squeeze clamp open and move into position. If the drain hose was cut, use a 1¹⁄₂" to 2" (3.8 to 5 cm) screw-type clamp (not provided). 3. Use a rubber hose (not provided) with screw-type clamps (not provided) to connect from waste tee to air gap. 11
-
 1
1 -
2
-
3
-
4
-
5
-
 6
6 -
 7
7 -
 8
8 -
 9
9 -
 10
10 -
 11
11 -
 12
12 -
 13
13 -
 14
14 -
 15
15 -
 16
16 -
17
-
18
-
19
-
20
-
21
-
22
-
23
-
24
-
25
-
26
-
27
-
28
-
29
-
30
-
31
-
32
-
33
-
34
-
35
-
36
-
37
-
38
-
39
-
40
-
41
-
42
-
43
-
44
-
45
-
46
-
47
-
48
-
49
-
50
-
51
-
52
-
53
-
54
-
55
-
56
-
57
-
58
-
59
-
60
-
61
-
62
-
63
-
64
-
65
-
66
-
67
-
68
-
69
-
70
-
71
-
72
-
73
-
74
-
75
-
76
 |
 |