KitchenAid KERS807SWW User Guide - Page 26
Troubleshooting
 |
UPC - 883049027043
View all KitchenAid KERS807SWW manuals
Add to My Manuals
Save this manual to your list of manuals |
Page 26 highlights
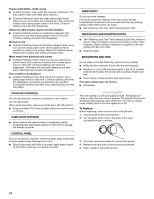
TROUBLESHOOTING Try the solutions suggested here first in order to avoid the cost of an unnecessary service call. Nothing will operate Display shows messages s Is the power supply cord unplugged? Plug into a grounded 3 prong outlet. s Has a household fuse blown, or has a circuit breaker tripped? Replace the fuse or reset the circuit. If the problem continues, call an electrician. Cooktop will not operate s Is the control knob set correctly? Push in knob before turning to a setting. s Is the simmer switch ON? Turn the simmer switch OFF for normal operation. Excessive heat around cookware on cooktop s Is the cookware the proper size? Use cookware about the same size as the surface cooking area, element or surface burner. Cookware should not extend more than ½" (1.25 cm) outside the cooking area. Hot surface indicator light stays on s Does the hot surface indicator light stay on after control knob(s) have been turned off? See "Cooktop Controls" section. Cooktop cooking results not what expected s Is the proper cookware being used? See "Cookware" section. s Is the control knob set to the proper heat level? See "Cooktop Controls" section. s Is the appliance level? Level the appliance. See the Installation Instructions. Oven will not operate s Is the electronic oven control set correctly? See "Electronic Oven Control" section. s Has a delay start been set? See "Timed Cooking" section. s On some models, is the Control Lock set? See "Control Lock" section. s On some models, is the Sabbath Mode set? See "Sabbath Mode" section. Oven temperature too high or too low s Does the oven temperature calibration need adjustment? See "Oven Temperature Calibration" in "Options - Style 1" or "Options - Styles 2 and 3" section, depending on your model. s Is the display showing "SET CLOCK"? There has been a power failure. Clear the display. See "Oven Displays" section. On some models, reset the clock, if needed. See "Clock/ Timer Display" section. s Is the display showing a letter followed by a number? Press OFF to clear the display. If it reappears, call for service. See "Assistance or Service" section. Self-Cleaning cycle will not operate s Is the oven door open? Close the oven door all the way. s Has the function been entered? See "Self-Cleaning Cycle" section. s On some models, has a delay start Self-Clean cycle been set? See "Self-Cleaning Cycle" section. s Has a delay start been set? See "Timed Cooking" section. Oven cooking results not what expected s Is the appliance level? Level the appliance. See the Installation Instructions. s Is the proper temperature set? Double-check the recipe in a reliable cookbook. s Is the proper oven temperature calibration set? See "Oven Temperature Calibration" in "Options - Style 1" or "Options Styles 2 and 3" section, depending on your model. s Was the oven preheated? See "Bake," "Broil," "Easy Convect Conversion," "Convection Bake," "Convection Roast," "Convection Broil" or "Auto Convection Baking" section. s Is the proper bakeware being used? See "Bakeware" section. s Are the racks positioned properly? See "Positioning Racks and Bakeware" section. s Is there proper air circulation around bakeware? See "Positioning Racks and Bakeware" section. s Is the batter evenly distributed in the pan? Check that the batter is level in the pan. s Is the proper length of time being used? Adjust cooking time. s Has the oven door been opened while cooking? Oven peeking releases oven heat and can result in longer cooking times. s Are baked items too brown on the bottom? Move rack to higher position in the oven. s Are pie crust edges browning early? Use aluminum foil to cover the edge of the crust and/or reduce baking temperature. 26
-
 1
1 -
2
-
3
-
4
-
5
-
6
-
7
-
8
-
9
-
10
-
11
-
12
-
13
-
14
-
15
-
16
-
17
-
18
-
19
-
20
-
 21
21 -
 22
22 -
 23
23 -
 24
24 -
 25
25 -
 26
26 -
 27
27 -
 28
28
 |
 |