KitchenAid KFP1133CU Owners Manual - Page 10
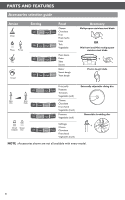
Attaching the wo°k bowl cove°, Installing the adjustable slicing disc, Adjusting the slicing
 |
View all KitchenAid KFP1133CU manuals
Add to My Manuals
Save this manual to your list of manuals |
Page 10 highlights
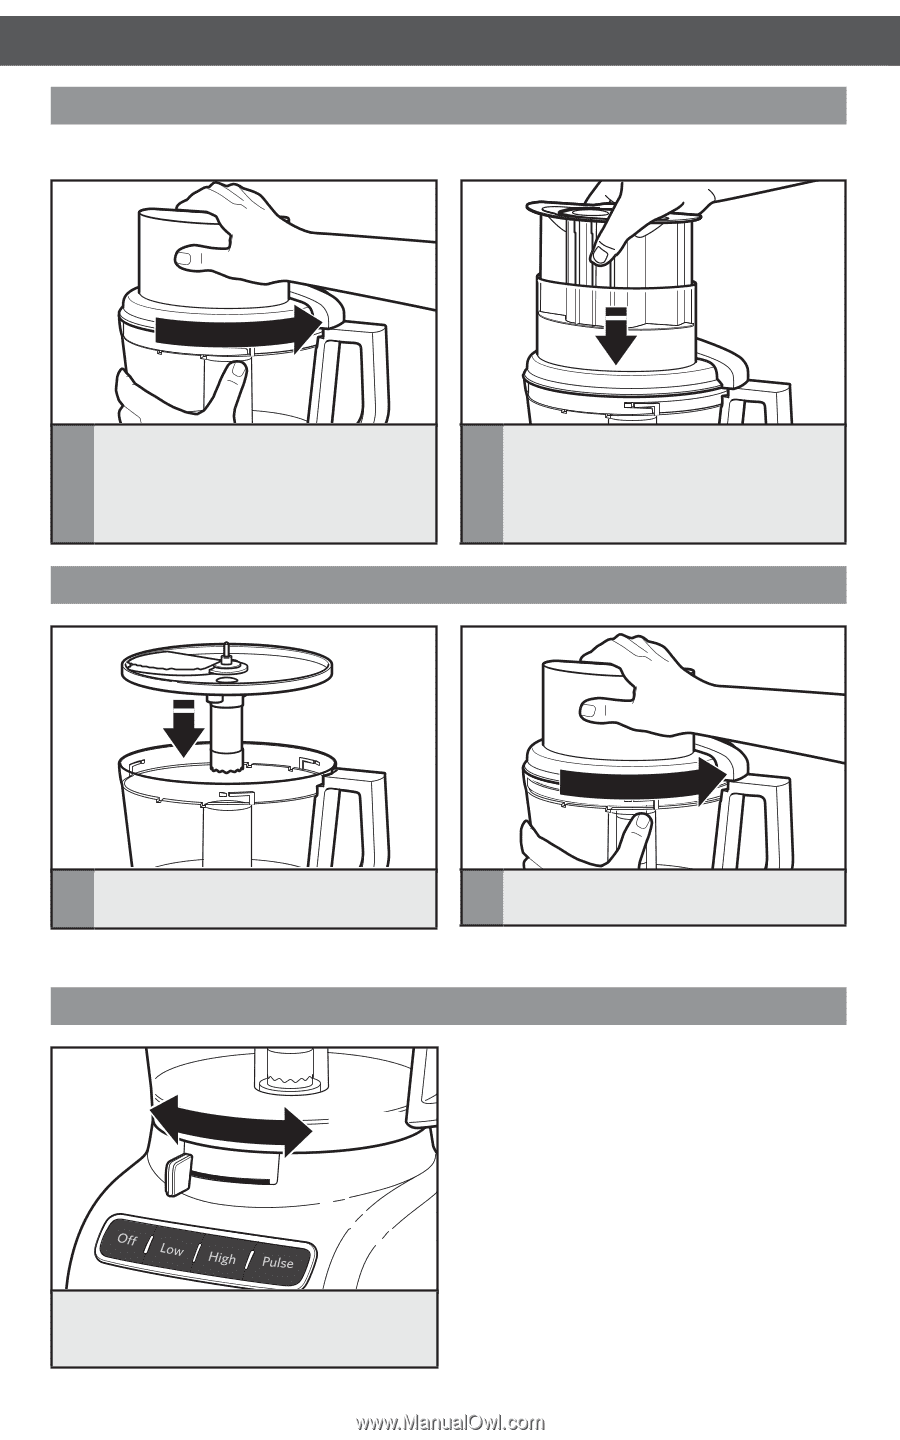
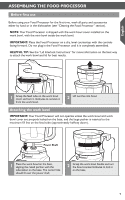
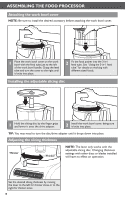
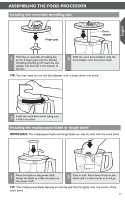
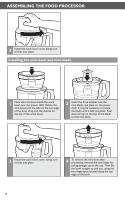
CAMSSDEM+BSLHINIFGT TCHLIECFKOTOODCPHRAONCGESESCOORPY Attaching the work bowl cover NOTE: Be sure to install the desired accessory before attaching the work bowl cover. 1 Place the work bowl cover on the work bowl with the feed tube just to the left of the work bowl handle. Grasp the feed tube and turn the cover to the right until it locks into place. 2 Fit the food pusher into the 3-in-1 feed tube. See "Using the 3-in-1 feed tube" for details on working with different sized foods. Installing the adjustable slicing disc 1 Hold the slicing disc by the finger grips and lower it onto the drive adapter. 2 Install the work bowl cover, being sure it locks into place. TIP: You may need to turn the disc/drive adapter until it drops down into place. Adjusting the slicing thickness Thinner Thicker NOTE: The lever only works with the adjustable slicing disc. Changing thickness settings with other discs or blades installed will have no effect on operation. Set the desired slicing thickness by moving the lever to the left for thinner slices or to the right for thicker slices. 10
-
 1
1 -
2
-
3
-
4
-
 5
5 -
 6
6 -
 7
7 -
 8
8 -
 9
9 -
 10
10 -
 11
11 -
 12
12 -
 13
13 -
 14
14 -
 15
15 -
16
-
17
-
18
-
19
-
20
-
21
-
22
-
23
-
24
-
25
-
26
-
27
-
28
-
29
-
30
-
31
-
32
-
33
-
34
-
35
-
36
-
37
-
38
-
39
-
40
-
41
-
42
-
43
-
44
-
45
-
46
-
47
-
48
-
49
-
50
-
51
-
52
-
53
-
54
-
55
-
56
-
57
-
58
-
59
-
60
-
61
-
62
-
63
-
64
-
65
-
66
-
67
-
68
 |
 |