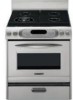
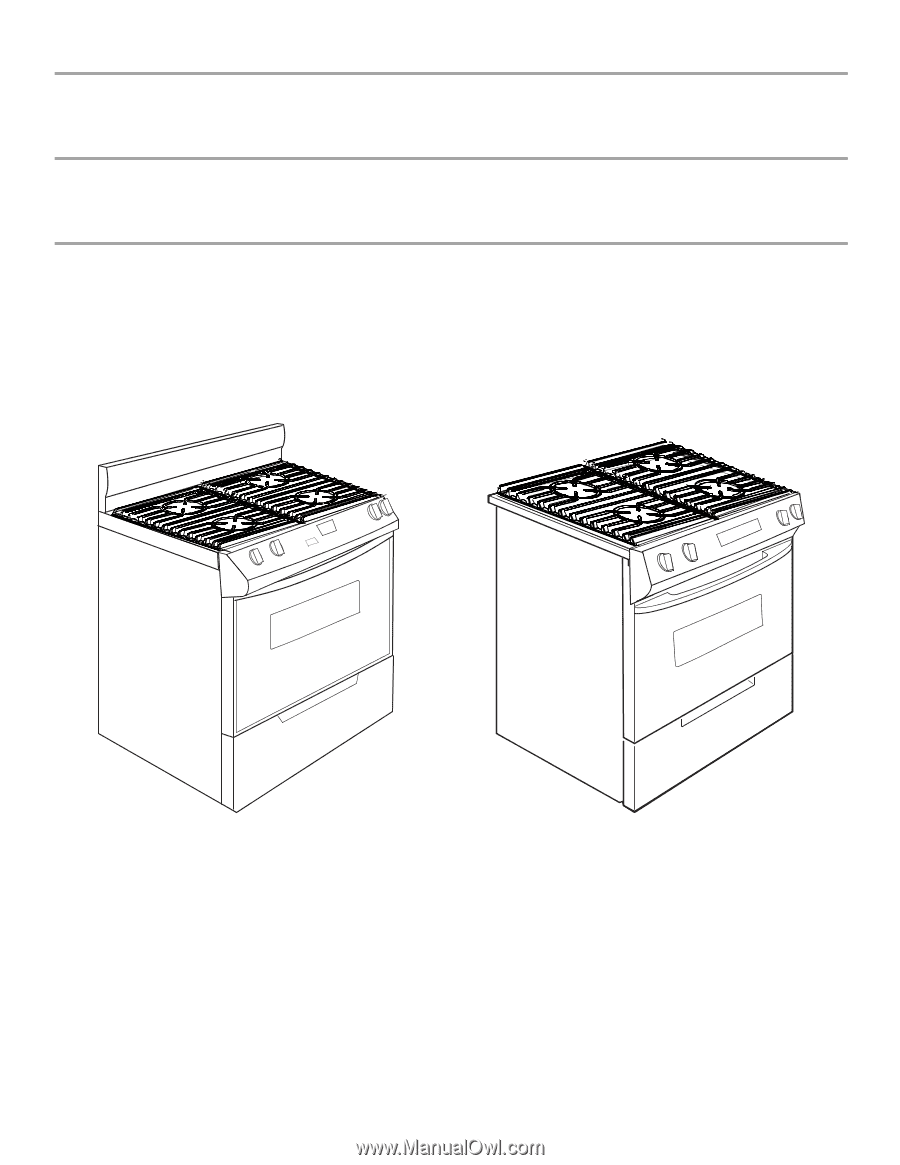
KitchenAid KGRA806PSS Installation Instructions
KitchenAid KGRA806PSS - ARCHITECT Series: 30'' Gas Range Manual
 |
View all KitchenAid KGRA806PSS manuals
Add to My Manuals
Save this manual to your list of manuals |
KitchenAid KGRA806PSS manual content summary:
- KitchenAid KGRA806PSS | Installation Instructions - Page 1
AND SLIDE-IN GAS RANGES INSTRUCTIONS POUR L'INSTALLATION DES CUISINIÈRES AUTOPORTANTES ET ENCASTRABLES DE 30" (76,2 CM) Table of Contents/Table des matières...2 IMPORTANT: Installer: Leave installation instructions with the homeowner. Homeowner: Keep installation instructions for future reference - KitchenAid KGRA806PSS | Installation Instructions - Page 2
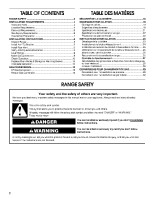
TABLE OF CONTENTS RANGE SAFETY ...2 INSTALLATION REQUIREMENTS ...4 Tools and Parts ...4 Location Requirements ...4 Electrical Requirements ...6 Gas Supply Requirements ...6 Countertop Preparation ...7 INSTALLATION INSTRUCTIONS ...8 Unpack Range...8 Install Anti-Tip Bracket...8 Install Rear Vent ...9 - KitchenAid KGRA806PSS | Installation Instructions - Page 3
from a neighbor's phone. Follow the gas supplier's instructions. • If you cannot reach your gas supplier, call the fire department. - Installation and service must be performed by a qualified installer, service agency or the gas supplier. WARNING: Gas leaks cannot always be detected by smell - KitchenAid KGRA806PSS | Installation Instructions - Page 4
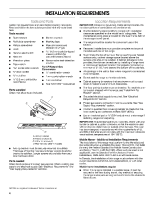
REQUIREMENTS Tools and Parts Gather the required tools and parts before starting installation. Read and follow the instructions provided with any tools listed here. Location Requirements IMPORTANT: Observe all governing codes and ordinances. Do not obstruct flow of combustion and ventilation - KitchenAid KGRA806PSS | Installation Instructions - Page 5
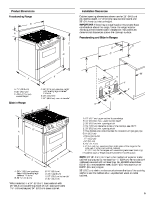
hood or microwave hood combination above the range, follow the range hood or microwave hood combination installation instructions for dimensional clearances above the cooktop surface. A Freestanding and Slide-in Ranges C D M E F A. 7⁷⁄₈" (20.0 cm) B. 30" (76.2 cm) C. 43⁷⁄₈" (111.4 cm) overall - KitchenAid KGRA806PSS | Installation Instructions - Page 6
use an extension cord. Failure to follow these instructions can result in death, fire, or electrical shock. IMPORTANT: The range must be electrically grounded in accordance with local codes and ordinances, or in the absence of local codes, with the National Electrical Code, ANSI/NFPA 70 or Canadian - KitchenAid KGRA806PSS | Installation Instructions - Page 7
Gas Supply Line - KitchenAid KGRA806PSS | Installation Instructions - Page 8
or more people to move and install range. Failure to do so can result in back or other injury. 1. Remove shipping materials, tape and protective film from range. Keep cardboard bottom under range. Remove oven racks and parts package from inside oven. 2. To place range on it's back, take 4 cardboard - KitchenAid KGRA806PSS | Installation Instructions - Page 9
installing your range using the following installation instructions. Level Range 1. Place rack in oven. 2. Place level on rack and check levelness of the range, first side to side; then front to back. Install in drawer guides. Remove drawer and set it aside on a covered surface. On models with a - KitchenAid KGRA806PSS | Installation Instructions - Page 10
position. Failure to follow these instructions can result in death, fire, or electrical shock. 5. Plug into a grounded 3 prong outlet. ON Check Operation A Electronic Ignition System Initial lighting and gas flame adjustments A. Gas pressure regulator shutoff valve Cooktop and oven burners use - KitchenAid KGRA806PSS | Installation Instructions - Page 11
cooktop control knob to the "OFF" position. Check that the range is plugged in and the circuit breaker has not tripped or the household fuse has not blown. Check that the gas shutoff valves are set to the "open" position. Check that burner caps are properly positioned on burner bases. A B C A. Oven - KitchenAid KGRA806PSS | Installation Instructions - Page 12
thoroughly with a soft cloth. For more information, see the "Range Care" section of the Use and Care Guide. 6. Read the Use and Care Guide. 7. Turn on surface burners and oven. See the Use and Care Guide for specific instruction on range operation. If range does not operate, check the following: - KitchenAid KGRA806PSS | Installation Instructions - Page 13
LP gas or from LP gas to Natural gas must be done by a qualified installer. WARNING 3. Remove warming drawer or storage drawer. See the "Remove Warming or Storage Drawer" section for instructions. Locate gas pressure regulator at rear of storage or warming drawer compartment. NOTE: On models with - KitchenAid KGRA806PSS | Installation Instructions - Page 14
Plate B. External gas orifice spud C. Internal gas orifice spud 5. Place Natural gas orifice spuds in plastic parts bag for future use and keep with literature package. 6. Replace burner cap. 7. Repeat steps 1-6 for the remaining burners, except for the three flame burner (on some models). See "To - KitchenAid KGRA806PSS | Installation Instructions - Page 15
this conversion is not made. See "Adjust Oven Broil Burner Flame" in the "Electronic Ignition System" section. To Convert Gas Pressure Regulator 1. Turn manual shutoff valve to the "closed" position. 2. Unplug range or disconnect power. B A C A. To range B. Manual shutoff valve "closed" position - KitchenAid KGRA806PSS | Installation Instructions - Page 16
end facing out D. Washer E. Gas pressure regulator cap 5. Place LP gas orifice spuds in plastic parts bag for future use and keep with literature package. 6. Replace burner cap. 7. Repeat steps 1-6 for the remaining burners, except for the three flame burner (on some models). See "To Convert Three - KitchenAid KGRA806PSS | Installation Instructions - Page 17
Racks and Warming or Storage Drawer" section for instructions. 3. Complete installation. See "Make Gas Connection" and "Electronic Ignition System" sections. Checking for proper cooktop burner and oven bake burner flame is very important. Natural gas flames do not have yellow tips. IMPORTANT: You - KitchenAid KGRA806PSS | Installation Instructions - Page 18
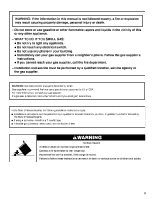
SÉCURITÉ DE LA CUISINIÈRE Votre sécurité et celle des autres est très importante. Nous donnons de nombreux messages de sécurité importants dans ce manuel et sur votre appareil ménager. Assurez-vous de toujours lire tous les messages de sécurité et de vous y conformer. Voici le symbole d'alerte de sé - KitchenAid KGRA806PSS | Installation Instructions - Page 19
èces Rassembler les outils et pièces nécessaires avant de commencer l'installation. Lire et suivre les instructions fournies avec les outils indiqués ici. Exigences d'emplacement IMPORTANT : Observer les dispositions de tous les codes et règlements en vigueur. Ne pas obstruer le flux de combustion - KitchenAid KGRA806PSS | Installation Instructions - Page 20
Résidence mobile - Spécifications additionnelles - KitchenAid KGRA806PSS | Installation Instructions - Page 21
Cuisinière autoportante et coulissante Spécifications électriques AVERTISSEMENT Risque de choc électrique M Brancher sur une prise - KitchenAid KGRA806PSS | Installation Instructions - Page 22
Spécifications de l'alimentation en gaz AVERTISSEMENT Canalisation de gaz Installer une canalisation de gaz rigide de ¾" (1,9 cm) jusqu' - KitchenAid KGRA806PSS | Installation Instructions - Page 23
Détendeur de gaz Le détendeur fourni avec cette cuisinière doit être utilisé. Pour un fonctionnement correct, la pression d'alimentation du détendeur doit être comme suit : Gaz naturel : Pression minimum : 5" (colonne d'eau) Pression maximum : 14" (colonne d'eau) Gaz propane : Pression minimum : 11" - KitchenAid KGRA806PSS | Installation Instructions - Page 24
devant la cuisinière. À l'aide de 2 personnes ou plus, de la bride. Enlever le gabarit du sol. Installation de la bride antibasculement AVERTISSEMENT Risque de basculement Un enfant cuisinière est déplacée. Le non-respect de ces instructions peut causer un décès ou des brûlures graves aux enfants - KitchenAid KGRA806PSS | Installation Instructions - Page 25
Installation du raccord du conduit d'évacuation - KitchenAid KGRA806PSS | Installation Instructions - Page 26
2. Utiliser une clé - KitchenAid KGRA806PSS | Installation Instructions - Page 27
Contrôle du fonctionnement Système d'allumage électronique Allumage initial et réglages des flammes Un système d'allumage électronique est utilisé - KitchenAid KGRA806PSS | Installation Instructions - Page 28
Un dispositif d'allumage électronique est utilisé pour l'allumage des brûleurs du four et du gril. Le brûleur du four devrait s'allumer en moins de 8 secondes; dans certaines conditions, l'allumage peut ne survenir qu'après 50 - KitchenAid KGRA806PSS | Installation Instructions - Page 29
, consulter la section "Entretien de la cuisinière" dans le Guide d'utilisation et d'entretien. 6. Lire le Guide d'utilisation et d'entretien. 7. Mettre en marche les brûleurs de la table de cuisson et le four. Pour des instructions spécifiques concernant l'utilisation de la cuisinière, consulter le - KitchenAid KGRA806PSS | Installation Instructions - Page 30
3. Retirer le tiroir-réchaud ou le tiroir de remisage. Voir la section "Retrait du tiroir-réchaud ou du tiroir de remisage" pour des instructions. Identifier le détendeur - KitchenAid KGRA806PSS | Installation Instructions - Page 31
3. Enlever la plaque associée au gicleur externe. A 7. Réinstaller la plaque de brûleur, la tête de brûleur et le chapeau de brûleur. 8. Placer les gicleurs pour gaz naturel dans le sachet - KitchenAid KGRA806PSS | Installation Instructions - Page 32
2. Réinstaller le tiroir-réchaud ou le tiroir de remisage. Voir la section "Réinstallation des grilles du four et du tiroir-réchaud ou du tiroir de remisage" pour des instructions. 3. Achever l'installation. Voir les sections "Raccordement - KitchenAid KGRA806PSS | Installation Instructions - Page 33
Conversion des brûleurs standard de la table de cuisson 1. Enlever le chapeau de brûleur. 2. Avec un tournevis TORX® T20, enlever la base du brûleur. 3. Appliquer du ruban adhésif de masquage - KitchenAid KGRA806PSS | Installation Instructions - Page 34
Gicleur pour gaz naturel pour brûleurs - KitchenAid KGRA806PSS | Installation Instructions - Page 35
ANTI-TIP BRACKET TEMPLATE GABARIT POUR LA BRIDE ANTIBASCULEMENT Cut here and place top edge against the left side cabinet and right edge against rear wall. Couper ici et placer le rebord supérieur contre le côté gauche du placard et le rebord droit contre la paroi arrière. . Holes in bracket Trous - KitchenAid KGRA806PSS | Installation Instructions - Page 36
9761413B © 2007. All rights reserved. Tous droits réservés. 12/07 Printed in U.S.A. Imprimé aux É.-U.
-
 1
1 -
 2
2 -
 3
3 -
 4
4 -
 5
5 -
 6
6 -
 7
7 -
8
-
9
-
10
-
11
-
12
-
13
-
14
-
15
-
16
-
17
-
18
-
19
-
20
-
21
-
22
-
23
-
24
-
25
-
26
-
27
-
28
-
29
-
30
-
31
-
32
-
33
-
34
-
35
-
36
 |
 |
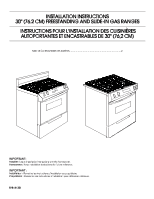
INSTALLATION INSTRUCTIONS
30" (76.2 CM) FREESTANDING AND SLIDE-IN GAS RANGES
INSTRUCTIONS POUR L’INSTALLATION DES CUISINIÈRES
AUTOPORTANTES ET ENCASTRABLES DE 30" (76,2 CM)
Table of Contents/Table des matières
..................................................................................
2
9761413B
IMPORTANT:
Installer:
Leave installation instructions with the homeowner.
Homeowner:
Keep installation instructions for future reference.
IMPORTANT :
Installateur :
Remettre les instructions d'installation au propriétaire.
Propriétaire :
Conserver les instructions d'installation pour référence ultérieure.