KitchenAid KGRA806PSS Installation Instructions - Page 9
KitchenAid KGRA806PSS - ARCHITECT Series: 30'' Gas Range Manual
 |
View all KitchenAid KGRA806PSS manuals
Add to My Manuals
Save this manual to your list of manuals |
Page 9 highlights
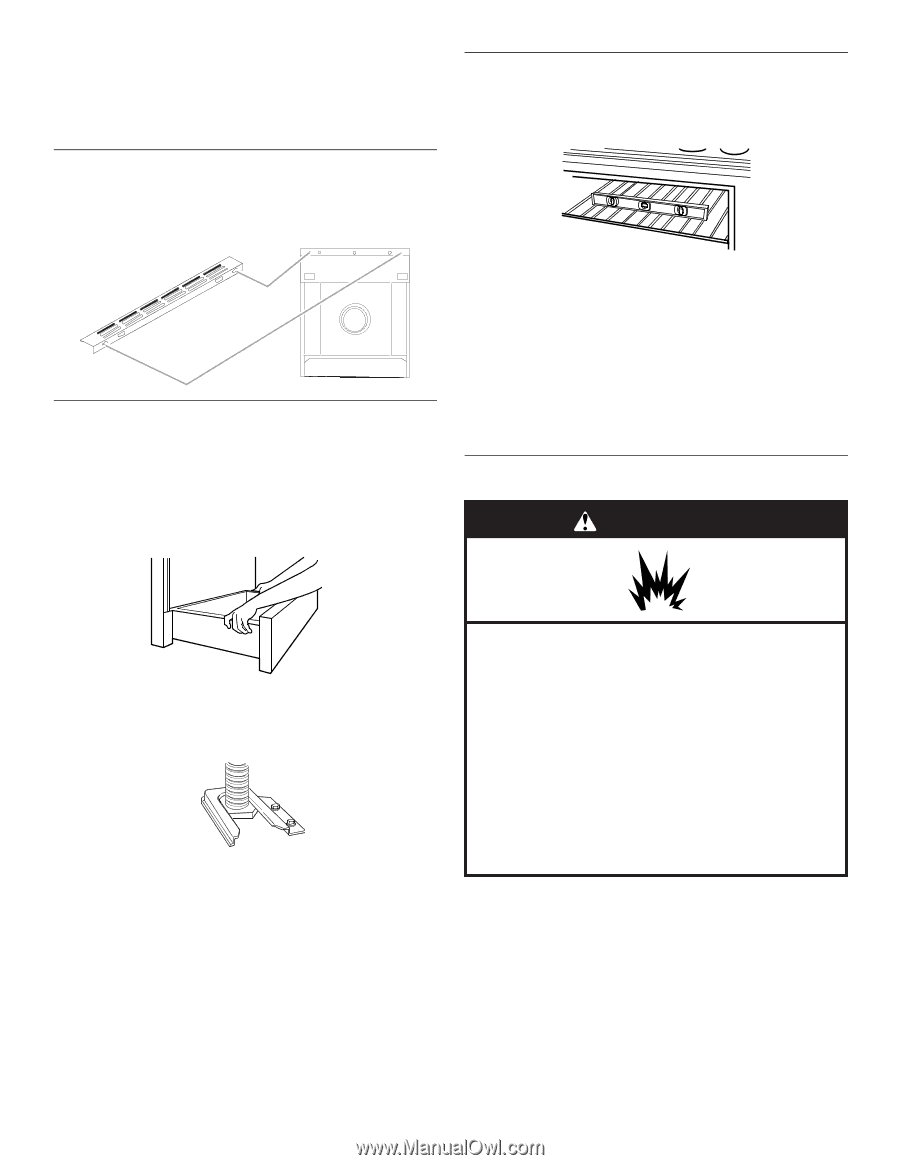
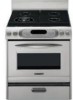
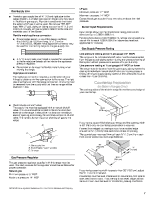
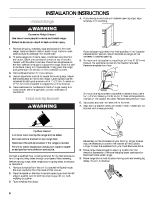
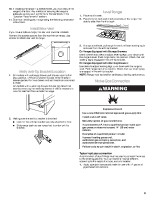
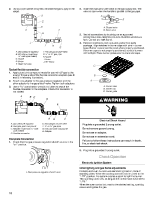
10. If installing the range in a mobile home, you must secure the range to the floor. Any method of securing the range is adequate as long as it conforms to the standards in the "Location Requirements" section. 11. Continue installing your range using the following installation instructions. Level Range 1. Place rack in oven. 2. Place level on rack and check levelness of the range, first side to side; then front to back. Install Rear Vent If you have a slide-in range, the rear vent must be installed. Remove the outside screws from the rear trim on range. Use screws to attach rear vent to range. 3. If range is not level, pull range forward until rear leveling leg is removed from the anti-tip bracket. On Ranges Equipped with Storage Drawers: Use a wrench and pliers to adjust leveling legs up or down until the range is level. Push range back into position. Check that rear leveling leg is engaged in the anti-tip bracket. On Ranges Equipped with Warming Drawers: Use pliers to adjust leveling legs up or down until the range is level. Push range back into position. Check that rear leveling leg is engaged in the anti-tip bracket. NOTE: Range must be level for satisfactory baking performance. Verify Anti-Tip Bracket Location 1. On models with a storage drawer, pull drawer open to first stop position. Lift front of drawer to clear white wheels in drawer guides. Remove drawer and set it aside on a covered surface. On models with a warming drawer, the rear leg cannot be seen by removing the warming drawer. It will be necesary to view the rear foot from outside the range. Make Gas Connection WARNING Explosion Hazard Use a new CSA International approved gas supply line. 2. Making sure the anti-tip bracket is installed:
-
 1
1 -
2
-
3
-
 4
4 -
 5
5 -
 6
6 -
 7
7 -
 8
8 -
 9
9 -
 10
10 -
 11
11 -
 12
12 -
 13
13 -
 14
14 -
15
-
16
-
17
-
18
-
19
-
20
-
21
-
22
-
23
-
24
-
25
-
26
-
27
-
28
-
29
-
30
-
31
-
32
-
33
-
34
-
35
-
36
 |
 |