KitchenAid KRFF507HPS Owners Manual - Page 10
Complete the Installation, Connect to Refrigerator
 |
View all KitchenAid KRFF507HPS manuals
Add to My Manuals
Save this manual to your list of manuals |
Page 10 highlights
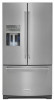
4. Now you are ready to connect the copper or PEX tubing to the shutoff valve. Use 1/4" (6.35 mm) O.D. (outside diameter) soft copper or PEX tubing to connect the shutoff valve and the refrigerator. � Ensure that you have the proper length needed for the job. Be sure both ends of the copper tubing are cut square. � Slip compression sleeve and compression nut onto copper tubing as shown. (PEX tubing has compression sleeves and compression nuts preinstalled.) Insert end of tubing into outlet end squarely as far as it will go. Screw compression nut onto outlet end with adjustable wrench. Do not overtighten. 3. Thread the nut onto the end of the tubing. Tighten the nut by hand. Then tighten it with a wrench two more turns. Do not overtighten. NOTE: To avoid rattling, be sure the copper tubing does not touch the cabinet's side wall or other parts inside the cabinet. A. Compression sleeve C. Copper or PEX tubing B. Compression nut 5. Place the free end of the tubing into a container or sink, and turn on main water supply to flush out tubing until water is clear. Turn off shutoff valve on the water pipe. NOTE: Always drain the water line before making the final connection to the inlet of the water valve, to avoid possible water valve malfunction. 6. Bend the copper or PEX tubing to meet the water line inlet, which is located on the back of the refrigerator cabinet. Leave a coil of copper or PEX tubing to allow the refrigerator to be pulled out of the cabinet or away from the wall for service. Connect to Refrigerator Depending on your model, the water line may come down from the top or up from the bottom. Follow the connection instructions for your model. Style 1 1. Remove plastic cap from water valve inlet port. Attach the copper or PEX tube to the valve inlet using a compression nut and sleeve as shown. Tighten the compression nut. Do not overtighten. Confirm copper or PEX tubing is secure by pulling on tubing. 2. Create a service loop with the copper tubing. Avoid kinks when coiling the tubing. Secure copper or PEX tubing to refrigerator cabinet with a "P" clamp. A. Household water line C. Ferrule (purchased) B. Nut (purchased) D. Refrigerator water tubing 4. Install the water supply tube clamp around the water supply line to reduce strain on the coupling. 5. Turn shutoff valve on. 6. Check for leaks. Tighten any connections (including connections at the valve) or nuts that leak. 7. On some models, the ice maker is equipped with a built-in water strainer. If your water conditions require a second water strainer, install in the 1/4ʺ (6.35 mm) water line at either tube connection. Obtain a water strainer from your appliance dealer. Complete the Installation WARNING Electrical Shock Hazard Plug into a grounded 3 prong outlet. Do not remove ground prong. Do not use an adapter. Do not use an extension cord. Failure to follow these instructions can result in death, fire, or electrical shock. 1. Plug into a grounded 3-prong outlet. NOTE: Allow 24 hours to produce the first batch of ice. Discard the first three batches of ice produced. Allow 3 days to completely fill the ice storage bin. 2. Flush the water system. See "Water and Ice Dispensers." A. Copper or PEX tubing B. "P" clamp C. Compression nut D. Compression sleeve 3. Turn on water supply to refrigerator and check for leaks. Correct any leaks. Style 2 1. Unplug refrigerator or disconnect power. 2. Remove and discard the short, black plastic part from the end of the water line inlet. 10 17-Dec-2020 11:40:23 EST | RELEASED In some European factories the letter "W" of the part code mentioned herein will be automatically replaced by the number "4000" (e.g. "W12345678" becomes "400012345678")
-
 1
1 -
2
-
3
-
4
-
 5
5 -
 6
6 -
 7
7 -
 8
8 -
 9
9 -
 10
10 -
 11
11 -
 12
12 -
 13
13 -
 14
14 -
 15
15 -
16
-
17
-
18
-
19
-
20
-
21
-
22
-
23
-
24
-
25
-
26
-
27
-
28
-
29
-
30
-
31
-
32
-
33
-
34
-
35
-
36
-
37
-
38
-
39
-
40
-
41
-
42
-
43
-
44
-
45
-
46
-
47
-
48
-
49
-
50
-
51
-
52
-
53
-
54
-
55
-
56
-
57
-
58
-
59
 |
 |
