KitchenAid KSM5PPWH User Guide - Page 3
TO ASSEMBLE:, TO ATTACH:, Tighten attachment knob - accessories
 |
View all KitchenAid KSM5PPWH manuals
Add to My Manuals
Save this manual to your list of manuals |
Page 3 highlights
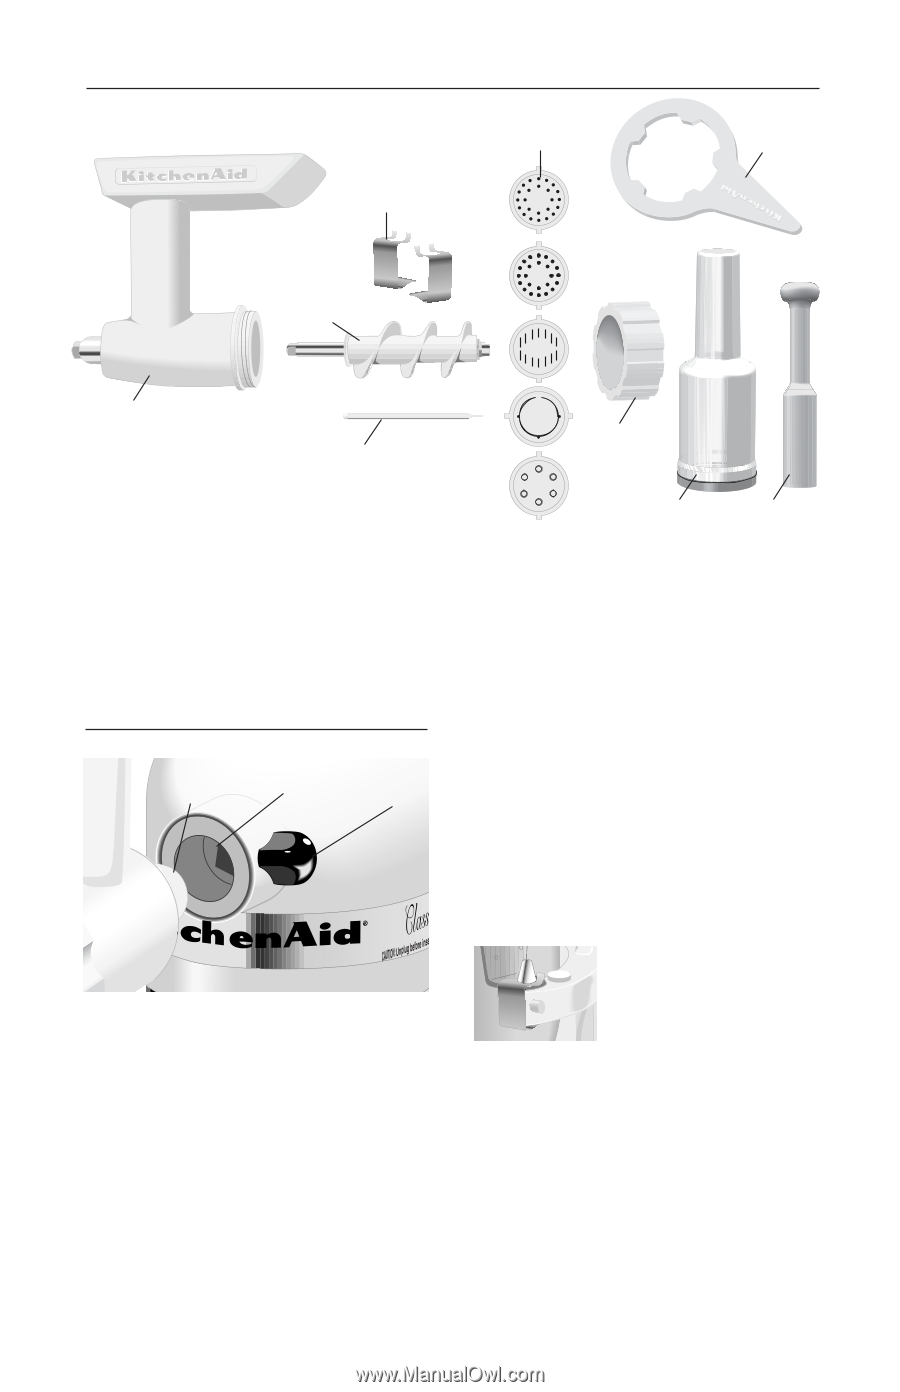
ķ℀ĸ TO ASSEMBLE: C E ® H A B D I G F Insert the grind worm (A) into the grinder body (B). Place one of the pasta plates (C) over the exposed end of the grind worm, matching the tabs of the plate with the notches in the grinder body. Place ring (D) onto grinder body, turning by hand until finger tight but not overtightened. Wooden food pusher (F). A storage case (G) is provided to store pasta plates, bowl clips (H) and cleaning tool (I). Note: Do not use wrench (E) to tighten ring. TO ATTACH: 2 3 1 Before attaching accessory, turn off and unplug unit. Loosen attachment knob (1) by turning it counterclockwise. Remove attachment hub cover. Insert attachment shaft housing (2) into attachment hub (3) making certain that attachment power shaft fits into square hub socket. Rotate attachment back and forth if necessary. When attachment is in proper position, the pin on the attachment will fit into the notch on the hub. Tighten attachment knob until attachment is completely secured to mixer. FOR 5 QUART MODELS** Two, small, metal clips (H) have been packed with this attachment. These clips are to be used only when making the pasta dough recipes. To use clips Once bowl has been attached to the mixer, place the clips over the locating pins. These clips help keep the bowl stationary during mixing. **5 Quart models include K5SS, KSM5, KSM50P. 3
-
 1
1 -
 2
2 -
 3
3 -
 4
4 -
 5
5 -
 6
6 -
 7
7 -
 8
8
 |
 |