KitchenAid KSSO48QTX Installation Guide - Page 26
Complete Installation, Water System Preparation - with no ice on the door
 |
UPC - 883049038483
View all KitchenAid KSSO48QTX manuals
Add to My Manuals
Save this manual to your list of manuals |
Page 26 highlights
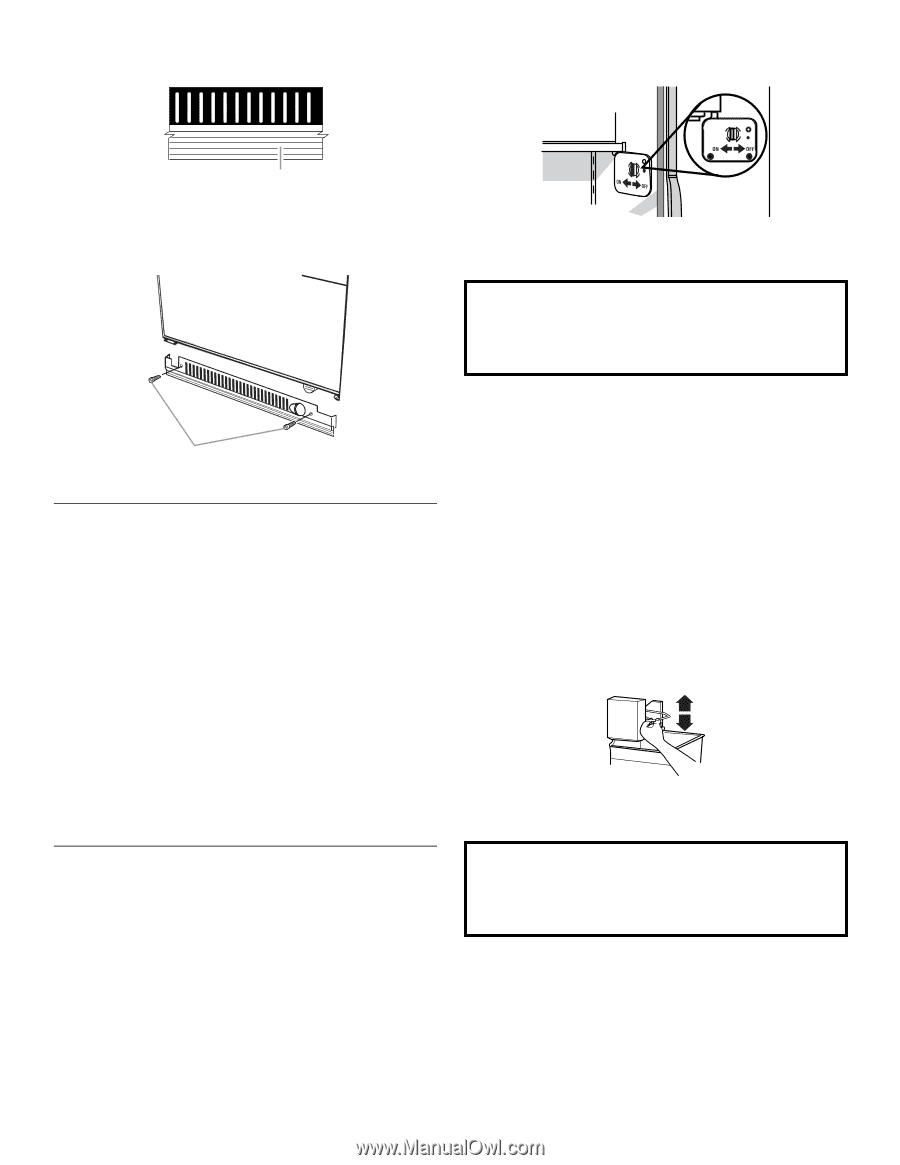
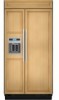
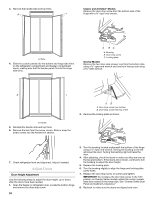
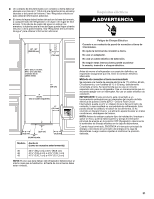
4. Trim the skirt by scoring the proper "V" groove with a utility knife. Break the skirt at the score line. 1. Open the freezer door and turn off the ice maker. Move the switch to the OFF (right) setting as shown. A A. "V" groove 5. Using the two screws, attach the base grille assembly to the refrigerator as shown. NOTE: Drive in the right side screw first. NOTE: If your model has a base grille filter system, make sure the base grille filter is properly installed and the cap is in the horizontal position. Do not use with water that is microbiologically unsafe or of unknown quality without adequate disinfection before or after the system. Systems certified for cyst reduction may be used on disinfected waters that may contain filterable cysts. A A. Screws (2) Complete Installation 1. Turn the water supply line valve to the "Open" position. 2. Turn the refrigerator switch to the ON position. See "Power On/Off Switch" in the Use and Care Guide for instructions. Wait a few minutes. Check the water line connections for leaks. 3. Remove all boxes, parts packages and packing materials from the interior of the refrigerator. See the "Cleaning" section in the Use and Care Guide for instructions. Remove the film and cardboard from the grille and doors or door frame, depending on your model. 4. Install the shelves and bins in the refrigerator and freezer compartments. 5. The controls are preset at the factory to the midpoint setting. Make sure the compressor is operating properly and that all the lights are working. 6. Flush the water system before use. See "Water System Preparation." To get the most efficient use from your new built-in refrigerator, read your Use and Care Guide. Keep Installation Instructions and Use & Care Guide near the built-in refrigerator for easy reference. Water System Preparation IMPORTANT: Please read before using the water system. After connecting the refrigerator to a water source or replacing the water filter, follow the steps below to make sure that the water system is properly cleaned. This will flush air from the filter and water dispensing system, and prepare the water filter for use. Follow the directions specific to your model. Style 1 - Dispenser Models The On/Off switch is located on the top right side of the freezer compartment. 2. Use a sturdy container to depress and hold the water dispenser lever for 5 seconds, then release it for 5 seconds. Repeat until water begins to flow. Once water begins to flow, continue depressing and releasing the dispenser lever (5 seconds on, 5 seconds off) until a total of 3 gal. (12 L) has been dispensed. Additional flushing may be required in some households. NOTE: As air is cleared from the system, water may spurt out of the dispenser. 3. Open the freezer door and turn on the ice maker. Move the switch to the ON (left) position. ■ Allow 24 hours to produce the first batch of ice. ■ Discard the first three batches of ice produced. ■ Depending on your model, you may want to select the maximum ice feature to increase the production of ice. Style 2 - Non-Dispenser Models 1. Open the freezer door and turn on the ice maker. Lower the wire shutoff arm as shown. NOTE: If your model has a base grille filter system, make sure the base grille filter is properly installed and the cap is in the horizontal position. Do not use with water that is microbiologically unsafe or of unknown quality without adequate disinfection before or after the system. Systems certified for cyst reduction may be used on disinfected waters that may contain filterable cysts. 2. Allow 24 hours to produce the first batch of ice. 3. Before using the ice, fill and discard two full containers of ice to prepare the filter for use. NOTES: ■ Allow 3 days to completely fill ice container. ■ Depending on your model, you may want to select the maximum ice feature to increase the production of ice. 26
-
 1
1 -
2
-
3
-
4
-
5
-
6
-
7
-
8
-
9
-
10
-
11
-
12
-
13
-
14
-
15
-
16
-
17
-
18
-
19
-
20
-
 21
21 -
 22
22 -
 23
23 -
 24
24 -
 25
25 -
 26
26 -
 27
27 -
 28
28 -
 29
29 -
 30
30 -
 31
31 -
32
-
33
-
34
-
35
-
36
-
37
-
38
-
39
-
40
-
41
-
42
-
43
-
44
-
45
-
46
-
47
-
48
-
49
-
50
-
51
-
52
-
53
-
54
-
55
-
56
-
57
-
58
-
59
-
60
-
61
-
62
-
63
-
64
-
65
-
66
-
67
-
68
-
69
-
70
-
71
-
72
-
73
-
74
-
75
-
76
 |
 |