KitchenAid KUDD03DTPA Use & Care Guide - Page 4
Add Rinse Aid, Select a Cycle cycles vary by model, Select Options options vary by model, Start or
 |
UPC - 883049128054
View all KitchenAid KUDD03DTPA manuals
Add to My Manuals
Save this manual to your list of manuals |
Page 4 highlights
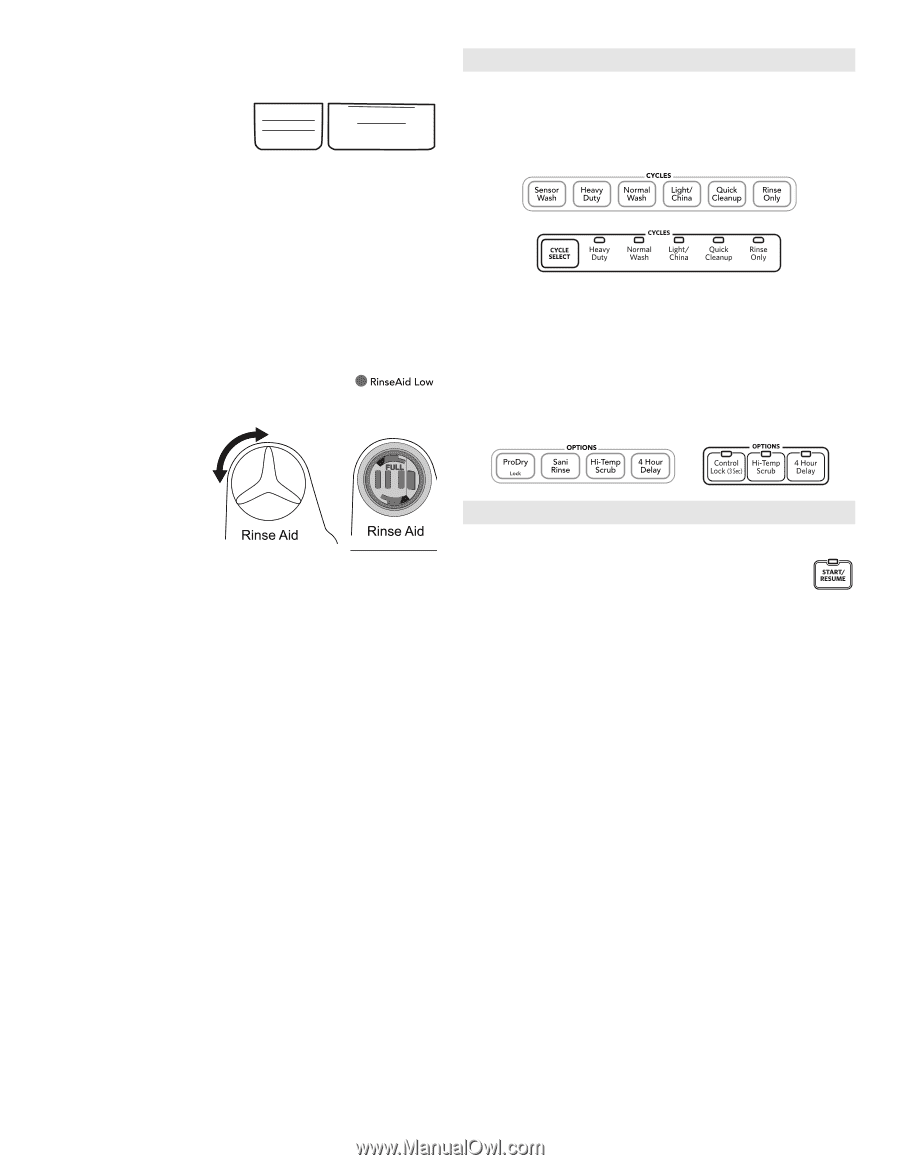
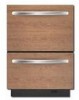
■ Depending on your water hardness, fill the Main Wash section of the dispenser as shown. Fill the Pre-Wash section to the level shown, if needed. NOTE: Fill amounts shown are for standard powdered detergent. Follow instructions on the package when using other dishwasher detergent. Hard Water Soft Water Pre-Wash Hard Water Soft Water Main Wash ■ Powdered detergent is recommended for use in the drawer dishwasher. Add Rinse Aid ■ Your dishwasher is designed to use rinse aid for good drying performance. Without rinse aid, your dishes and dishwasher interior will have excessive moisture. ■ Rinse aid keeps water from forming droplets that can dry as spots or streaks. They also improve drying by allowing water to drain off of the dishes after the final rinse. ■ Rinse aid helps to reduce excess moisture on the dish racks and interior of your dishwasher. ■ When the dispenser is low and needs to be refilled, an indicator light on the control panel will illuminate. ■ To add rinse aid, turn the dispenser cap a ¹⁄₄ turn counterclockwise and remove. Pour rinse aid into the opening until the liquid reaches the FULL level marking. Replace the dispenser cap and turn clockwise until the cap is secure. ¹⁄₄ turn to lock NOTE: For most water conditions, the factory setting of 3 will give good results. STEP 3 Select a Cycle (cycles vary by model) See "Cycle and Option Descriptions" charts in the following section. Heavier cycles and options affect cycle length. Some cycles and options will take up to 2¹⁄₂ hours to complete. For models with Cycle Select, pressing the Cycle Select button will illuminate the light above the cycle. With each press of Cycle Select, you will increment the cycle selection. To choose a cycle, press the Cycle Select button until the light above is illuminated. Select Options (options vary by model) See "Cycle and Option Descriptions" charts in the following section. You can customize your cycles by pressing the options desired. To Cancel an option, press it again. STEP 4 Start or Resume a Cycle ■ Prior to starting the dishwasher, run the water at the sink until it is hot. This will ensure the water is hot when it enters the dishwasher when it is started. Make sure to turn the sink water off. ■ Select the wash cycle and options desired. ■ Press START/RESUME button once and close the drawer. After a brief pause, the cycle will begin. The drawer must be closed within 4 seconds after pushing START/RESUME or the lights will flash, a tone will sound, and the dishwasher will not begin. Press the START/RESUME button again and shut the drawer within 4 seconds. ■ You can add an item anytime before the main wash starts. Open the drawer slowly and add the item. Press the START/ RESUME then close the drawer. NOTE: If you have a two drawer dishwasher model, each drawer has its own controls and can run independently of the other. 4
-
 1
1 -
 2
2 -
 3
3 -
 4
4 -
 5
5 -
 6
6 -
 7
7 -
 8
8 -
 9
9 -
 10
10 -
11
-
12
-
13
-
14
-
15
-
16
-
17
-
18
-
19
-
20
-
21
-
22
-
23
 |
 |