KitchenAid KUIC18PNTS Use and Care Guide - Page 7
Ice Maker Care
 |
UPC - 883049049885
View all KitchenAid KUIC18PNTS manuals
Add to My Manuals
Save this manual to your list of manuals |
Page 7 highlights
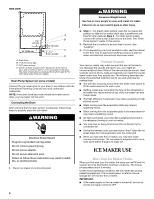
■ The ice maker is designed to make clear ice from the majority of water sources on a daily basis. If your results are unsatisfactory, your water may need to be filtered or treated. The Ice Making Process 1. Water is constantly circulated over a freezing plate. As the water freezes into ice, the minerals in the water are rejected. This produces a sheet of ice with a low mineral content. 2. When the desired thickness is reached, the ice sheet is released and slides onto a cutter grid. The grid divides the sheet into individual cubes. ■ Allow 24 hours to produce the first batch of ice. Discard the first batch produced. Holiday Mode The Holiday Mode feature is designed for the traveler or for those whose religious observances require turning off the lights and the ice maker. By selecting this feature, ice production will be disabled and the interior lights will turn off. Press and hold the Holiday Mode button to turn on the Holiday Mode feature. Press and hold the button again to turn off the feature. Service The service light indicates when service is needed. If the service light turns on, turn the ice maker off and back on. If the service light turns on again, call for service. Clean/Reset The Cleaning/Reset Status light will help you know when it is time to clean your ice maker. The light will change from green to yellow. This tells you it is almost time to clean your ice maker. It is recommended that you clean the ice maker when the status light changes to red OR ice production decreases significantly. To clean your ice maker, see "Ice Maker System" in the "Cleaning" section. 3. The water containing the rejected minerals is drained after each freezing cycle. 4. Fresh water enters the machine for the next ice making cycle. 5. Cubes fall into the storage bin. When the bin is full, the ice maker shuts off automatically and restarts when more ice is needed. The ice bin is not refrigerated, and some melting will occur. The amount of melting varies with room temperature. NOTE: As the room and water temperatures vary, so will the amount of ice produced and stored. This means that higher operating temperatures result in reduced ice production. Using the Controls 1. To start the normal ice making cycle, select ON. 2. To stop ice maker operation, press and hold OFF. NOTES: ■ Pressing the ON/OFF switch does not shut off power to the ice maker. ICE MAKER CARE Cleaning The ice making system and the air cooled condenser need to be cleaned regularly for the ice maker to operate at peak efficiency and to avoid premature failure of system components. See the "Ice Maker System" and the "Condenser" sections. Exterior Surfaces Wash the exterior enamel surfaces and gaskets with warm water and mild soap or detergent. Wipe and dry. Regular use of a good household appliance cleaner and wax will help maintain the finish. Do not use abrasive cleaners on enamel surfaces as they may scratch the finish. For products with a stainless steel exterior, use a clean sponge or soft cloth and a mild detergent in warm water. Do not use abrasive or harsh cleaners. Do not use chlorine bleach on the stainless steel surfaces. Ice Maker System Minerals that are removed from water during the freezing cycle will eventually form a hard scaly deposit in the water system. Cleaning the system regularly helps remove the mineral scale buildup. How often you need to clean the system depends upon how hard your water is. With hard water of 15 to 20 grains/gal. (4 to 5 grains/liter), you may need to clean the system as often as every 6 months. NOTE: Use one 16 oz (473 mL) bottle of approved ice maker cleaner. To order, call 1-800-442-9991 and ask for Part Number 4396808. In Canada, call 1-800-807-6777. 1. Press and hold selector switch to OFF. 2. Wait 5 to 10 minutes for the ice to fall into the storage bin. Remove all ice from the storage bin. 7
-
 1
1 -
 2
2 -
 3
3 -
 4
4 -
 5
5 -
 6
6 -
 7
7 -
 8
8 -
 9
9 -
 10
10 -
 11
11 -
 12
12 -
13
-
14
-
15
-
16
-
17
-
18
-
19
-
20
-
21
-
22
-
23
-
24
 |
 |
